Front Rack Installation Guide
This guide will show you how to install the front rack on an ebike by Rad Power Bikes.
If you are not confident in your ability to successfully and safely perform all steps, we recommend having the work performed or checked by a local, certified, and reputable bike mechanic.
Tools needed for all models:
- 4 mm Allen wrench
- 5 mm Allen wrench
- 10 mm wrench
- Torque wrench with 4 and 5 mm Allen bits
- Phillips head screwdriver
- Flat side cutters
- The front rack and included hardware
Additional tools needed to reroute the front brake cable (RadMini, and RadRunner Plus models only):
- 3 mm Allen wrench
- 8 mm wrench
- Needle nose pliers
- Permanent marker
- Isopropyl alcohol
- Paper towels
- Tape measure or ruler
Hardware bolt head, style, and size may vary between models and require different tools. Use the appropriate head size and type of tool for your bolts. Ensure the tool is pressed firmly into the bolt head and turn slowly to prevent stripping.
Prepare for Installation
- Get the bike ready for installation. Turn off the bike, remove the battery, and press and hold the MODE or power button to discharge remaining power.
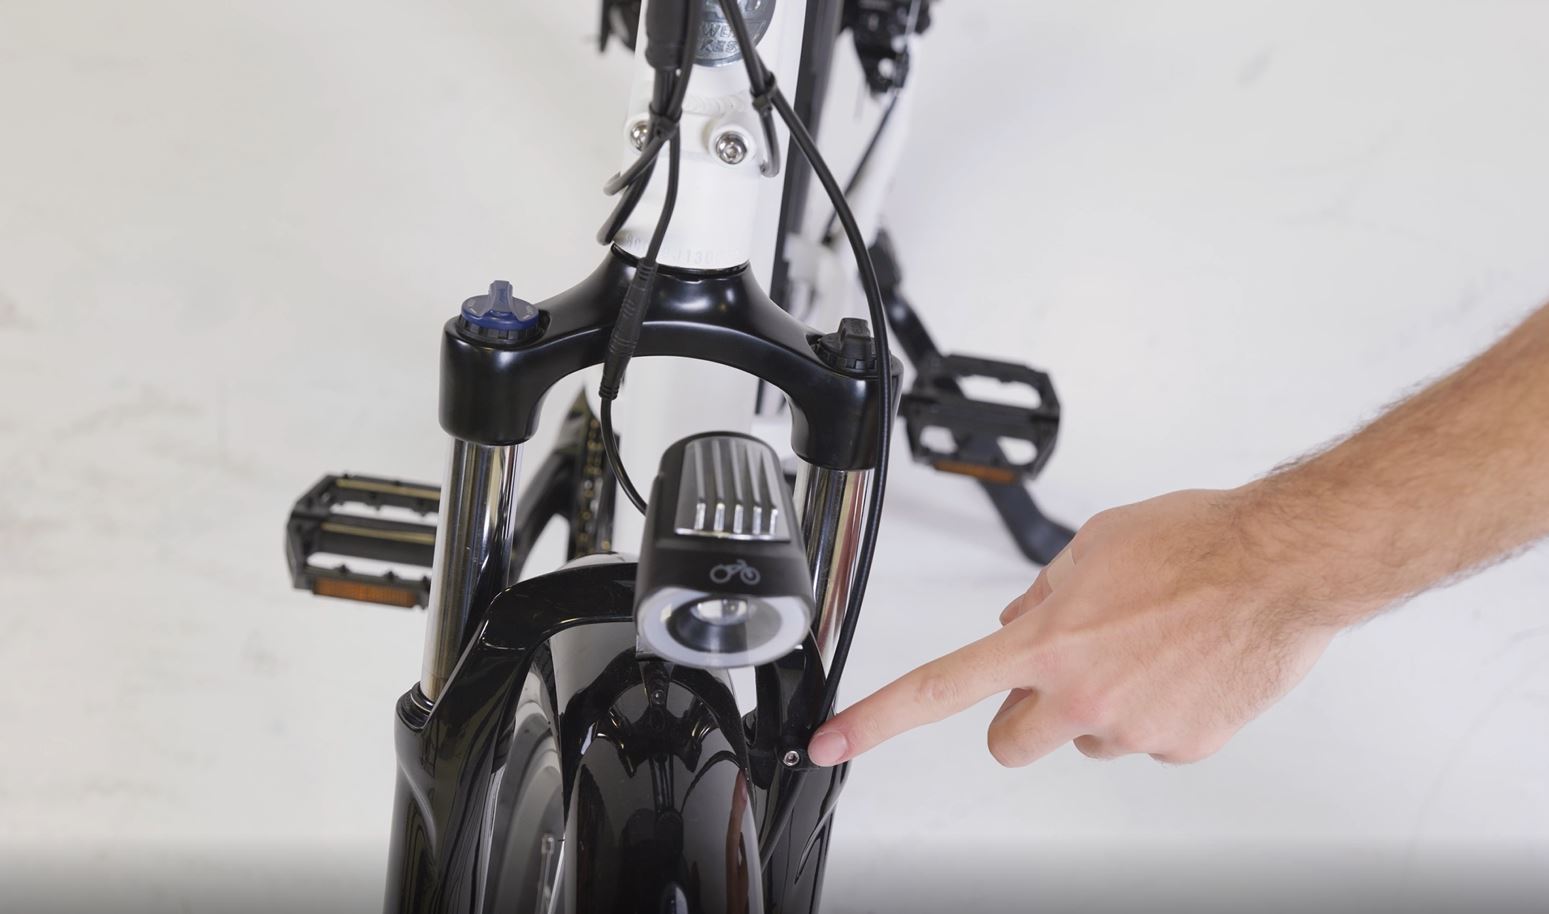
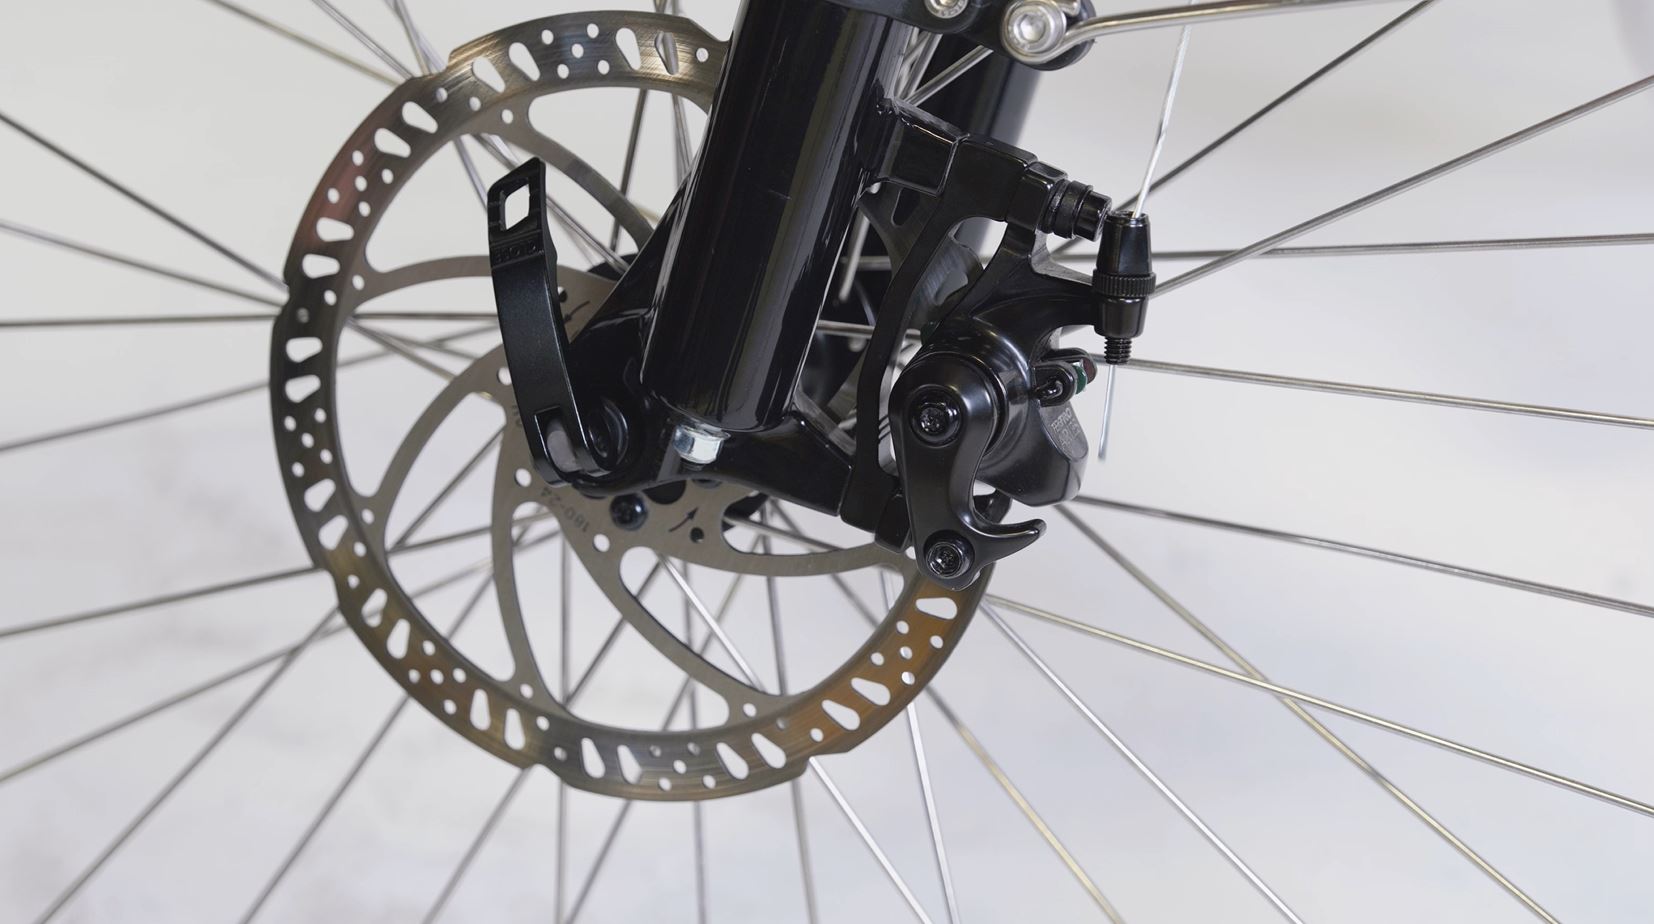
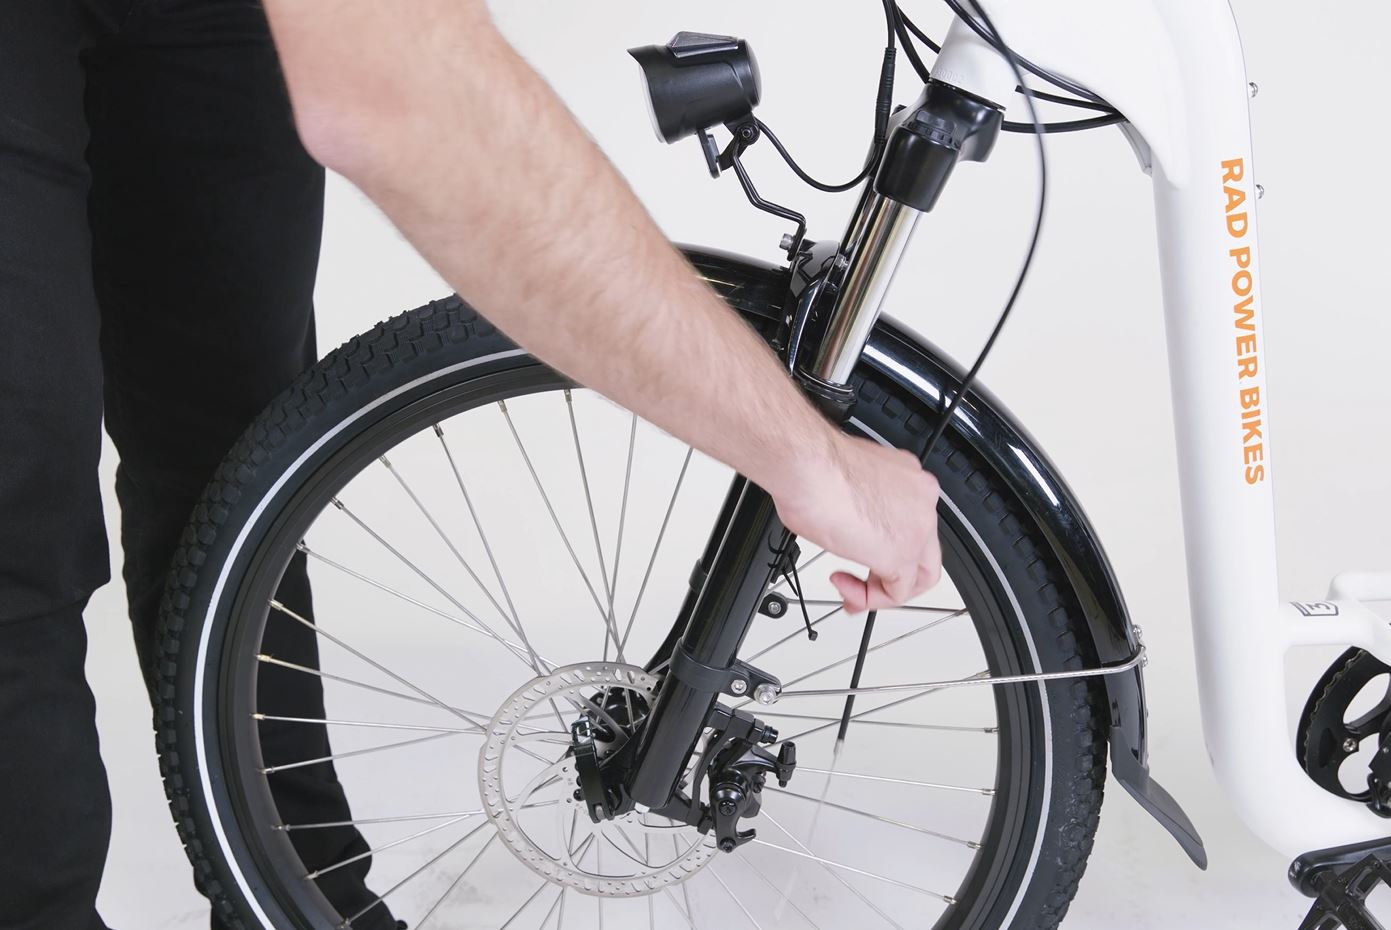
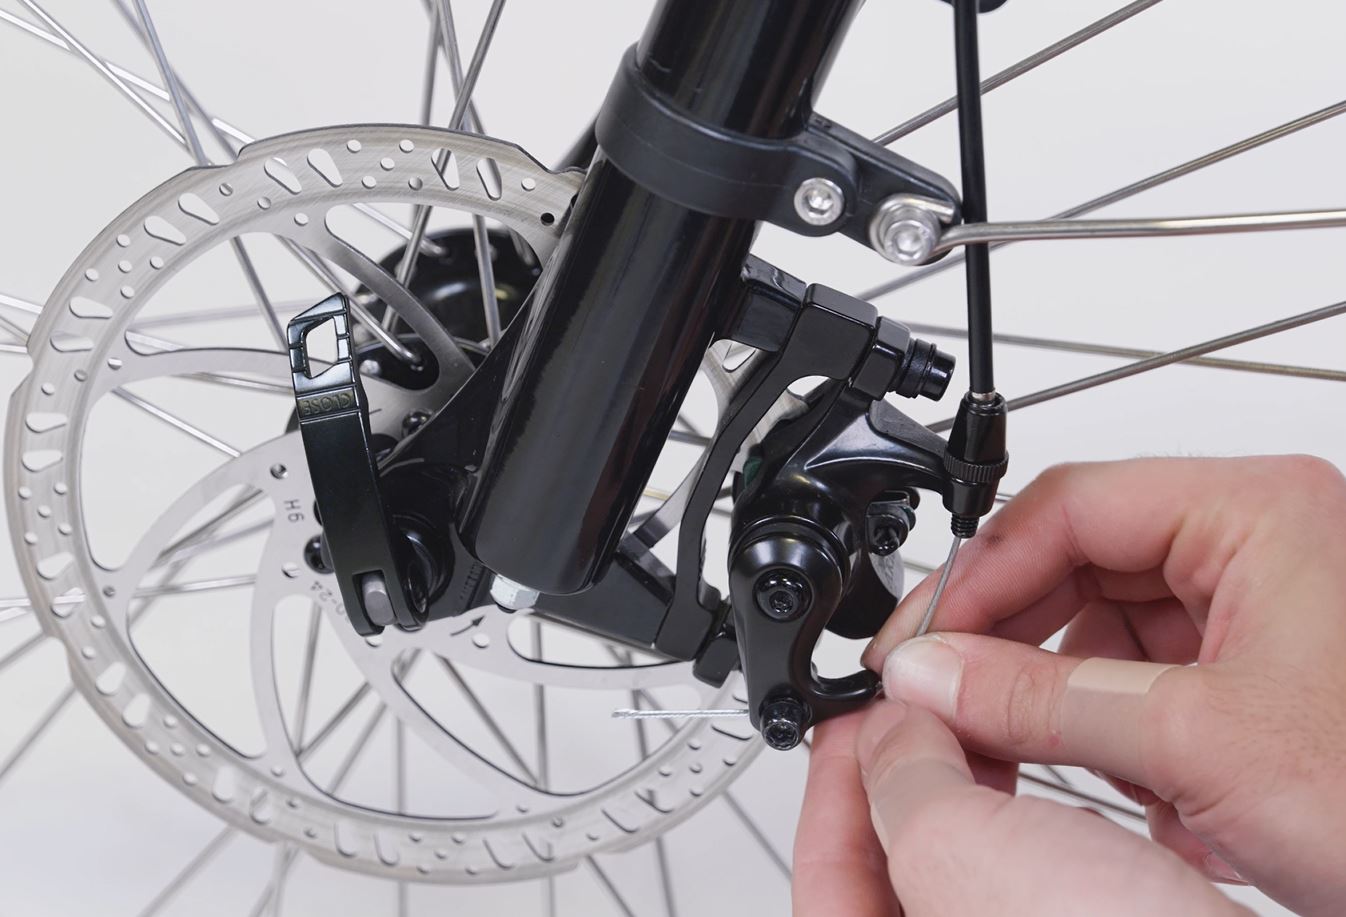
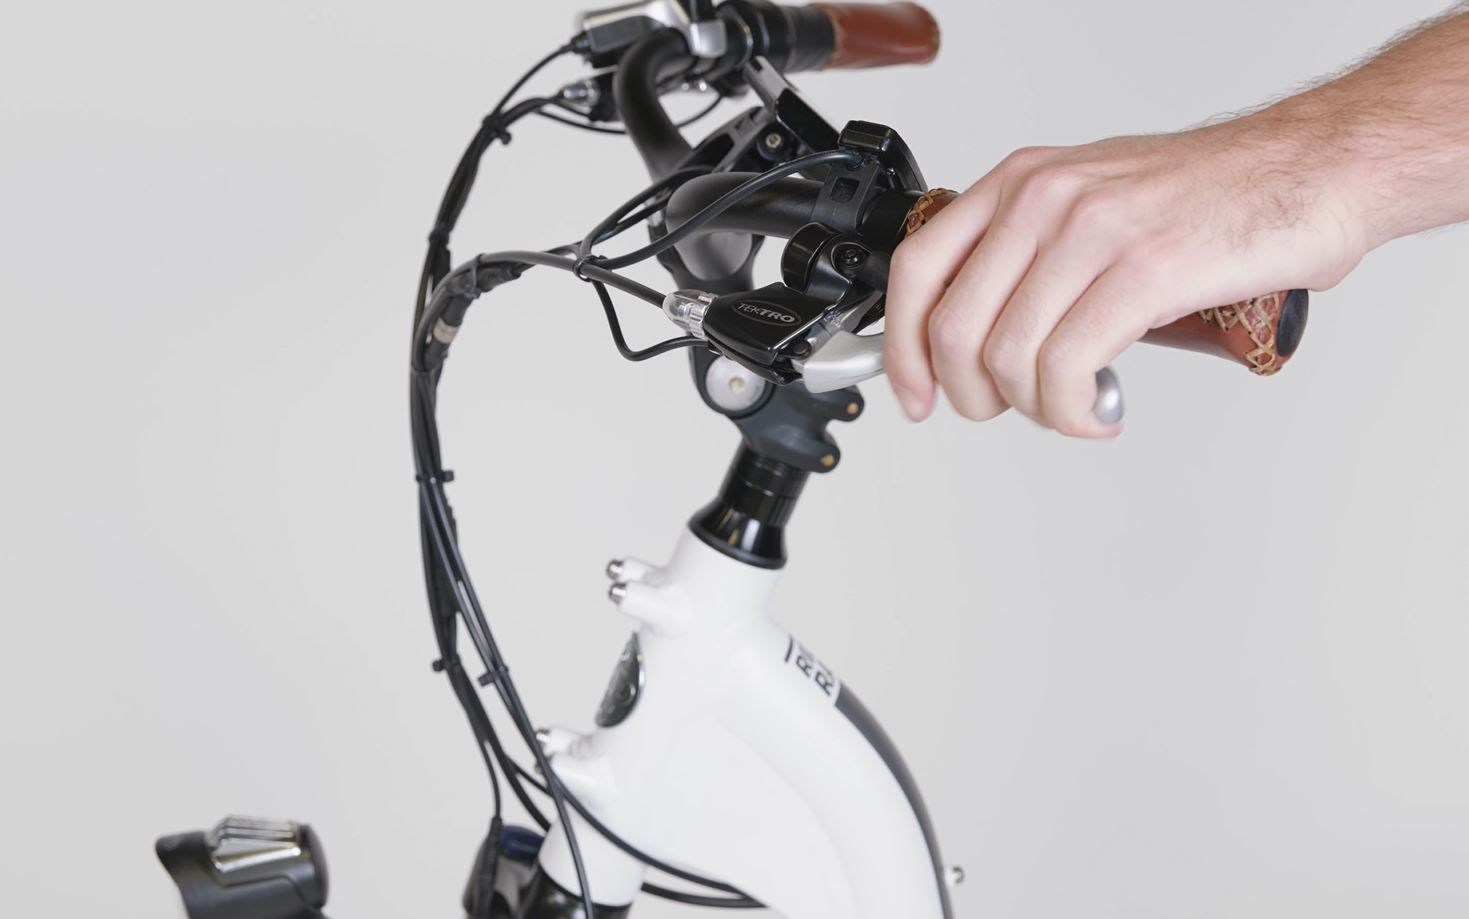
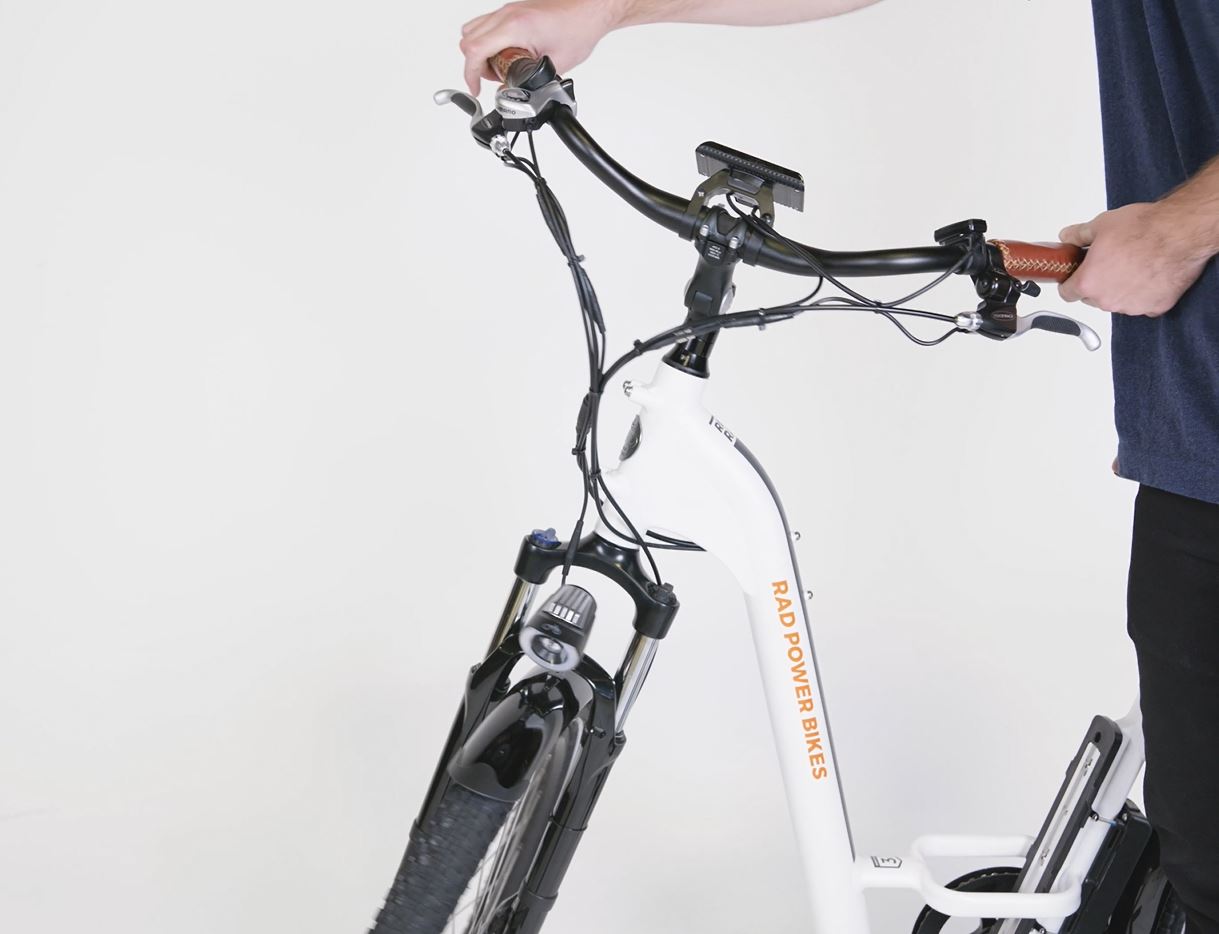
- Check the position of the front brake cable to see if it needs to be rerouted before installing the front rack. Trace the cable coming out of the left brake lever to the caliper near the front wheel.
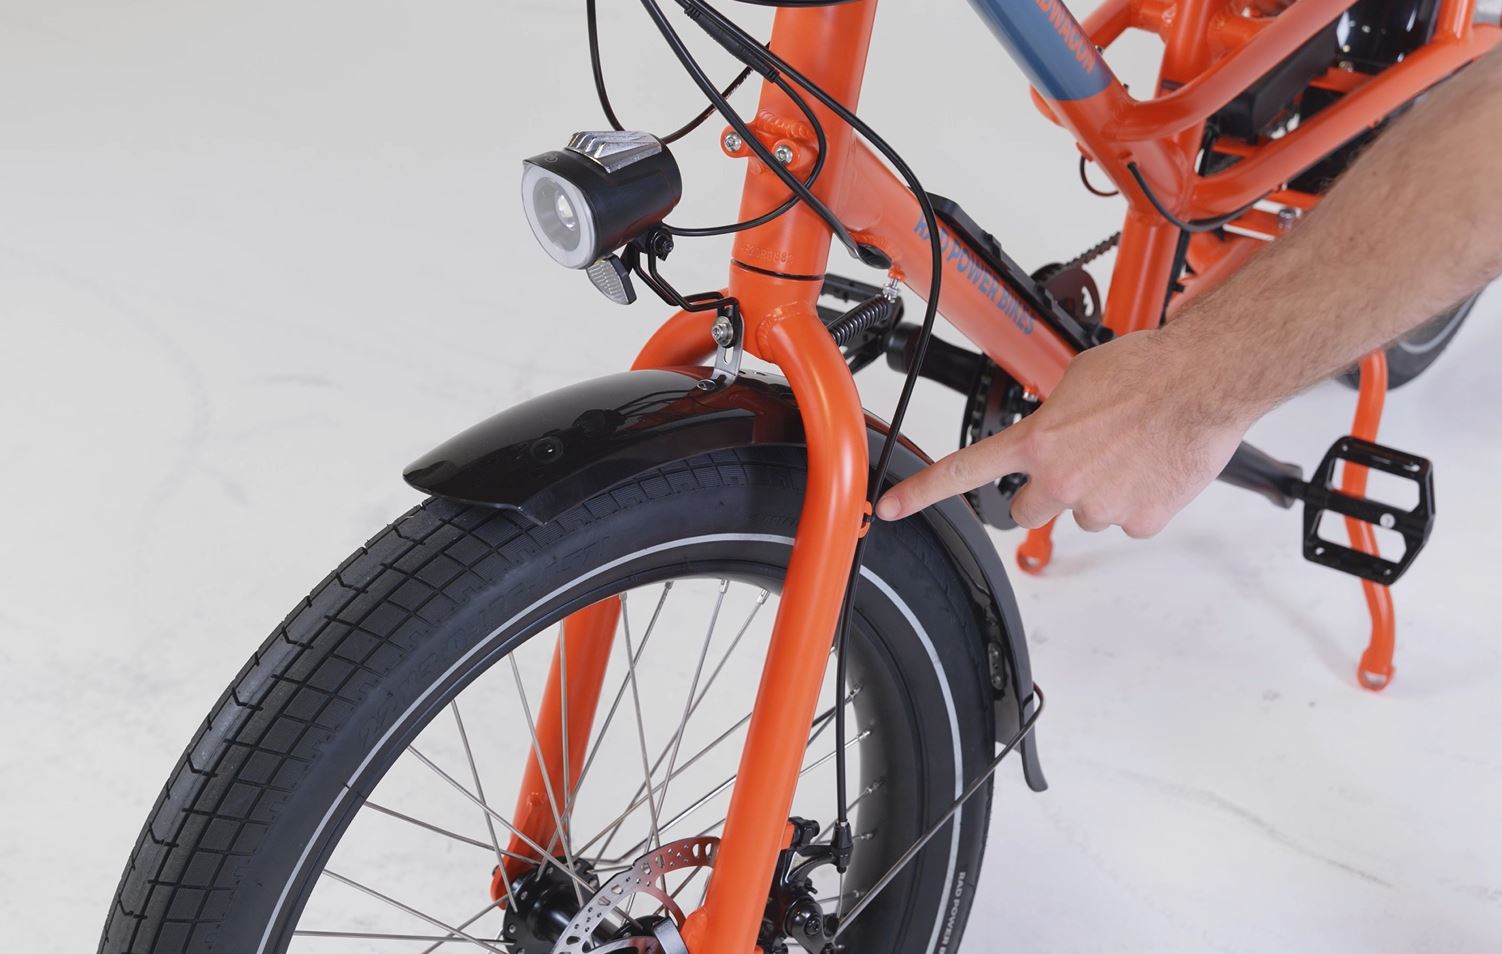
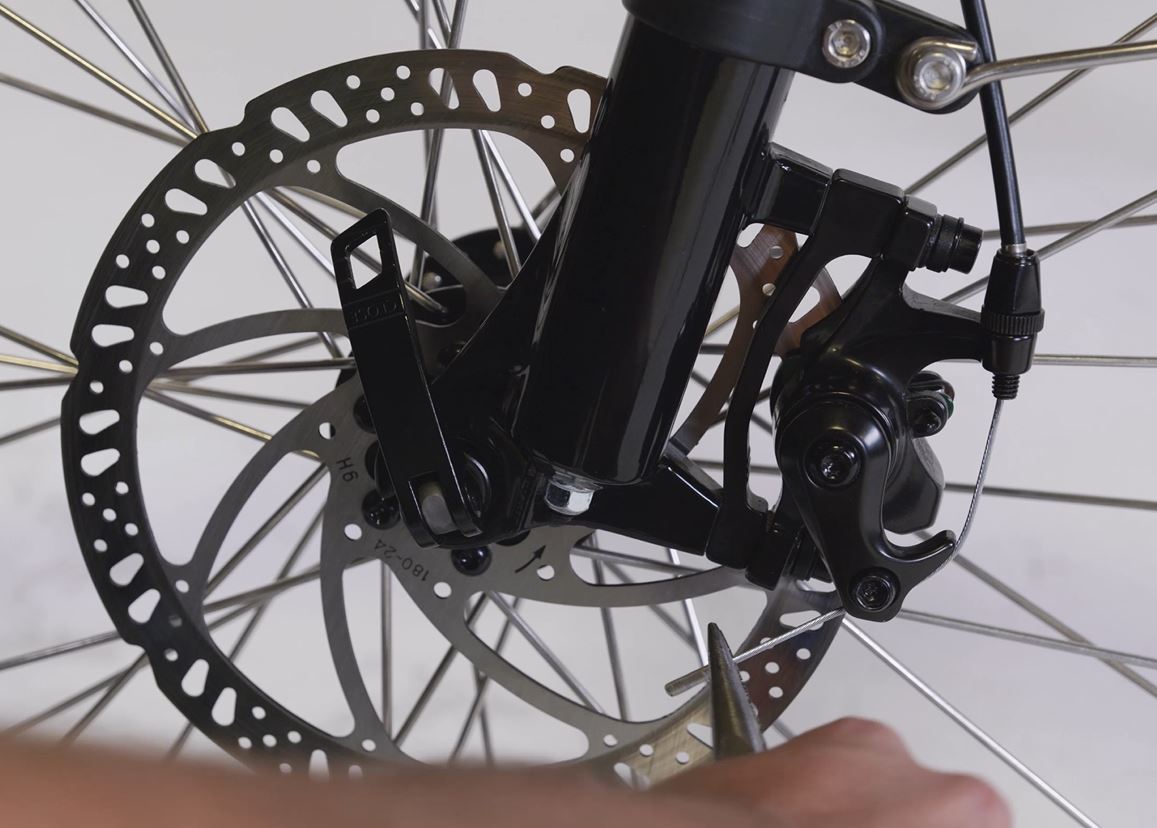
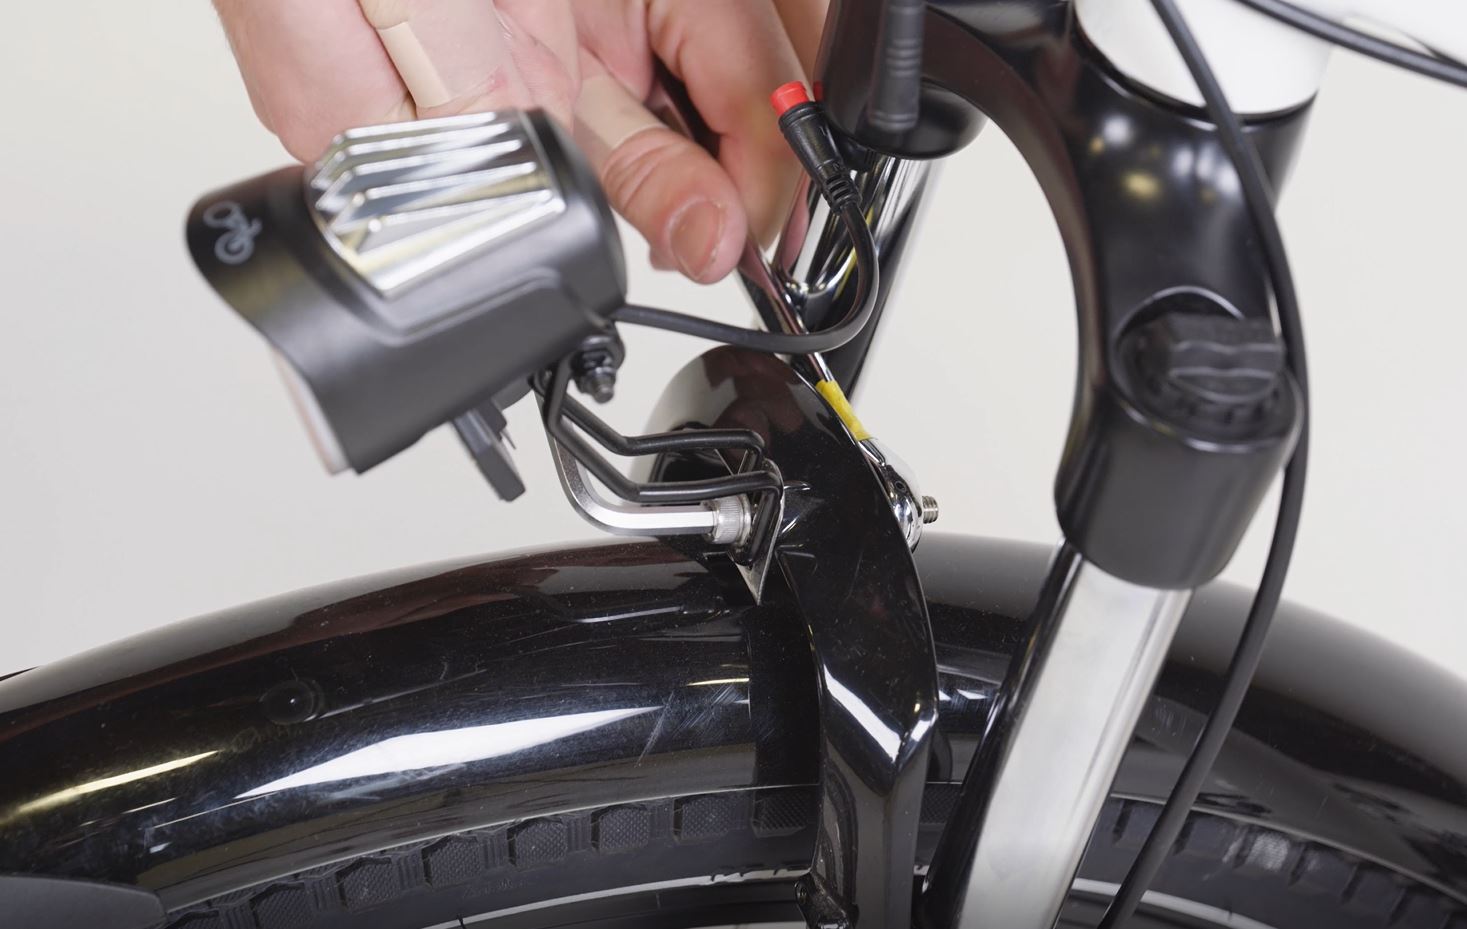
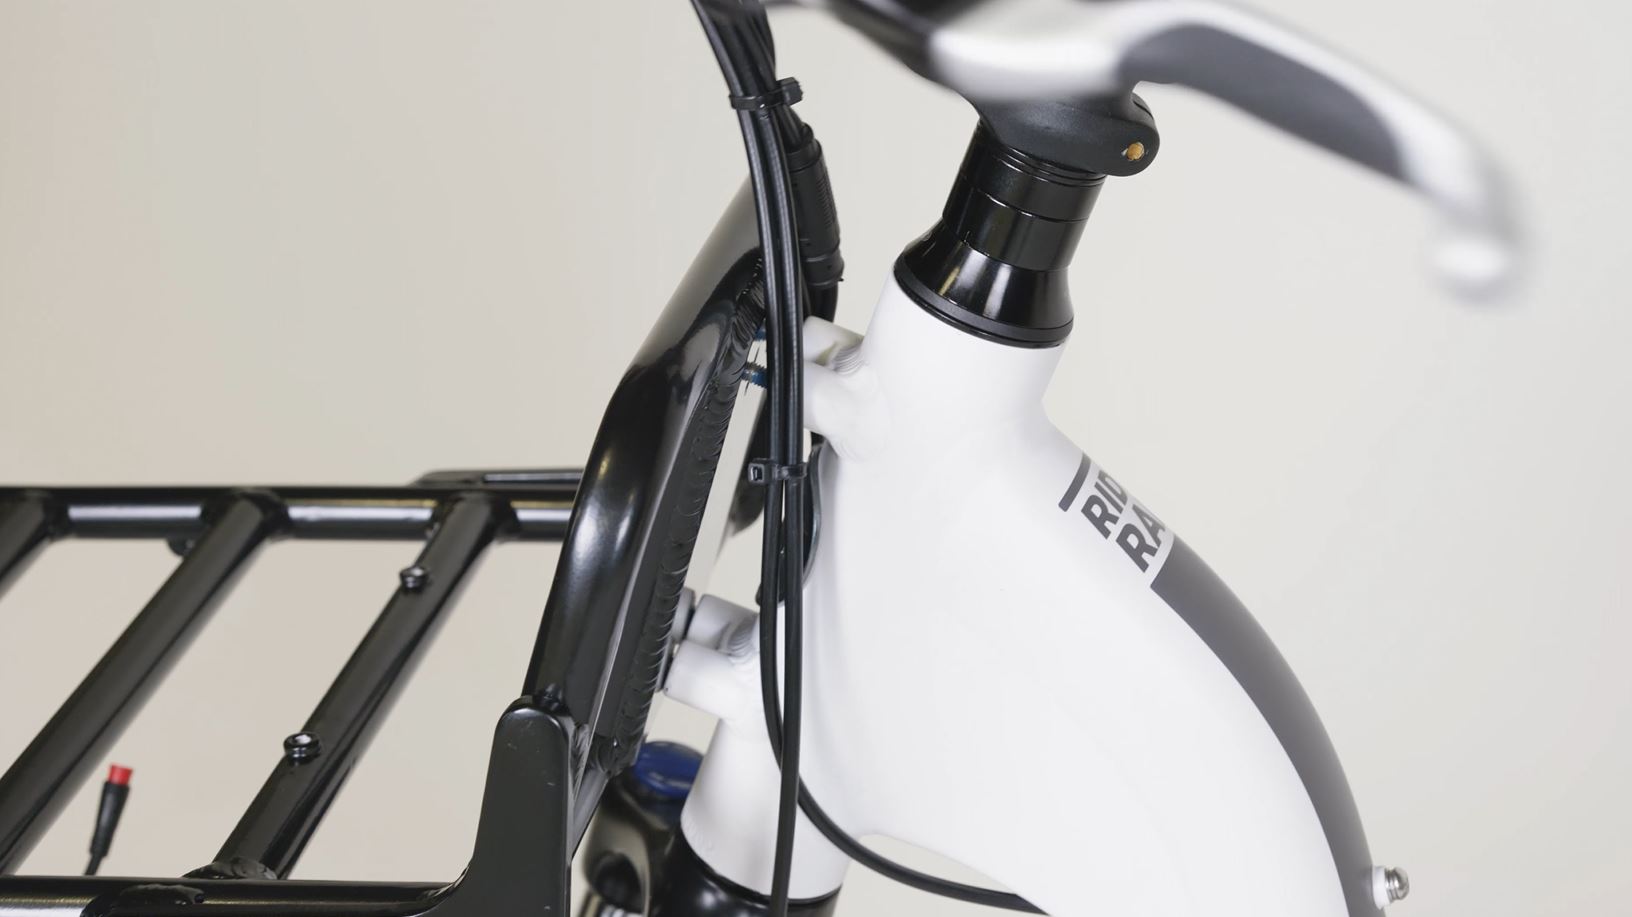
For RadMini, and RadRunner Plus models: The brake cable is secured at the front of the fork lower (as shown below). Reroute the brake cable before installing the front rack to prevent premature wear on the brake cable housing. Follow the steps in the "Reroute the Brake Cable (Select Models Only)" section below to reroute the brake cable.
The brake cable must be in the proper position before attempting to install the front rack. Improper placement of the brake cable during front rack installation can lead to premature wear on the brake cable housing.
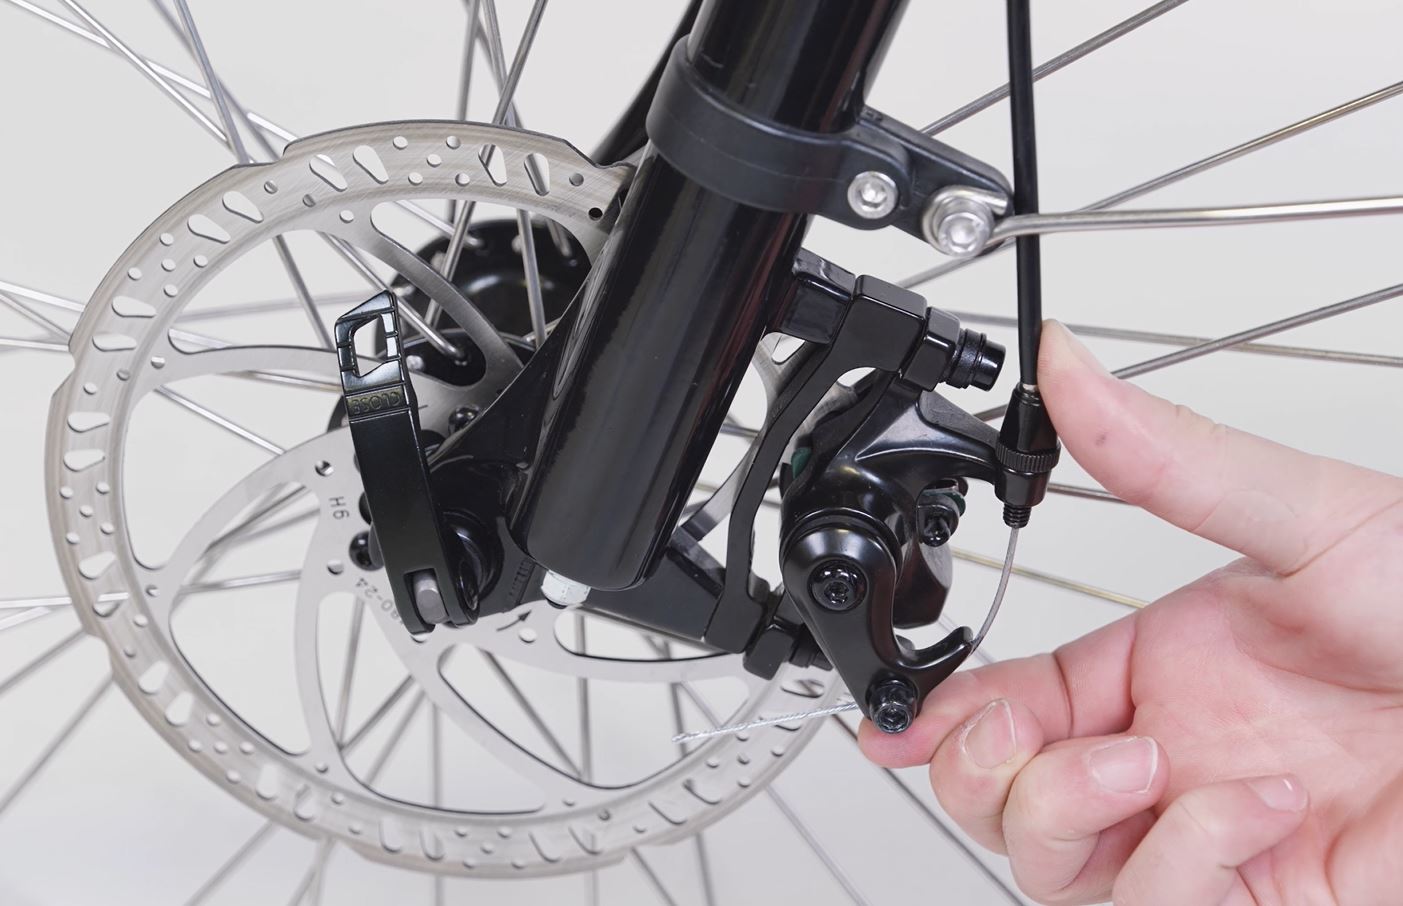
For all other models: The brake cable is secured on the rear of the fork lower (as shown below). The brake cable does not need to be rerouted. Continue to the "Install the Headlight on the Front Rack" section.
Reroute the Brake Cable (Select Models Only)
This section applies to RadMini, and RadRunner Plus models.
- Prepare the cable guide and fork lower for installation.
- Locate the adhesive cable guide and two zip ties included in the front rack kit. Slide the zip ties into the cable guide, as shown. Set it aside.

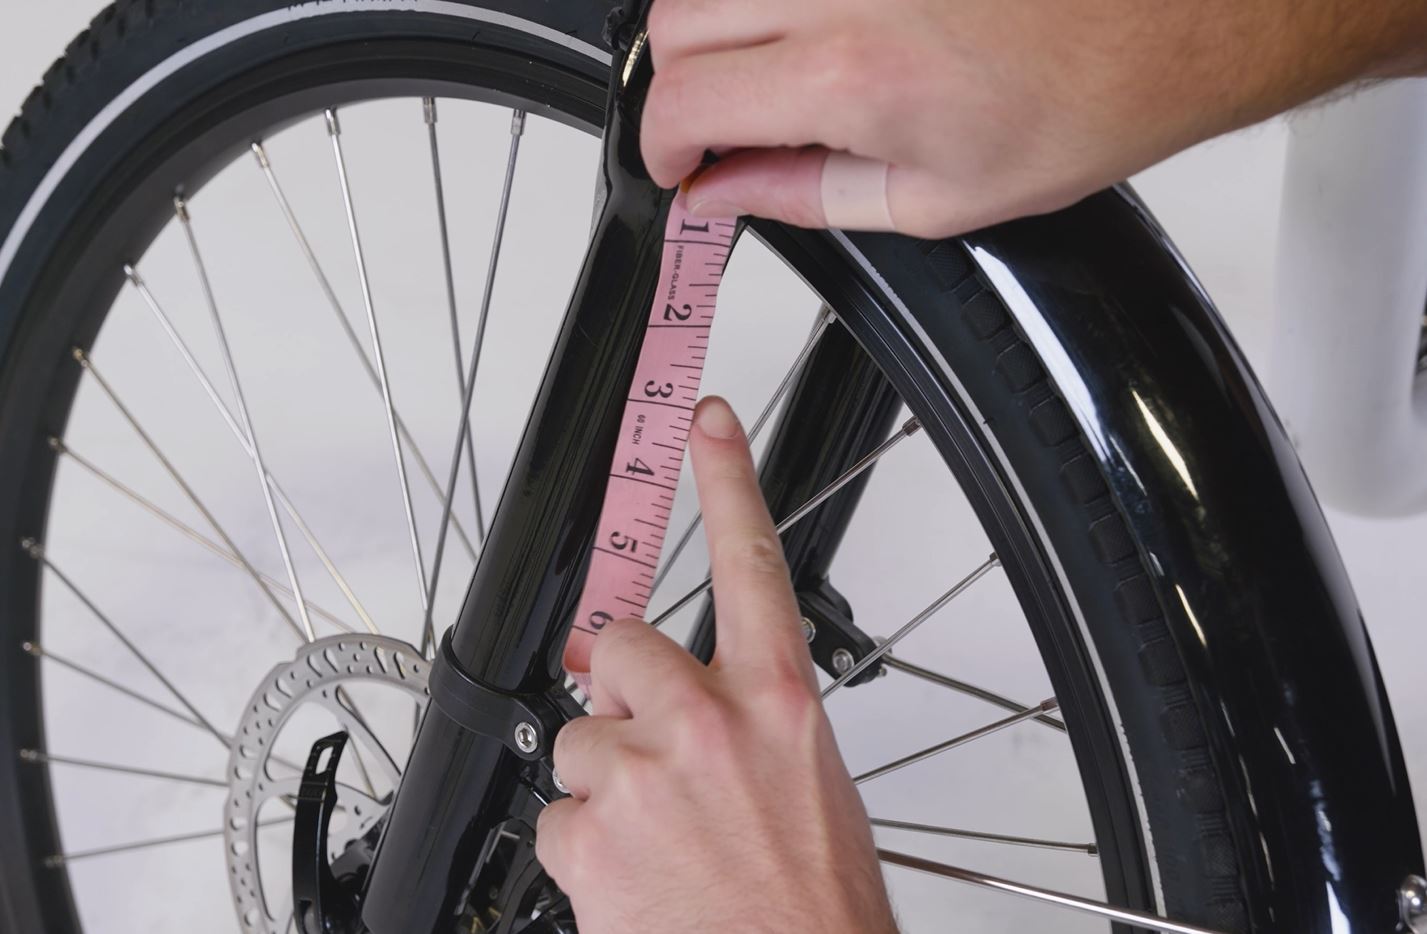
- Locate the area where the cable guide will be installed. On the rear of the fork lower, measure a spot about 2-3" below the top of the fork (as shown below).
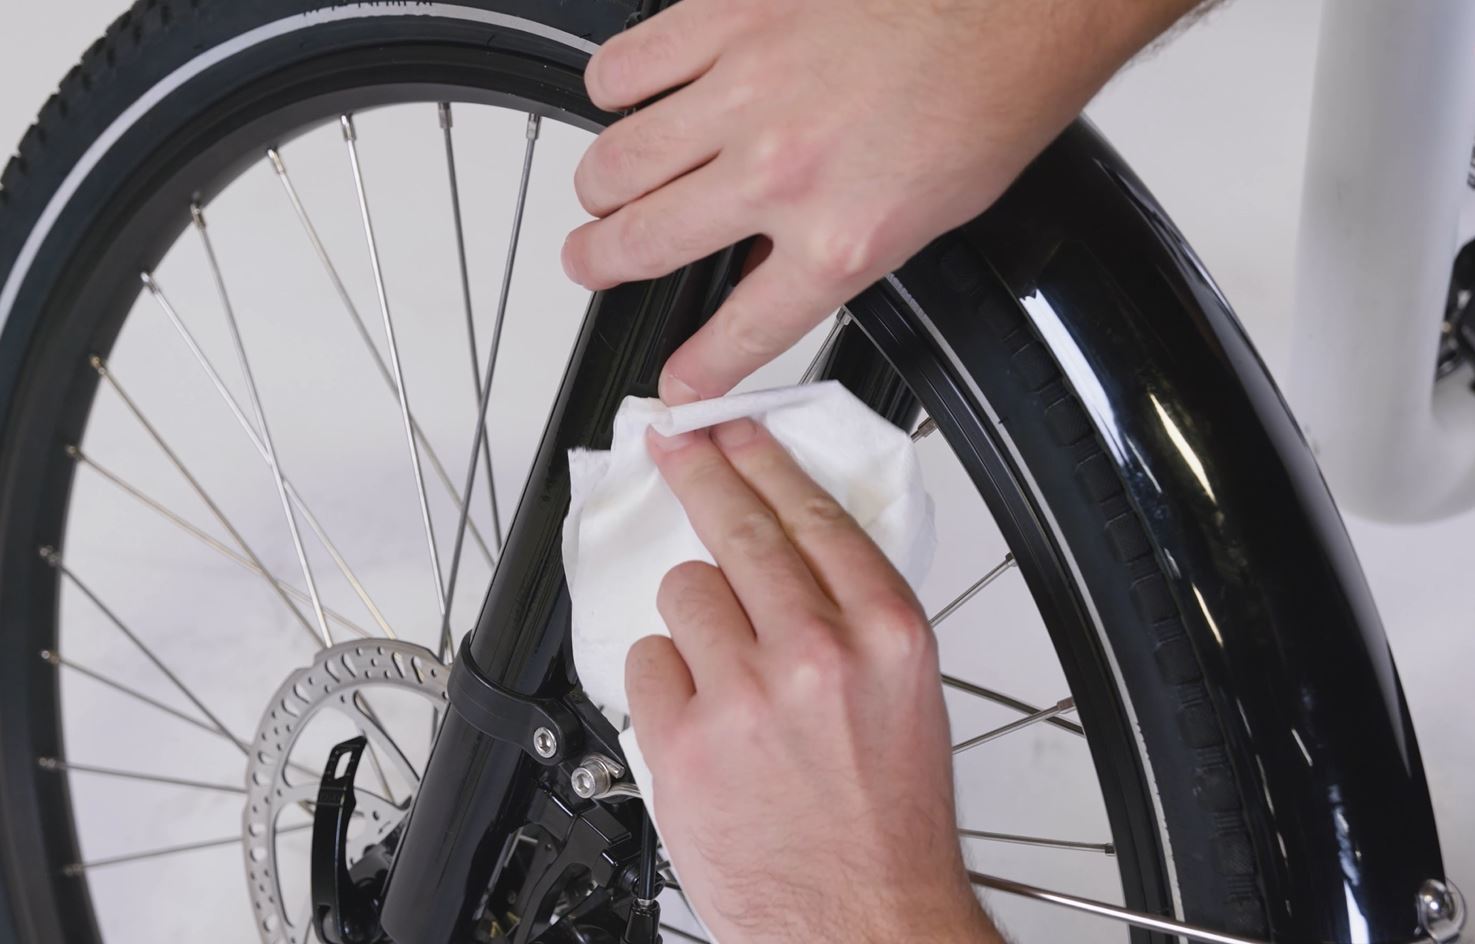
- Clean the fork lower. Apply some isopropyl alcohol to a paper towel and wipe the back of the fork lower. Allow the area to dry completely.
- Install the cable guide. Remove the adhesive backing cover from the cable guide and place the cable guide in position, pressing firmly for a few moments to adhere.
- Locate the adhesive cable guide and two zip ties included in the front rack kit. Slide the zip ties into the cable guide, as shown. Set it aside.
- Remove the brake cable from the cable guide on the frame. Use a 3 mm Allen wrench to remove the cable guide bolt. Remove the brake cable from the cable guide and reinstall the bolt.
- Locate the brake caliper and remove the brake cable.
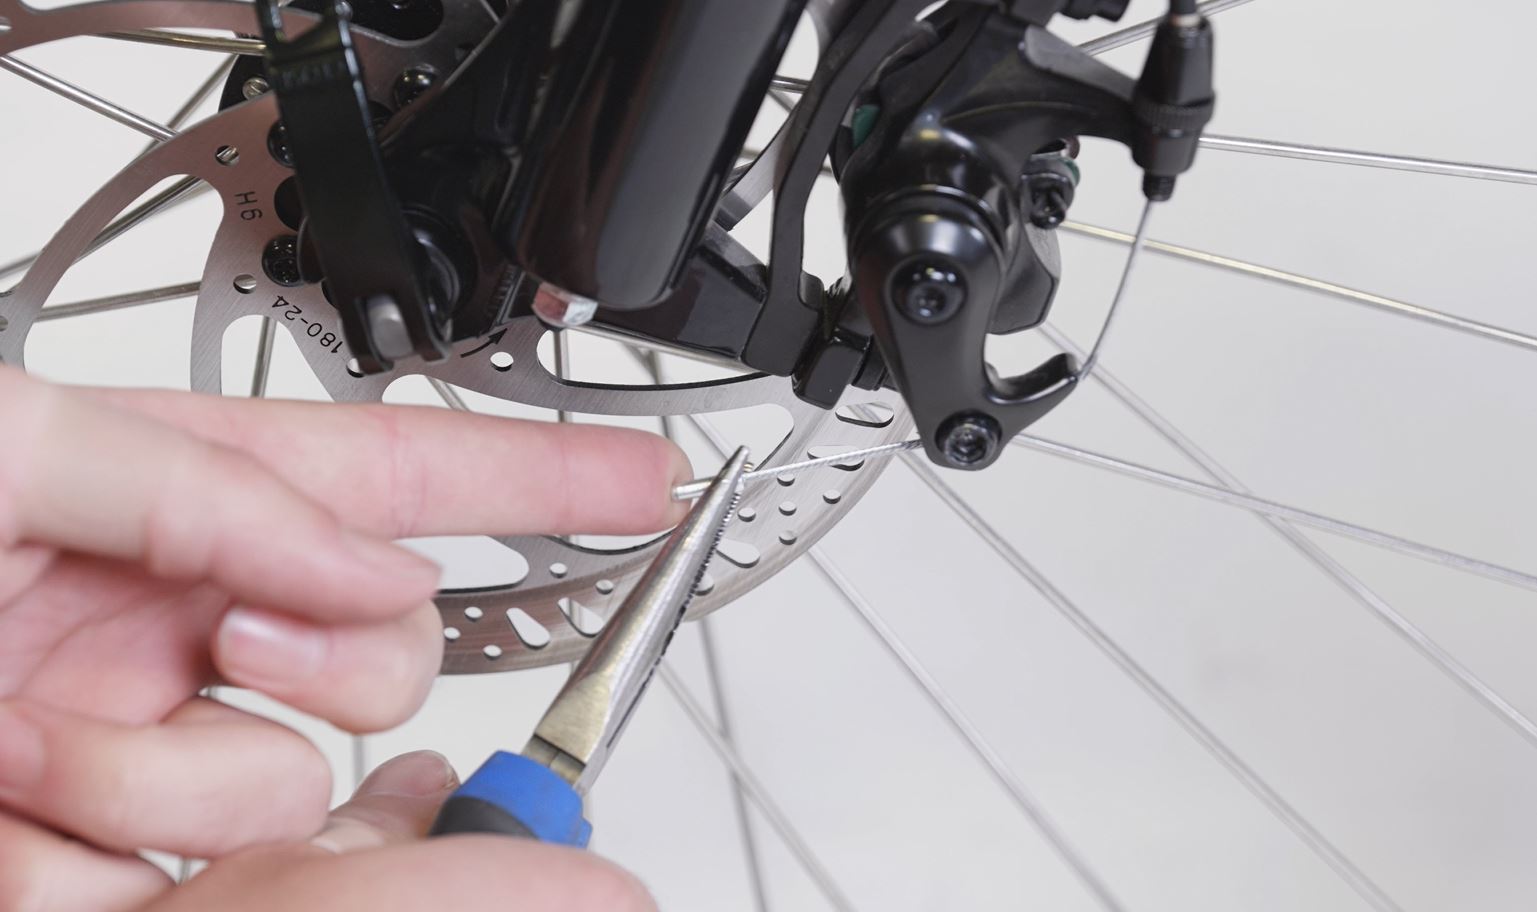
- Locate and remove the brake cable crimp. Use needle nose pliers to carefully remove the cable crimp at the end of the cable. Set the cable crimp aside for reinstallation.
- Locate and remove the brake cable crimp. Use needle nose pliers to carefully remove the cable crimp at the end of the cable. Set the cable crimp aside for reinstallation.
Use caution when handling the brake cable end with the cable crimp removed. The end of the cable is sharp and can cause injury if not handled carefully. If the brake cable appears corroded, rusty, or damaged, or if the brake cable housing appears worn or damaged, which can happen over time and with normal use, the cable and/or housing should be replaced by a certified, reputable bike mechanic.
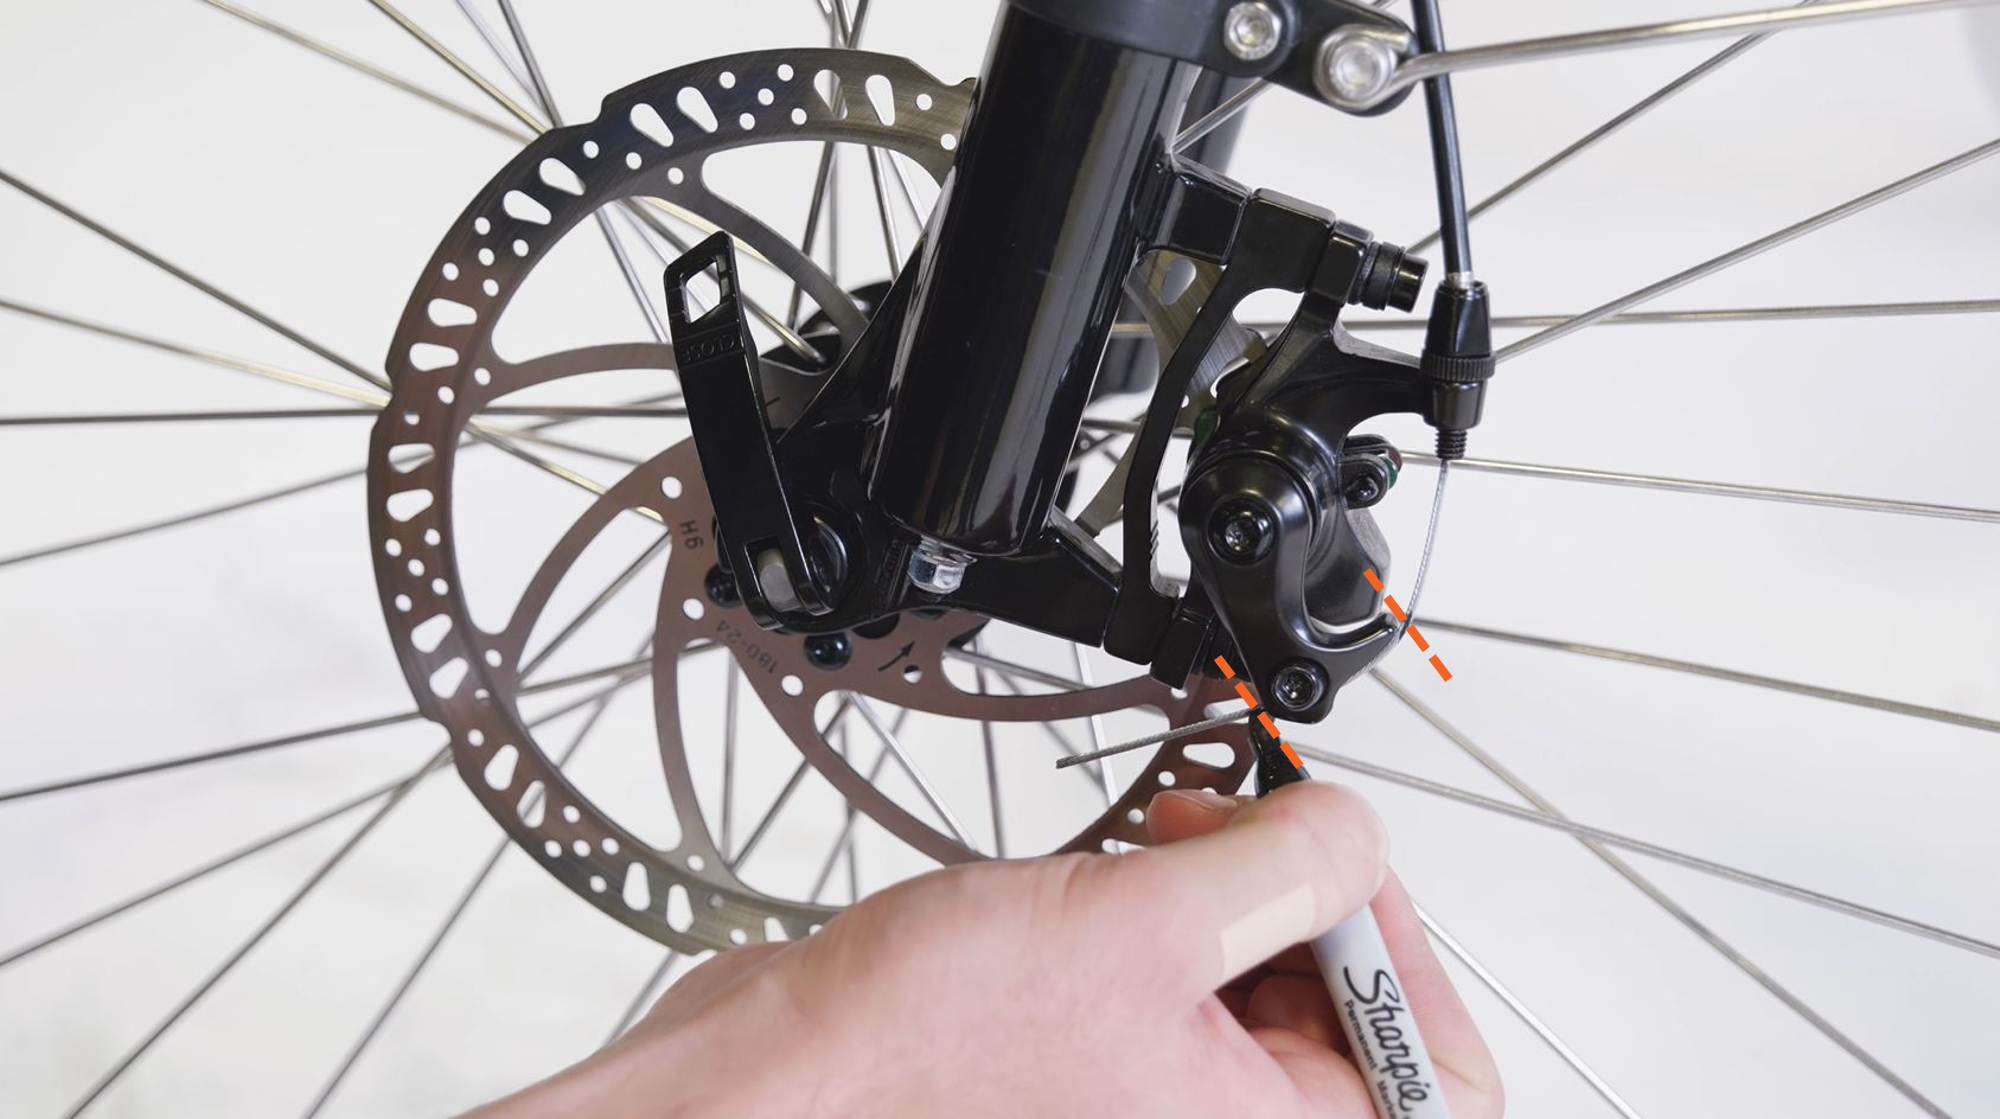
- If your brakes are well-adjusted, use a permanent marker to mark the brake cable on either side of the cable pinch bolt. This will help make it quicker to adjust the brakes after reinstalling the cable at a later step.
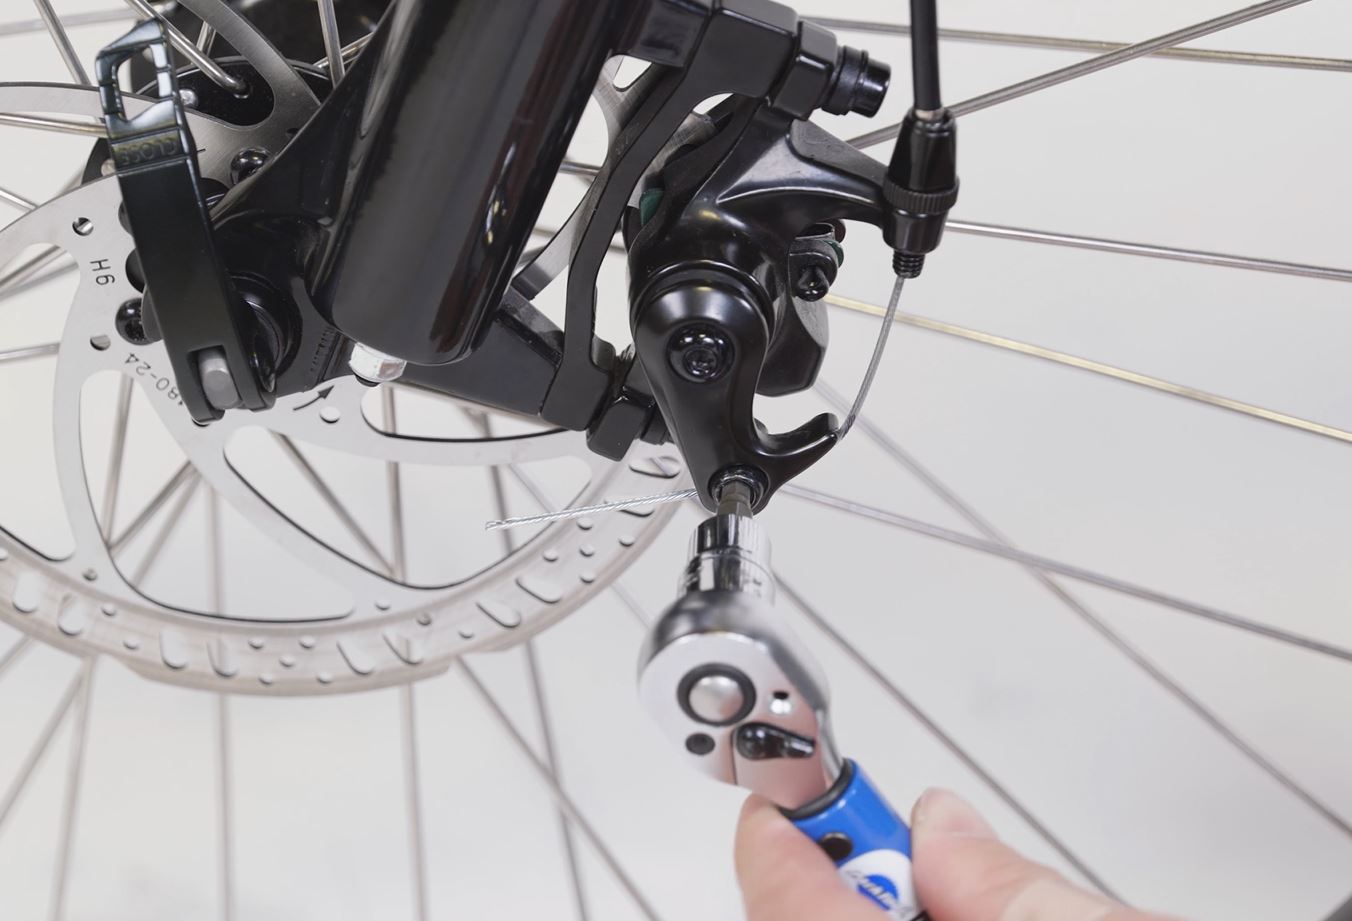
- Loosen the cable pinch bolt and remove the brake cable. Use a 5 mm Allen wrench to loosen (but not remove) the cable pinch bolt on the caliper just enough to allow the cable to pass through the opening. Pull the cable out of the brake caliper and barrel adjuster.
- Reroute and secure the brake cable in the new cable guide.
- Reroute the brake cable so it passes over the fork crown and behind the fork lower (as shown below).
- Press the brake cable into the cable guide. Align the brake cable and housing with the opening of the cable guide and carefully press the cable directly into the cable guide.
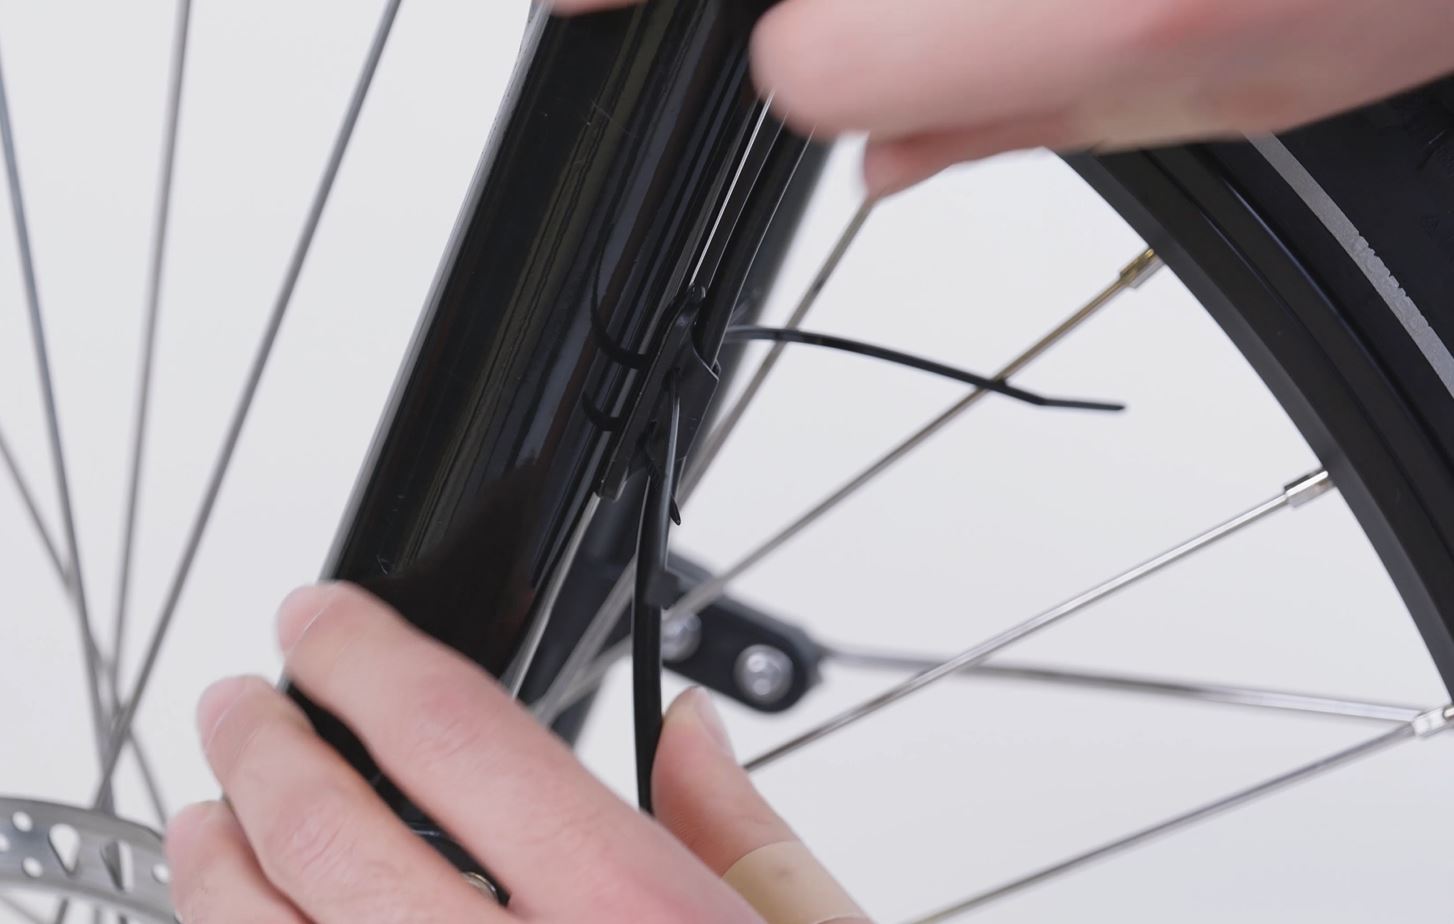
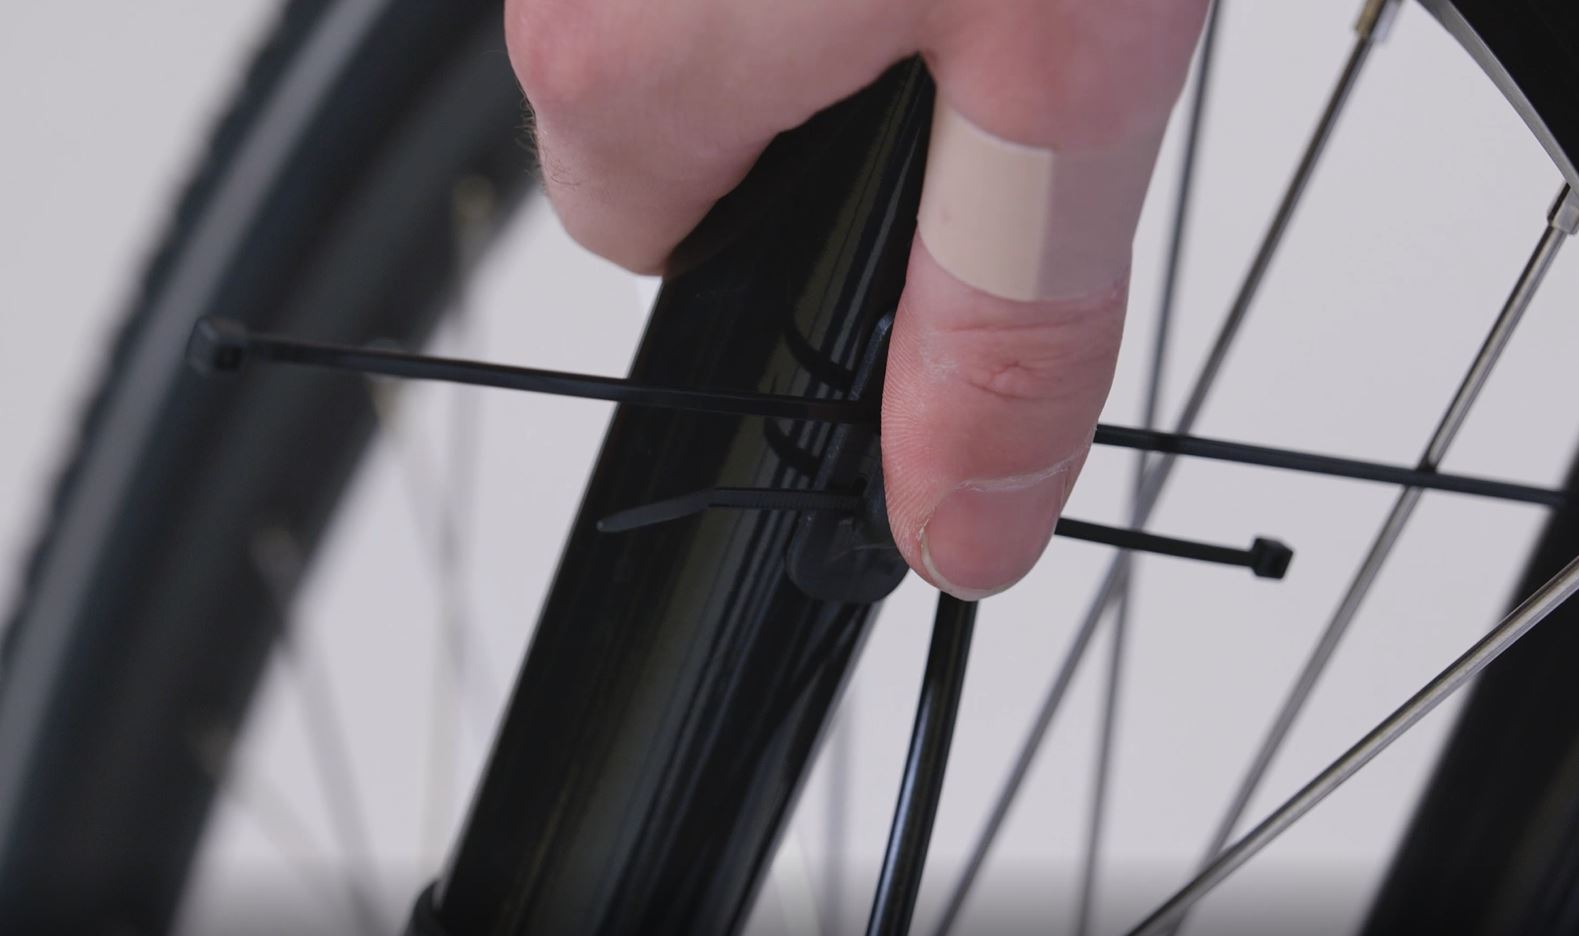
- Secure the cable guide with zip ties. Secure the longer zip tie around the fork and the shorter zip tie around the brake cable so it is out of the way of moving parts. Trim both zip ties to be flush and smooth.
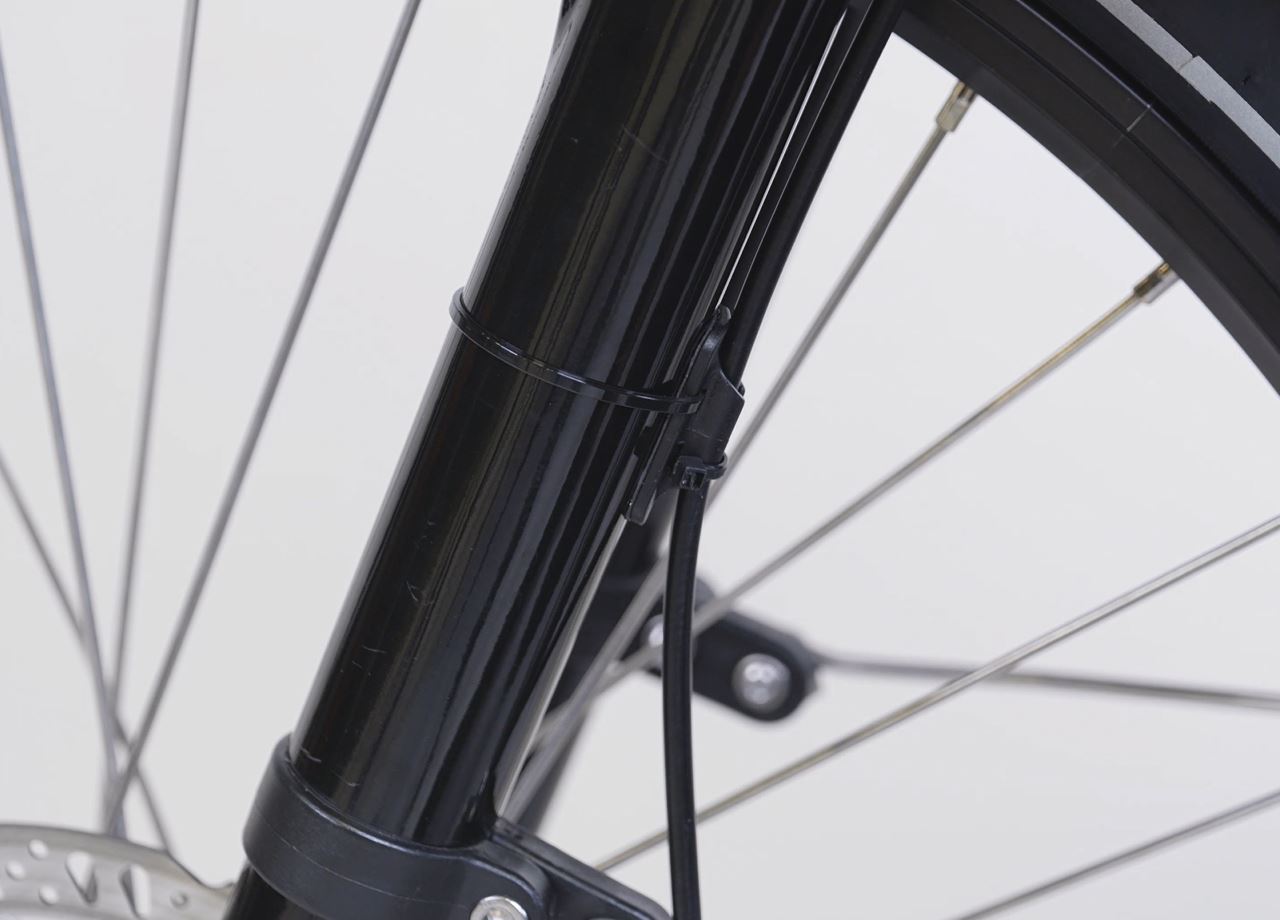
- Reroute the brake cable so it passes over the fork crown and behind the fork lower (as shown below).
- Reinstall the brake cable.
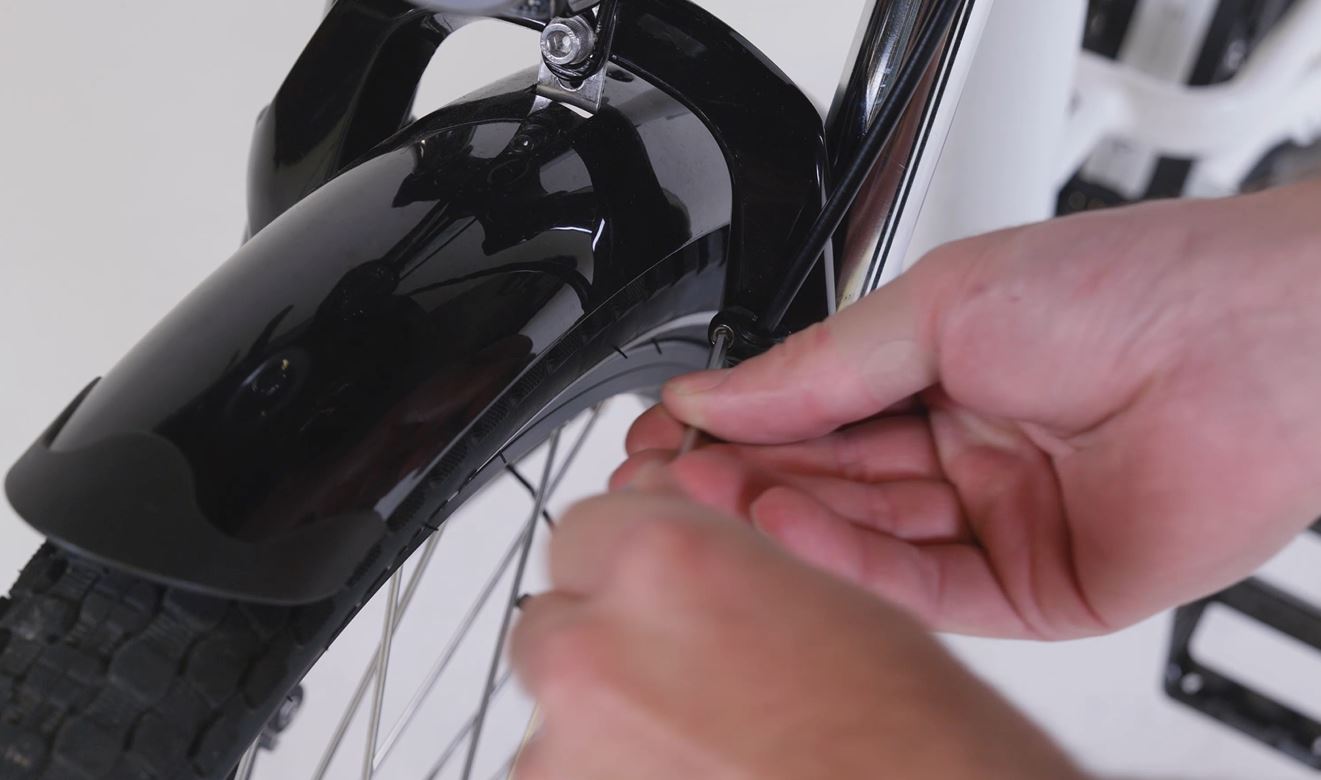
- Pass the brake cable through the barrel adjuster. Pass the brake cable on the inside of the fender arm if installed, and through the barrel adjuster. Press the cable housing into the barrel adjuster, then pass the brake cable into the caliper.
- Pull the caliper arm up and pull the brake cable down and taut, matching the position of the permanent marker lines created earlier.r
- Use a 5 mm Allen wrench to tighten the cable pinch bolt. Torque the bolt to 6 Nm.
- Carefully slide the cable crimp over the end of the cable, twisting clockwise to gather any loose strands. Use needle nose pliers to gently squeeze the cable crimp to secure it to the cable end.
- Pass the brake cable through the barrel adjuster. Pass the brake cable on the inside of the fender arm if installed, and through the barrel adjuster. Press the cable housing into the barrel adjuster, then pass the brake cable into the caliper.
Cable ends are extremely sharp, especially if the cable has frayed. Use caution to avoid sharp and frayed cable ends or injury could occur.
- Check the brakes and perform an adjustment if needed.
- Squeeze the brake lever several times to fully seat the cable housing. If the brake lever can be easily squeezed more than halfway to the handlebar, the brake should be adjusted. Click here for instructions to adjust the brakes.
- Check cable slack. Turn the handlebar from side to side. Ensure the handlebar has complete range of motion and that the brake cable has enough slack to move as the bike turns without stretching or damaging the cable, and without activating the brake pads. If the handlebar cannot turn fully, or if the brake activates while turning, click here to adjust the brakes as needed.
- Squeeze the brake lever several times to fully seat the cable housing. If the brake lever can be easily squeezed more than halfway to the handlebar, the brake should be adjusted. Click here for instructions to adjust the brakes.
Continue to the next section to install the headlight on the front rack.
Install the Headlight on the Front Rack
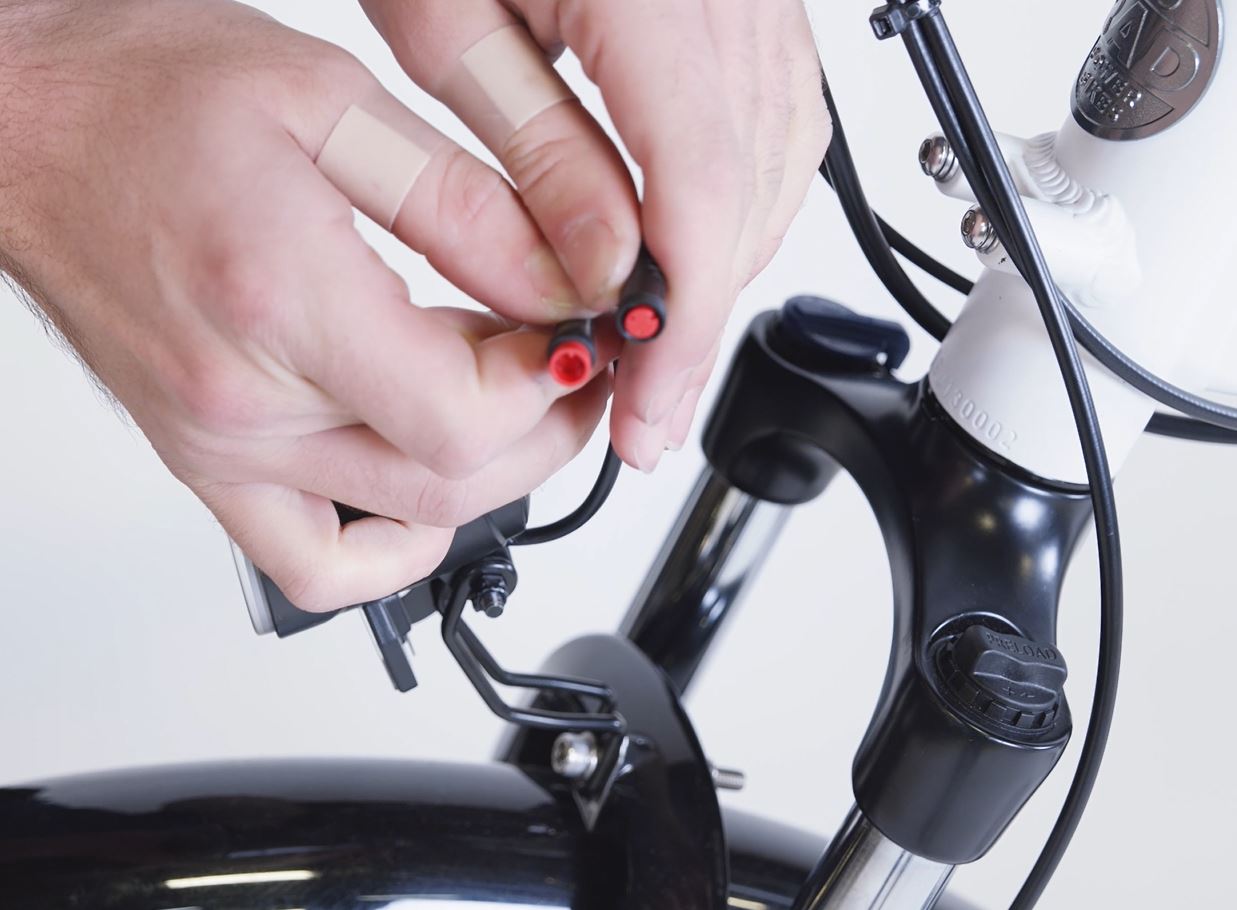
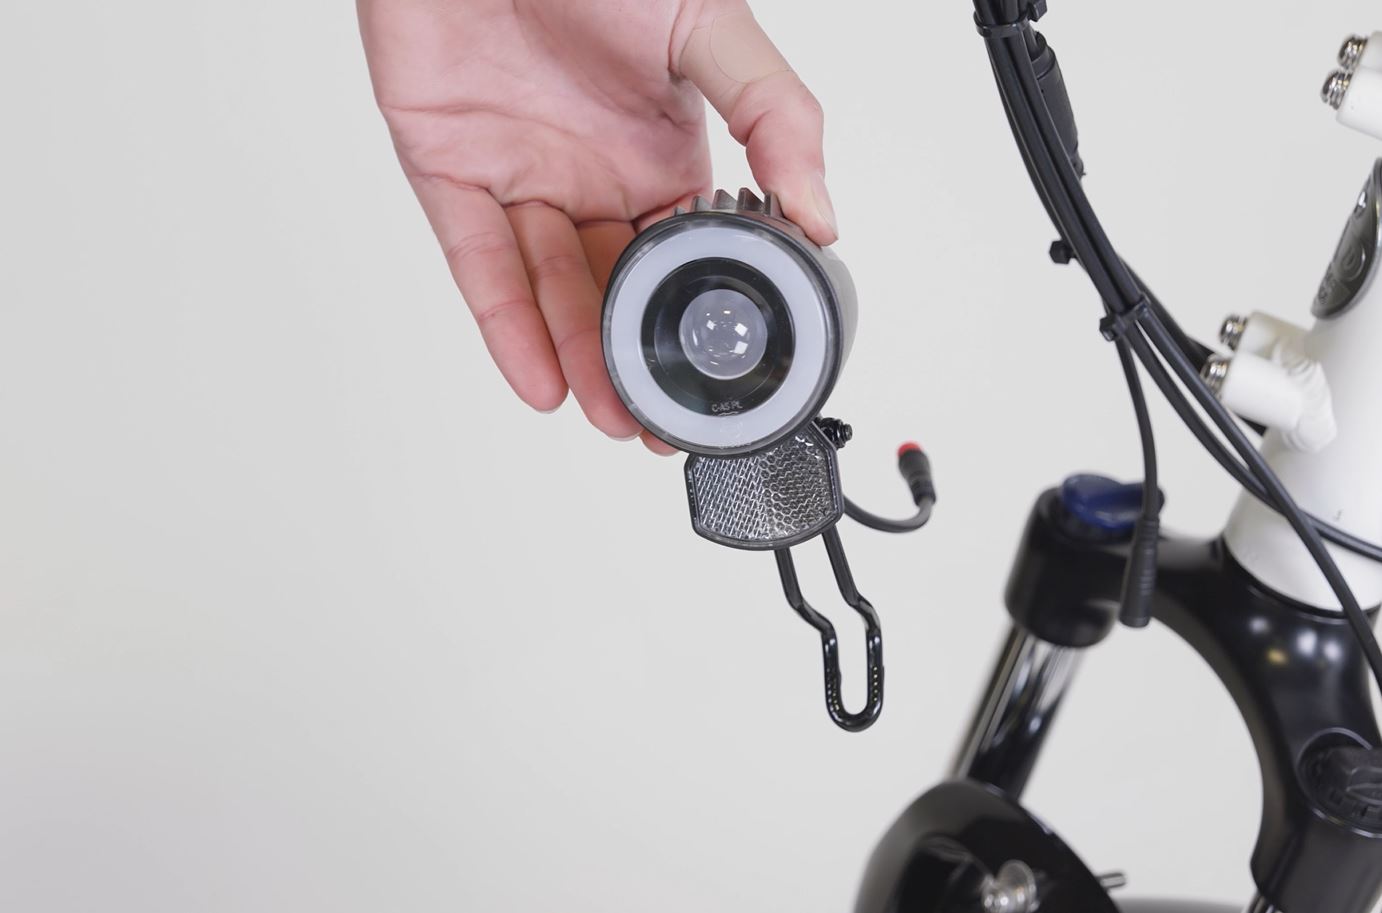
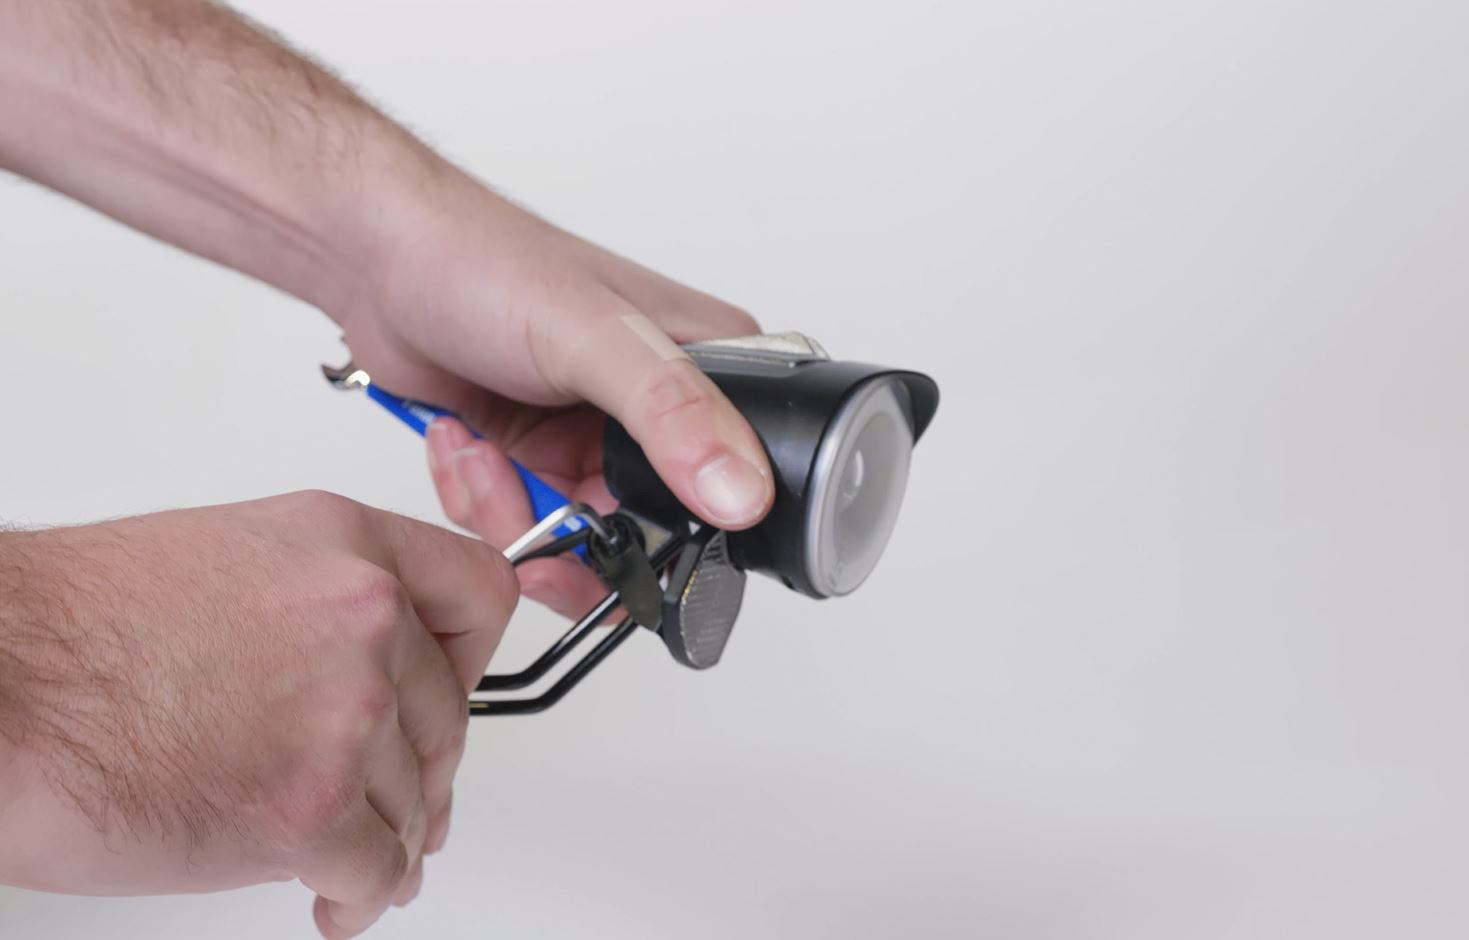
- Unplug the headlight connector. Snip zip ties as needed, then pull each side of the connector directly apart, without twisting, to unplug.
- Remove the headlight from the fork. Use a 5 mm Allen wrench and a 10 mm wrench to remove the headlight mounting bolt, flat washers, and lock nut. Set the headlight aside; it will be installed on the front rack at a later step.
- Reinstall the headlight mounting hardware in the fork. Pass the washer over the bolt end and insert the bolt through the fender mounting point and the mounting point on the fork arch. Pass the other washer over the bolt end and thread on the lock nut. Torque the bolt to 6 Nm. If a fender is installed, ensure the fender is centered. Adjust the fender by hand, if needed.

- Check if the headlight bracket is compatible with the front rack.
RadRunner, RadMission, and all 2020 and newer models: The headlight bracket is compatible with the front rack. The additional bracket included in the front rack kit is not necessary for installation. Continue to the next step.
2019 and earlier models: The headlight bracket is not compatible with the front rack. Follow the steps below to install the headlight on the compatible bracket.- Locate the additional bracket included in the front rack kit.
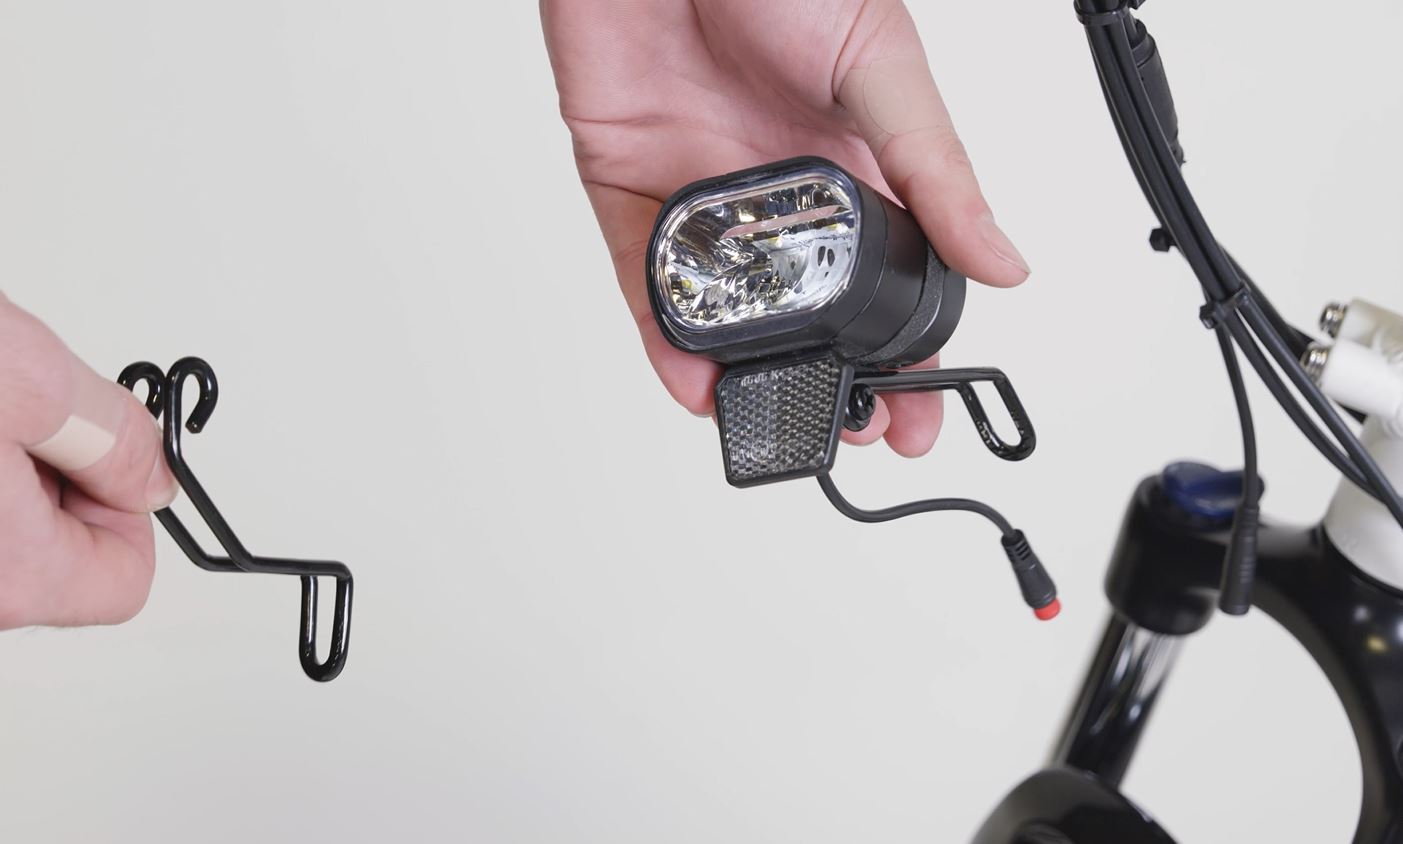
- Remove the headlight from the original bracket. Use a Phillips head screwdriver and an 8 mm wrench to remove the headlight from the bracket. Store the old bracket or recycle it according to local rules.
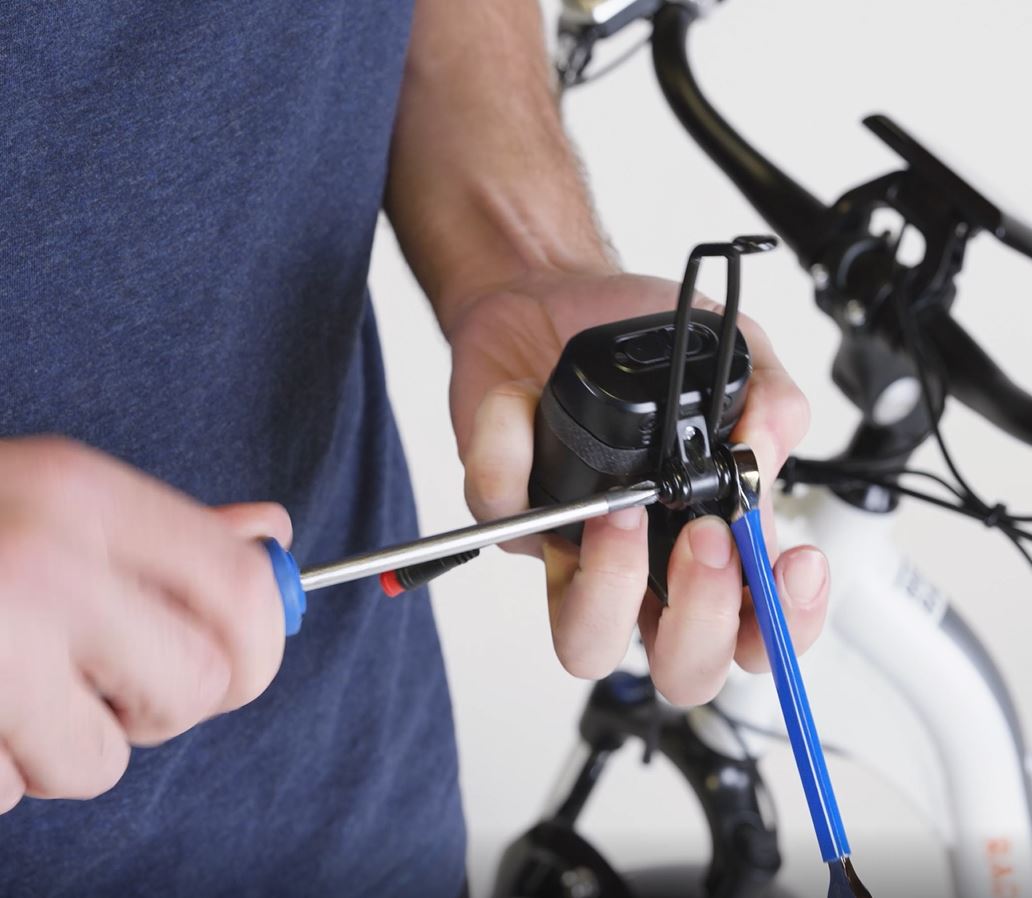
- Install the headlight on the new bracket. Place the headlight in position on the new mounting bracket and install the hardware. Tighten the bolt, but do not overtighten. Set the headlight aside.

- Locate the additional bracket included in the front rack kit.
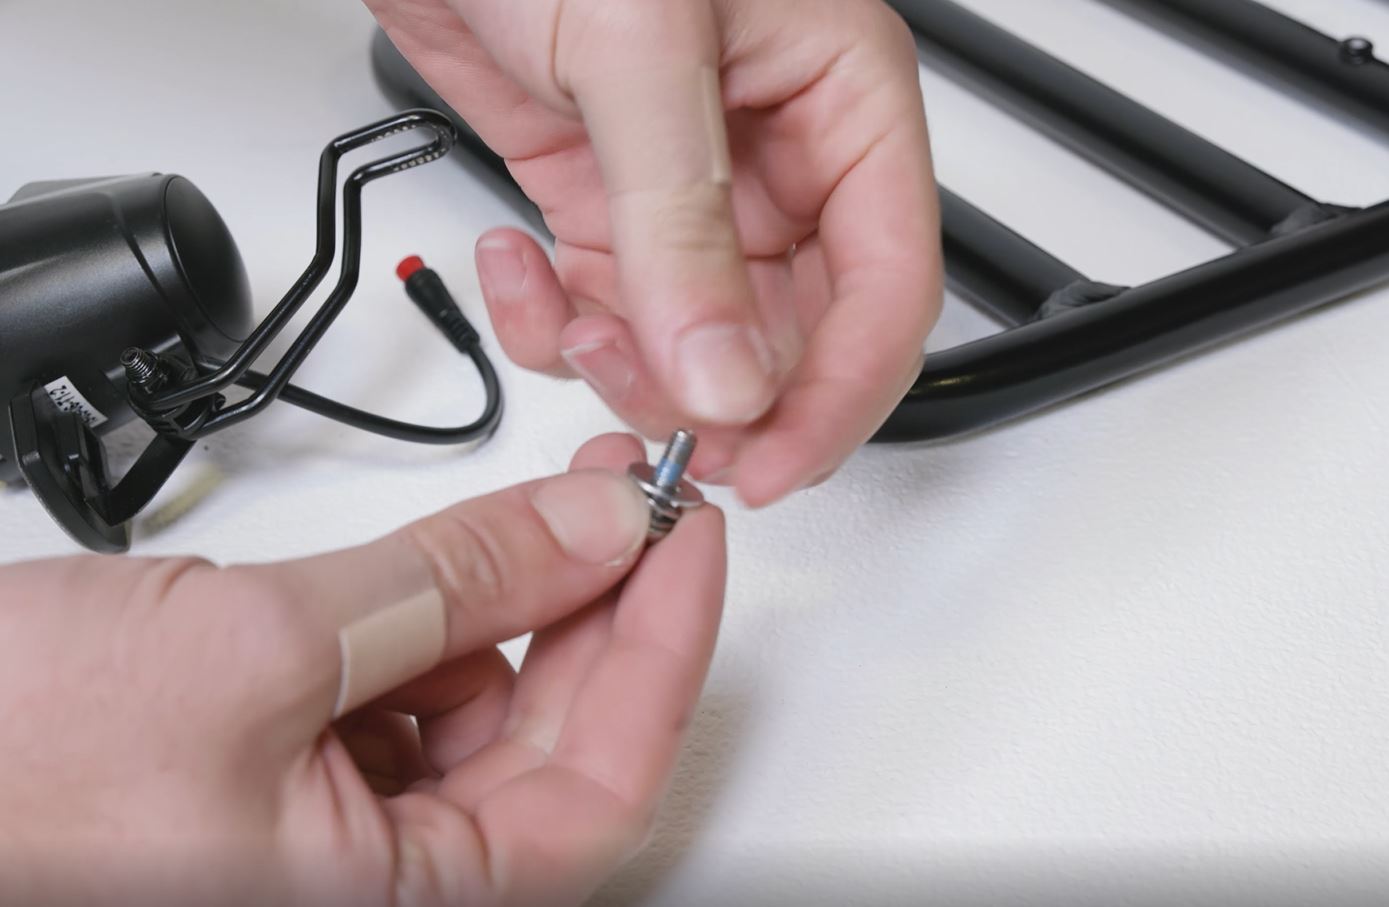
- Locate and prepare the headlight mounting hardware included in the front rack kit. Ensure the bolt has a captive washer, small washer, and large washer installed.
- Flip the front rack to access the headlight mounting point.
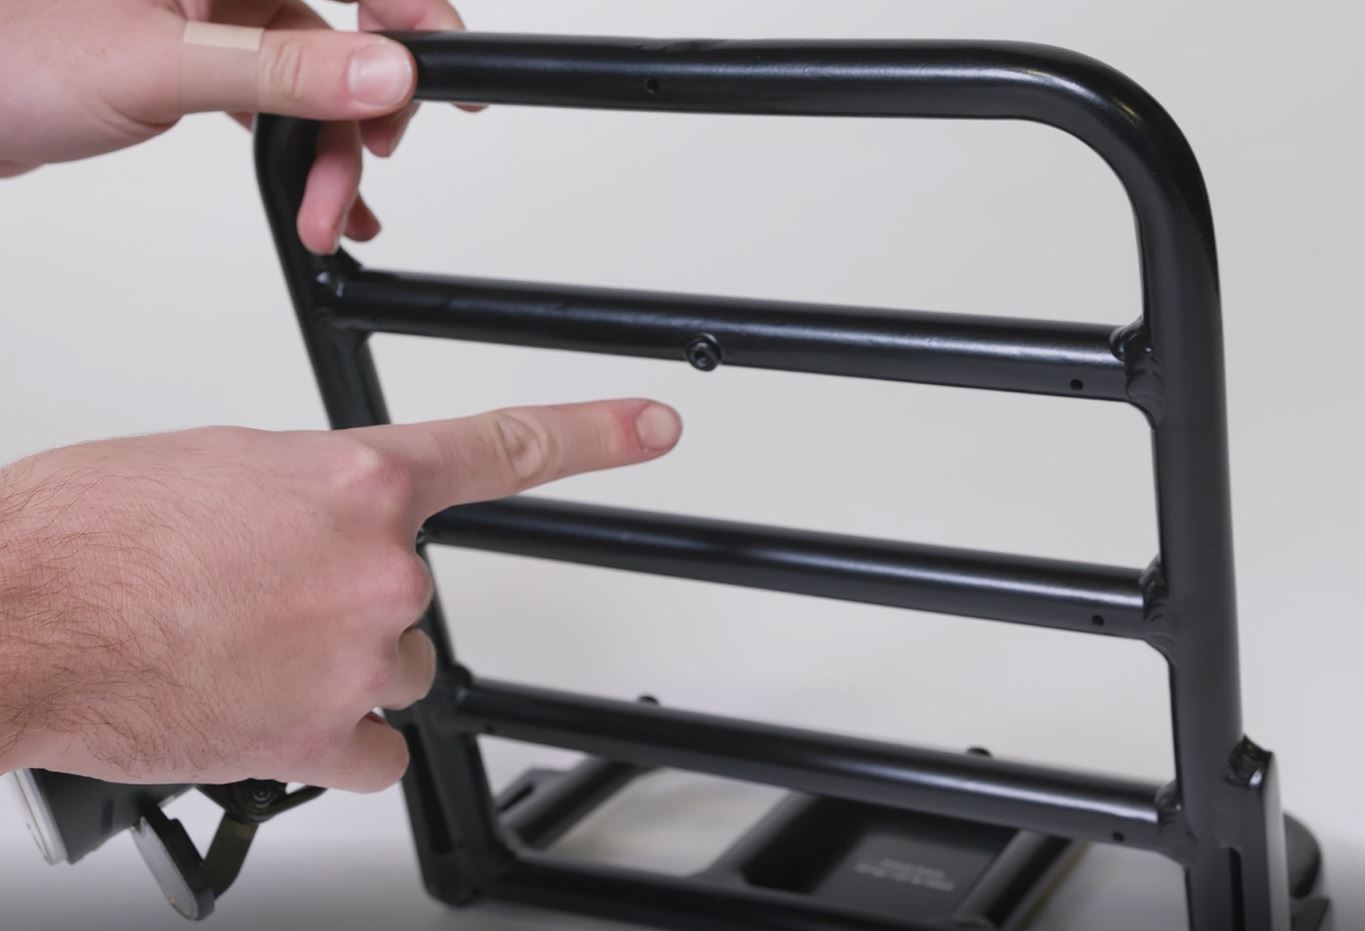
- Orient the headlight mounting bracket as shown in the image below, and place it in position over the mounting point.
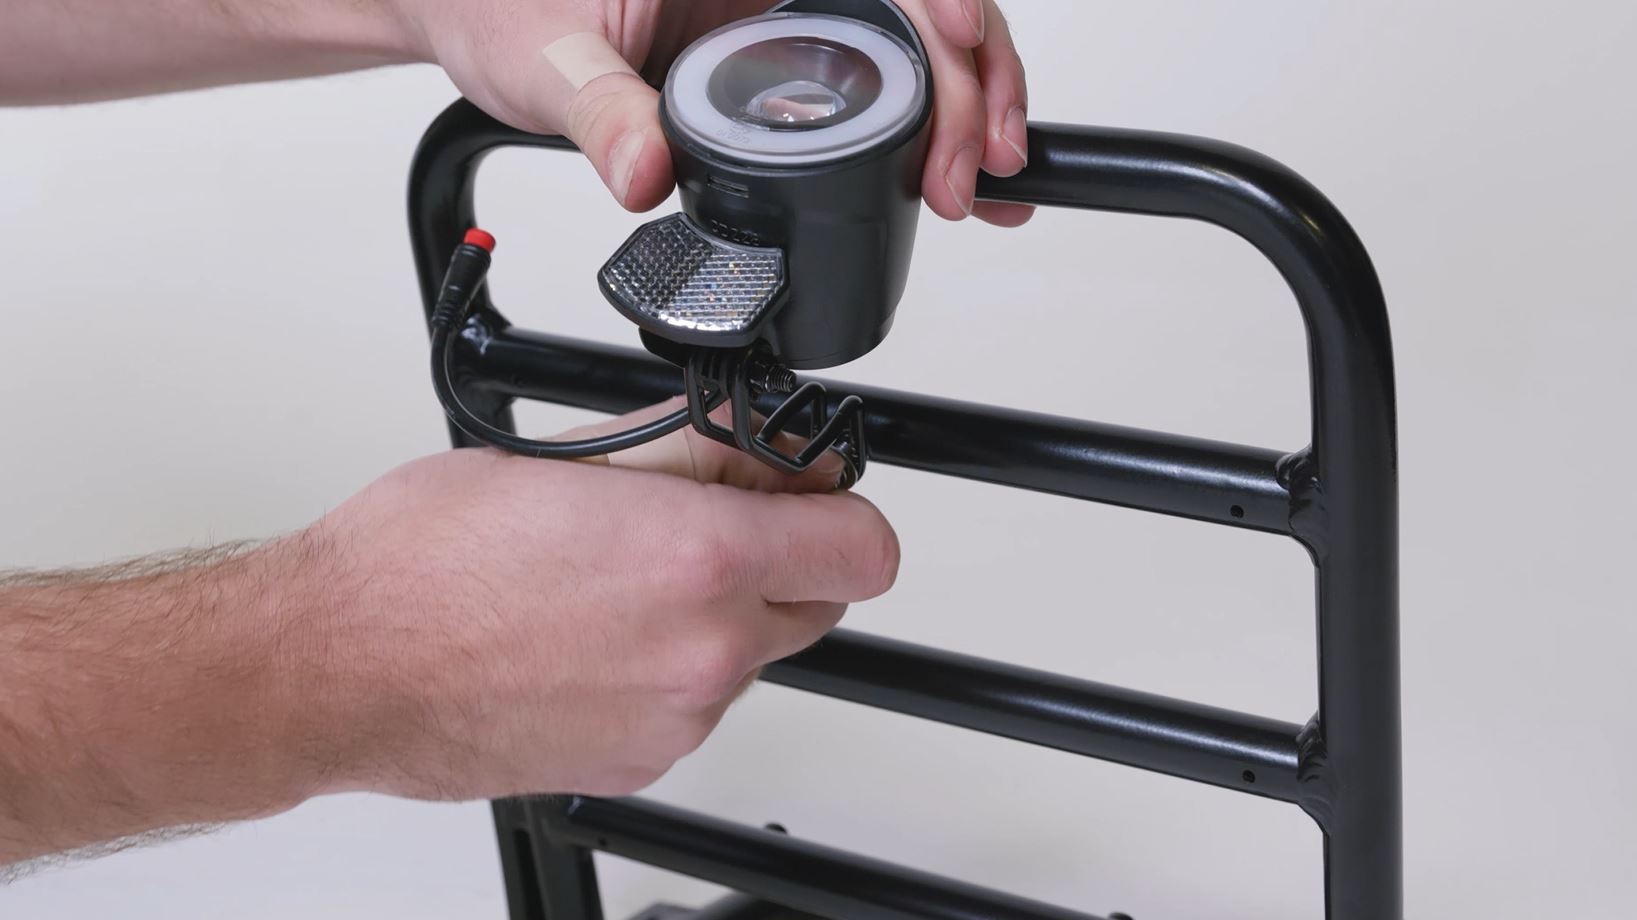
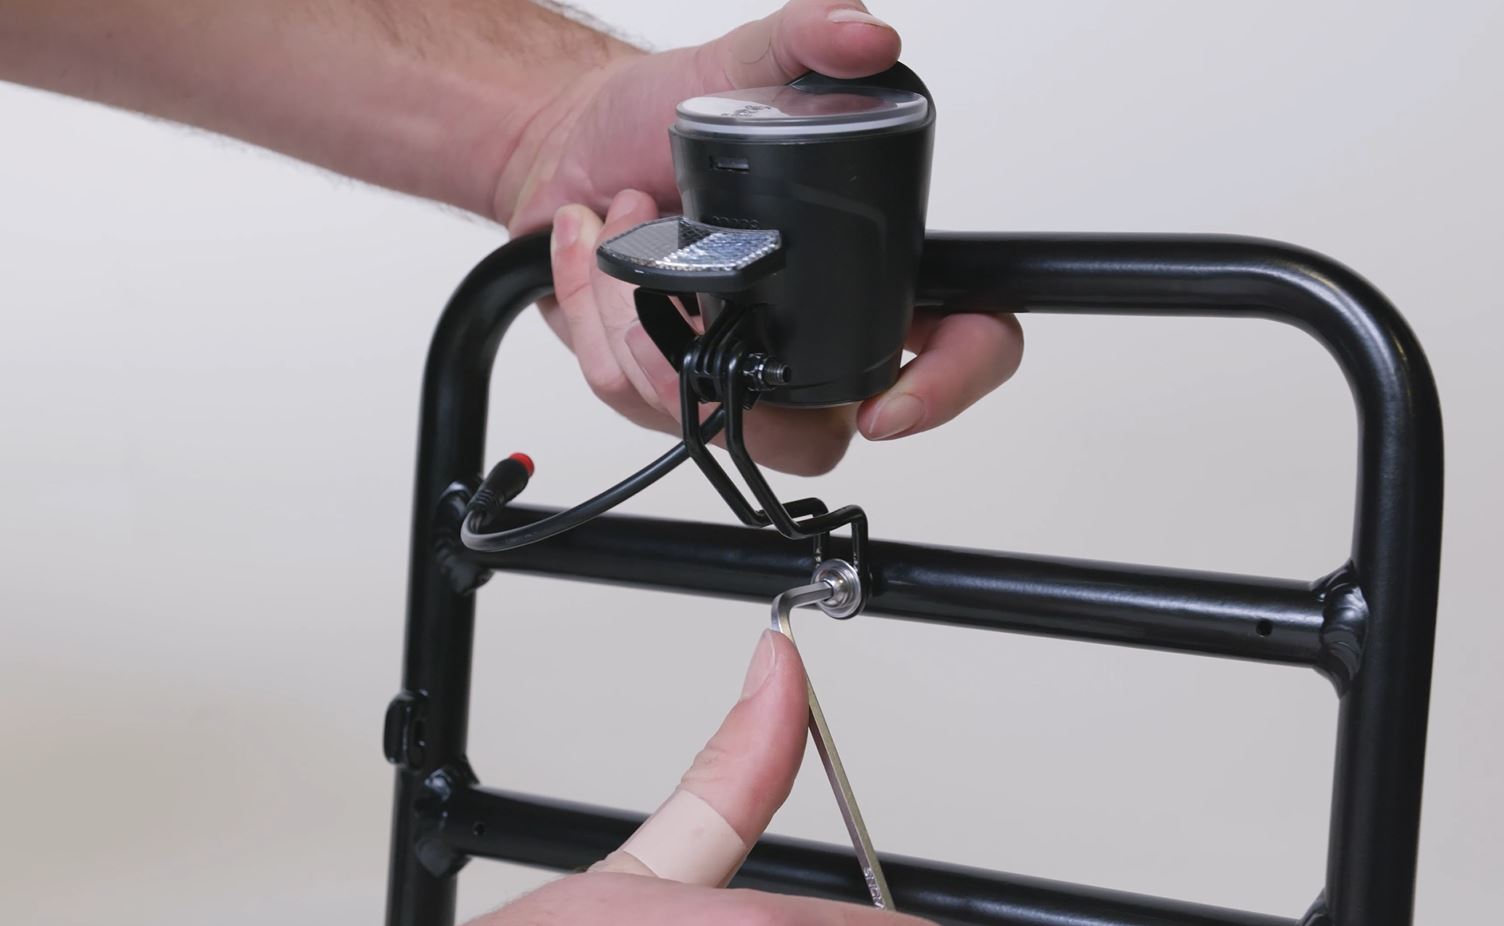
- Install the headlight mounting hardware. Pass the headlight mounting hardware through the headlight mounting bracket and the mounting point on the rack. Use a 4 mm Allen wrench to tighten securely.
The headlight will look like the image below when correctly installed and adjusted on the front rack.
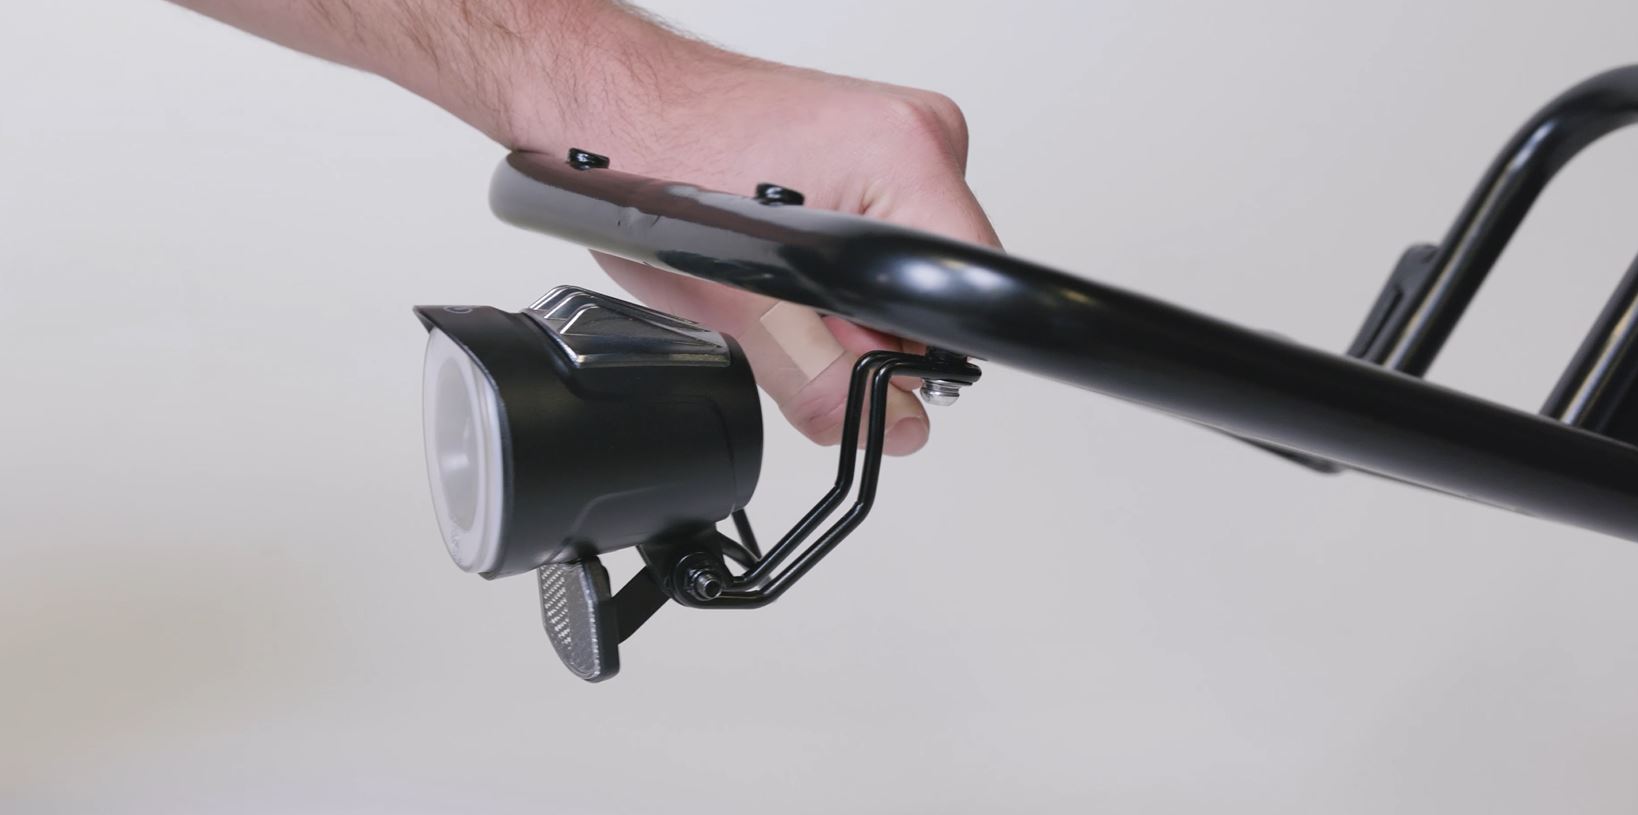
Continue to the next section to install the front rack on the bike.
Install the Front Rack on the Bike
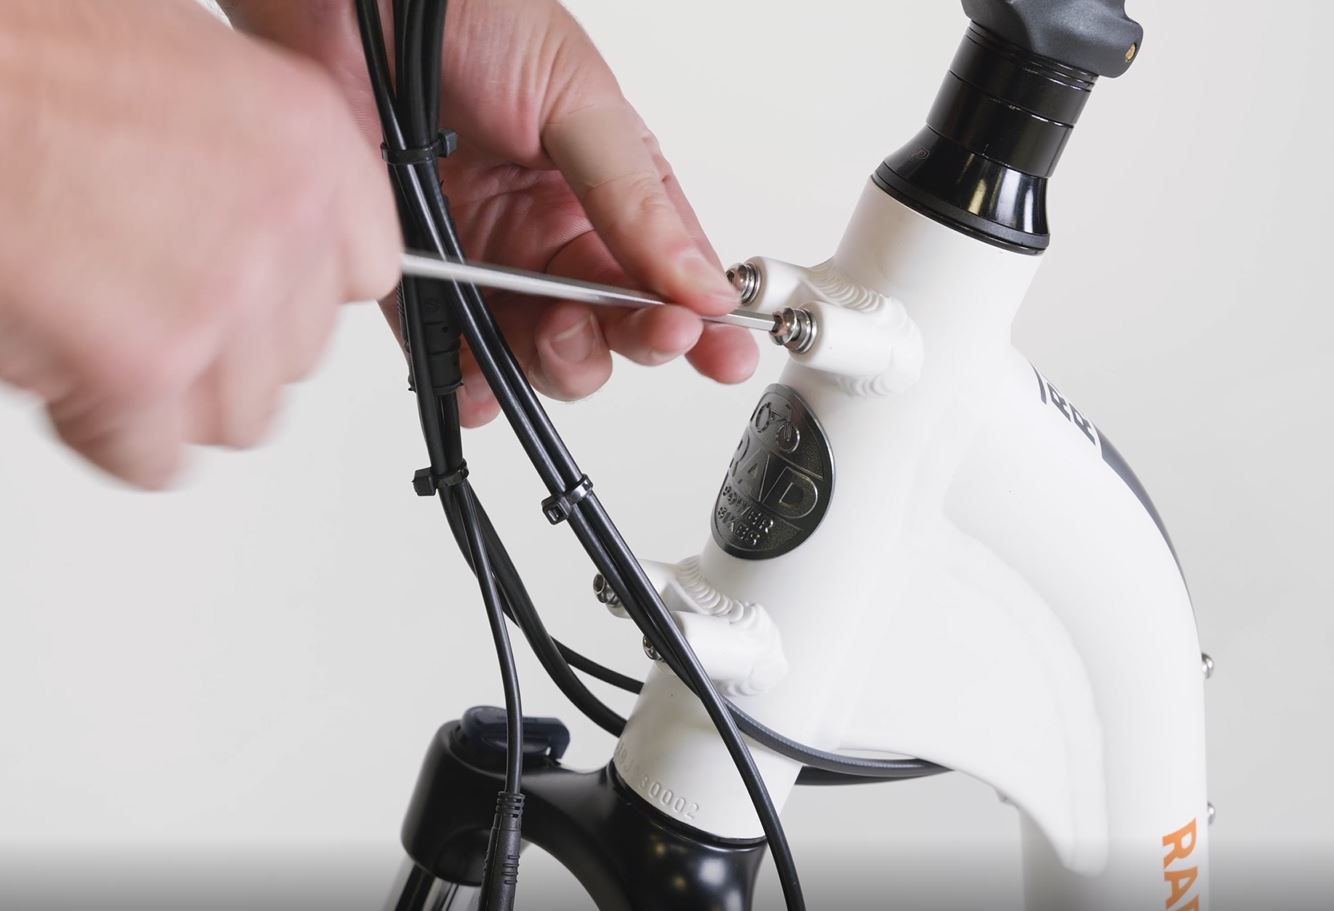
- Remove the hardware from the headtube. Use a 4 mm Allen wrench to remove the bolts and washers from the headtube at the front of the bike. Recycle the hardware according to local rules.
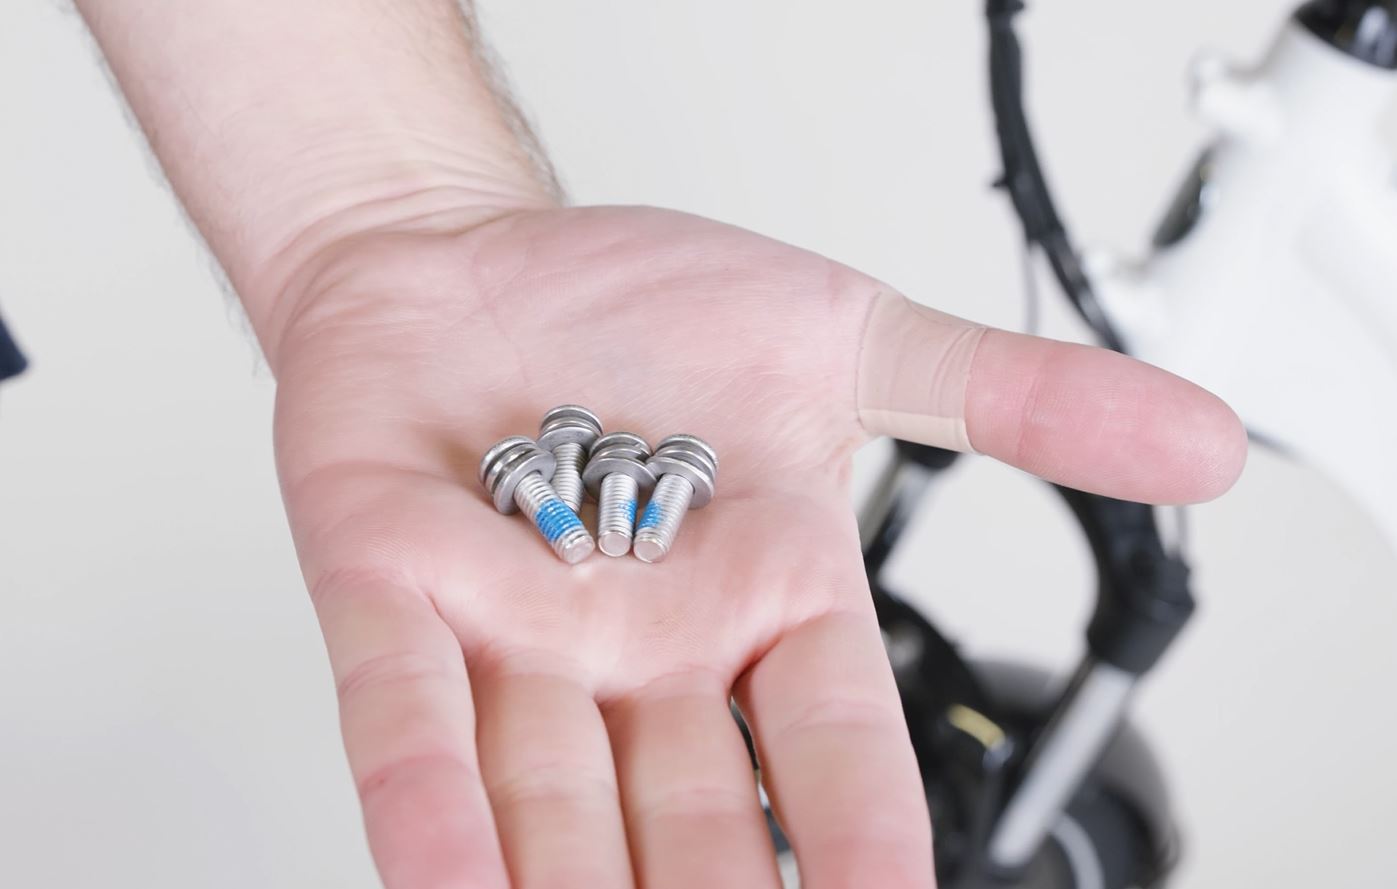
- Locate and prepare the front rack mounting hardware included in the front rack kit. Pass a split washer and then a flat washer over each bolt end and set them aside.
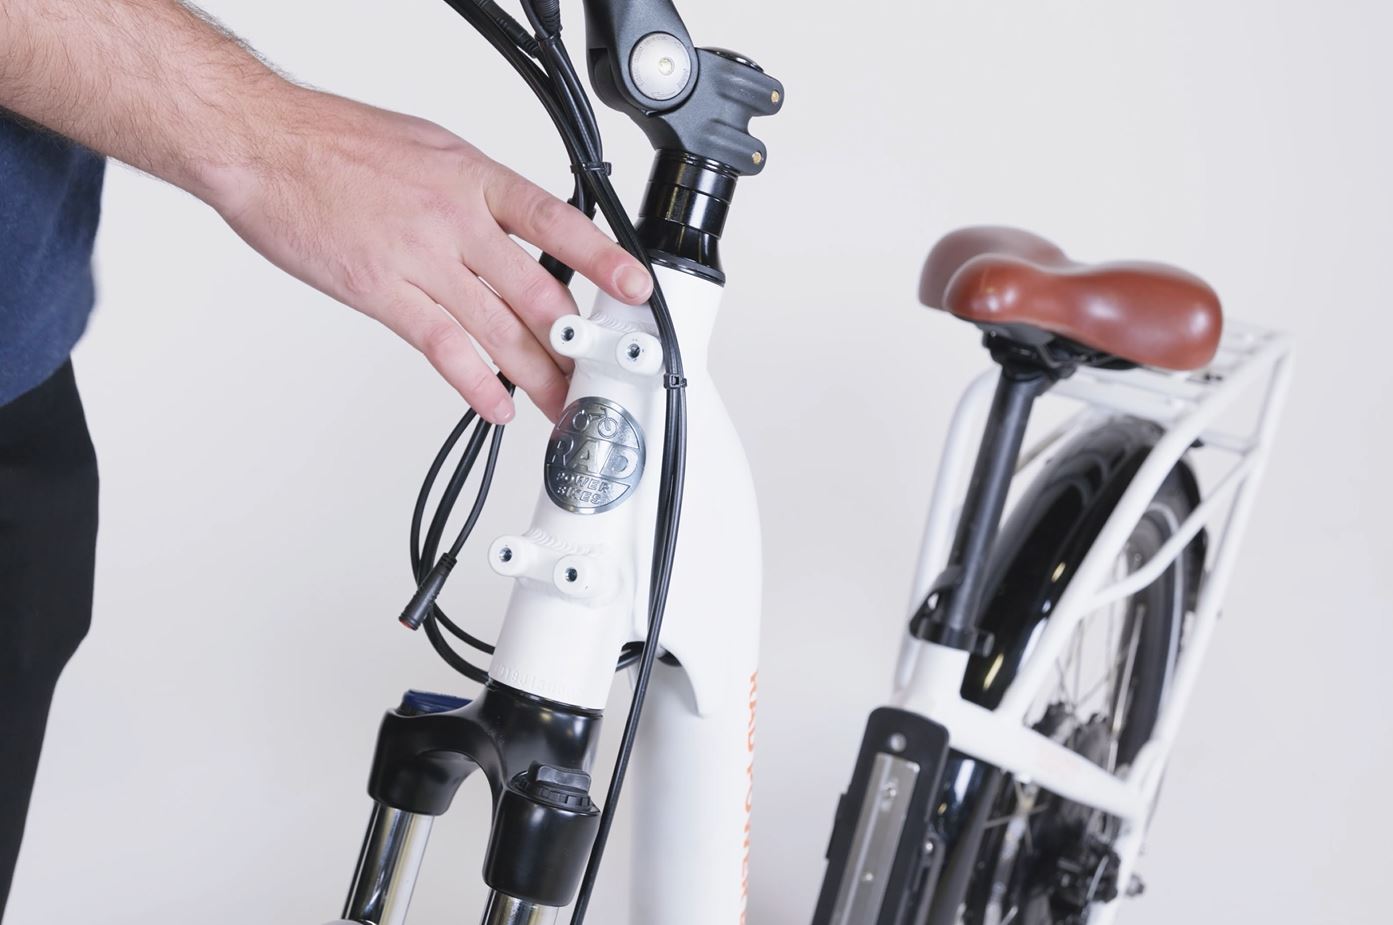
- Separate the cables at the front of the bike to make room for the front rack. Snip zip ties if needed, and make sure the front brake cable is on the rider’s left side and runs behind the fork, as shown below. All other cables should be on the rider’s right side.
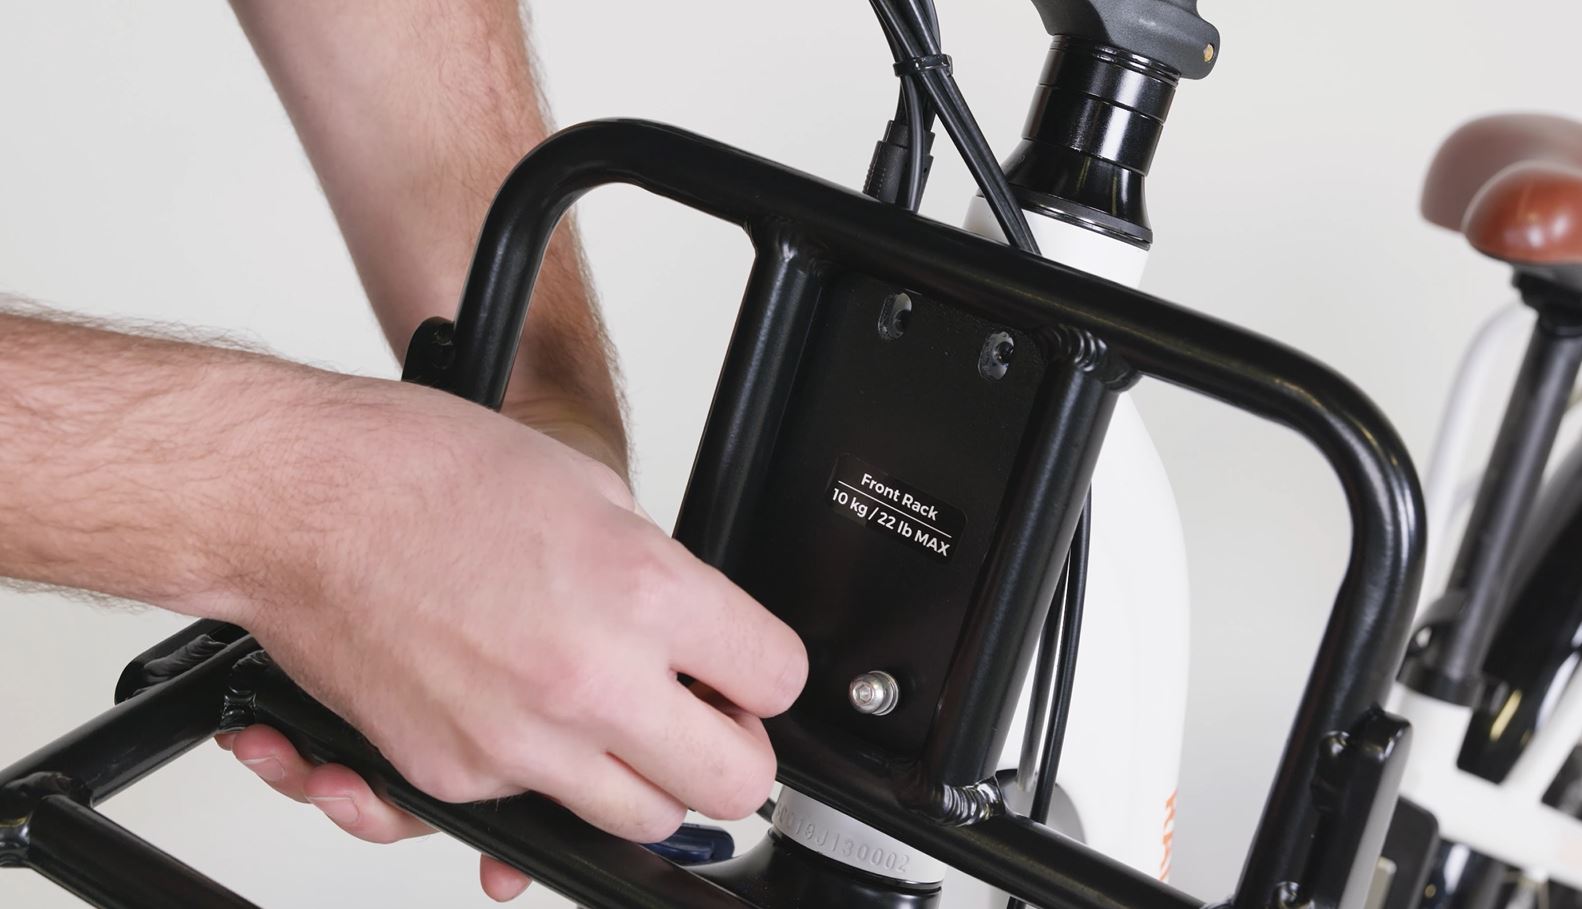
- Place the front rack mounting holes over the headtube mounting points. Be careful not to pinch any cables behind the rack.
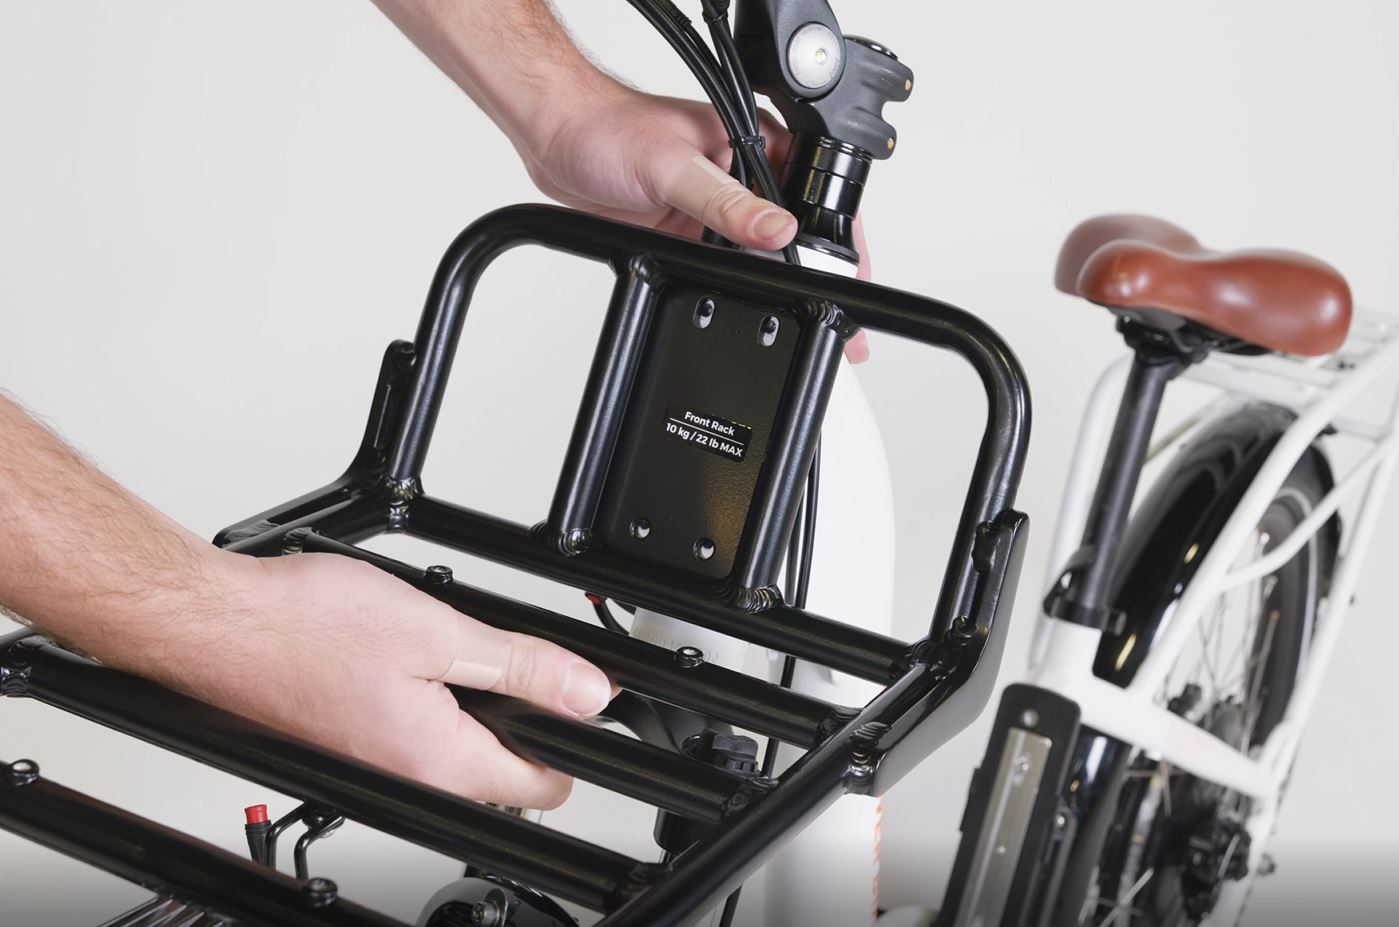
- Install the front rack mounting hardware.
- Thread a bolt through the two bottom mounting points on the front rack and into the headtube by hand, partway. Repeat with the top bolts.
- Turn the handlebar from side to side and make sure no cables are pinched behind the front rack.
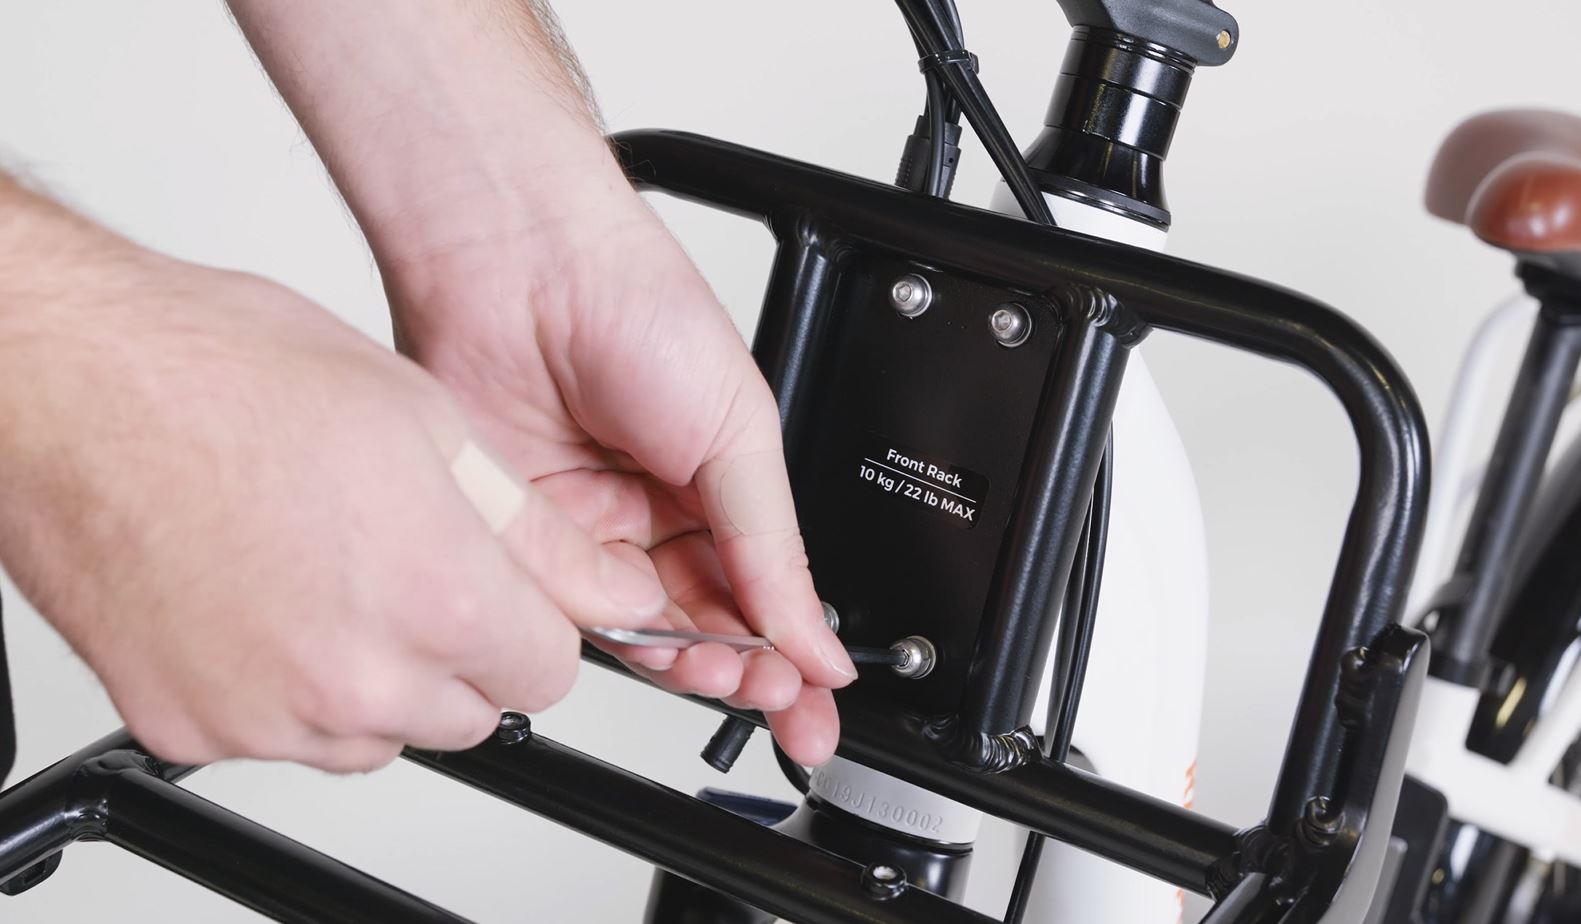
- Use a 4 mm Allen wrench, moving in an "X" pattern, to tighten the 4 bolts evenly. Torque the bolts to 8 Nm.
- Thread a bolt through the two bottom mounting points on the front rack and into the headtube by hand, partway. Repeat with the top bolts.
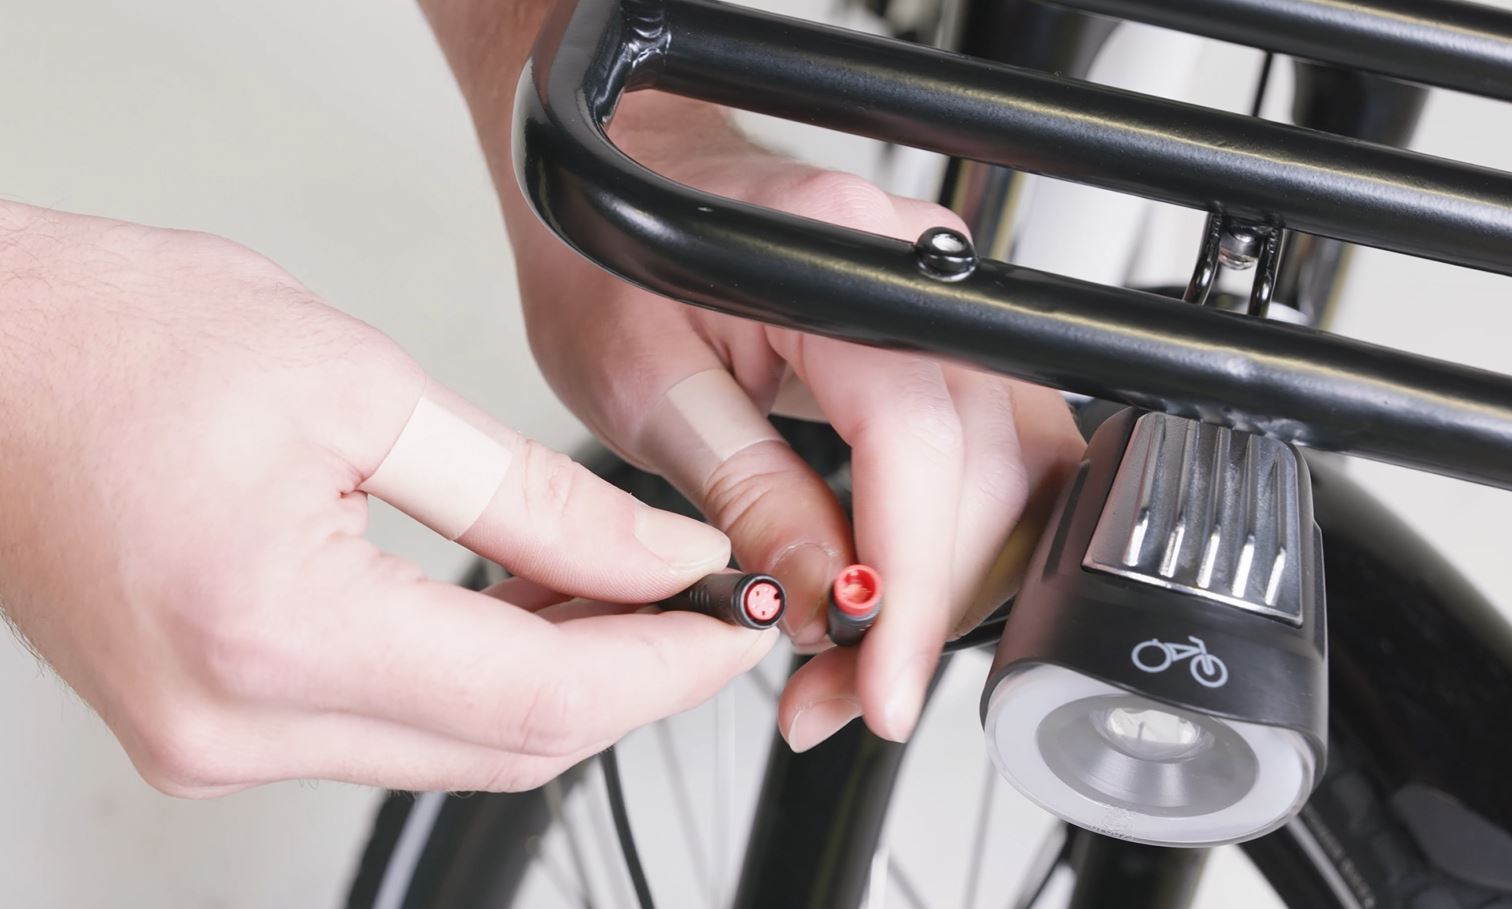
- Plug in the headlight. Locate the headlight extension cable and the compatible connector ends. Line up the internal notch and pins and external markings and press directly together, without twisting, to connect. Repeat with the remaining connector ends.
- Zip tie the cable to the side of the front rack. Adjust the headlight extension cable so any excess is close to the headtube and not underneath the front rack. Secure the cable to the cable guides on the side of the front rack. Trim the zip ties to be flush and smooth.
- Adjust the headlight slightly downward so it does not blind oncoming traffic when illuminated. If needed, use a 3 mm Allen wrench and an 8 mm wrench to loosen the headlight adjustment bolt. Adjust the headlight, then tighten the hardware securely.
- Turn the handlebar to the left and right to make sure the front wheel can turn freely and that there is enough cable slack. This will help the cables settle in place so they don’t catch on the rack or fork crown.
- Secure cables with zip ties and make sure they are out of the way of moving parts. Trim zip tie excess to be flush and smooth.
- Reinstall the battery, test the bike fully before riding, and ride Rad!