Brake Lever Replacement Guide
Follow this guide to replace a brake lever on your bike in the unlikely event it becomes damaged or determined to be non-functional by Rad Power Bikes Product Support.
This guide will show how to replace the right brake lever, which requires the removal of the twist power assist. If you are replacing the left brake lever, you do not need to remove the twist power assist.
You will need:
- Flat head screwdriver
- Isopropyl alcohol
- Paper towel
- Flat side cutters
- 3 mm Allen wrench
- 5 mm Allen wrench
- Torque wrench with 3 mm and 5 mm Allen bits
- A few zip ties
- The replacement brake lever from Rad Power Bikes
Remove the Handlebar Grip
- Get the bike ready for maintenance. Turn off the bike, remove the battery, and press and hold MODE or power to discharge remaining power.
- Remove the handlebar grip.
- Remove the end cap. Use a flat head screwdriver to remove the grip end cap.
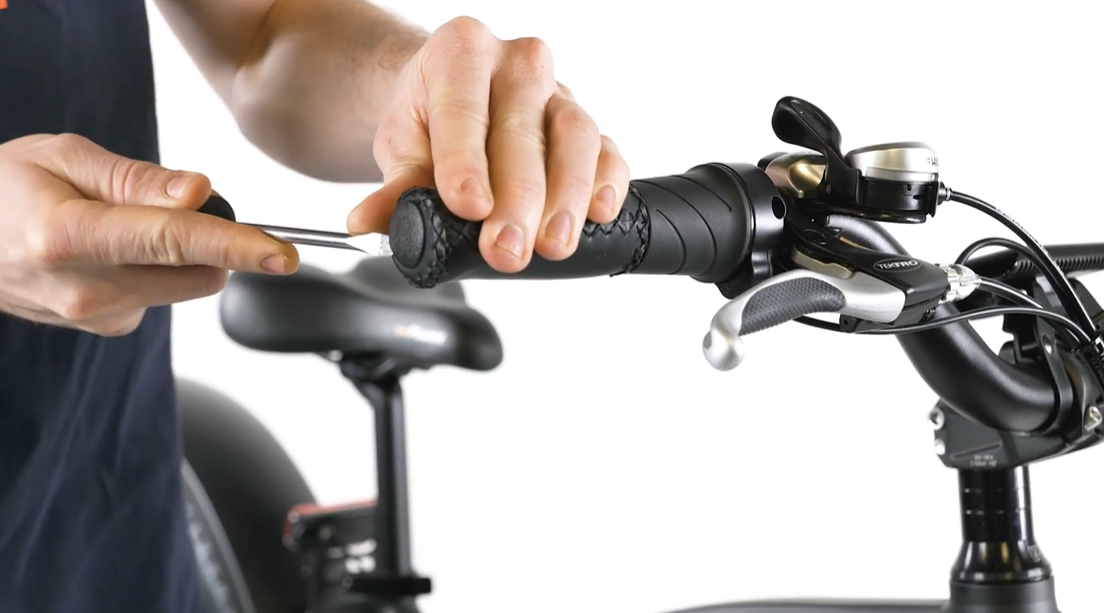
- Remove the grip. Twist and pull the grip off the handlebar end. If needed, apply a small amount of rubbing alcohol in between the grip and the handlebar as temporary lubrication: carefully insert the screwdriver between the handlebar tubing and the grip, pry the grip away from the handlebar slightly, then use a paper towel or squeeze bottle to apply the alcohol in the gap.
- Remove the end cap. Use a flat head screwdriver to remove the grip end cap.
- Remove the twist power assist (if replacing the right brake lever).
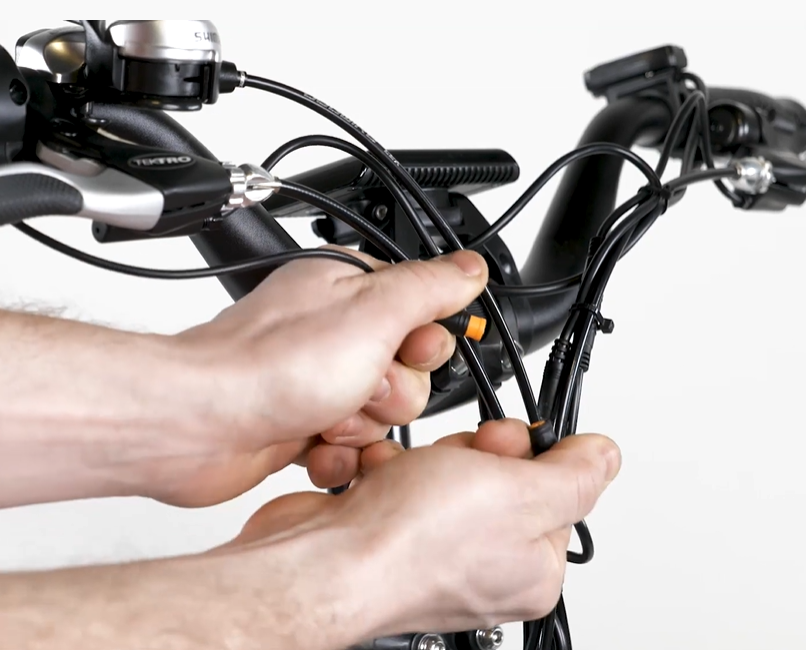
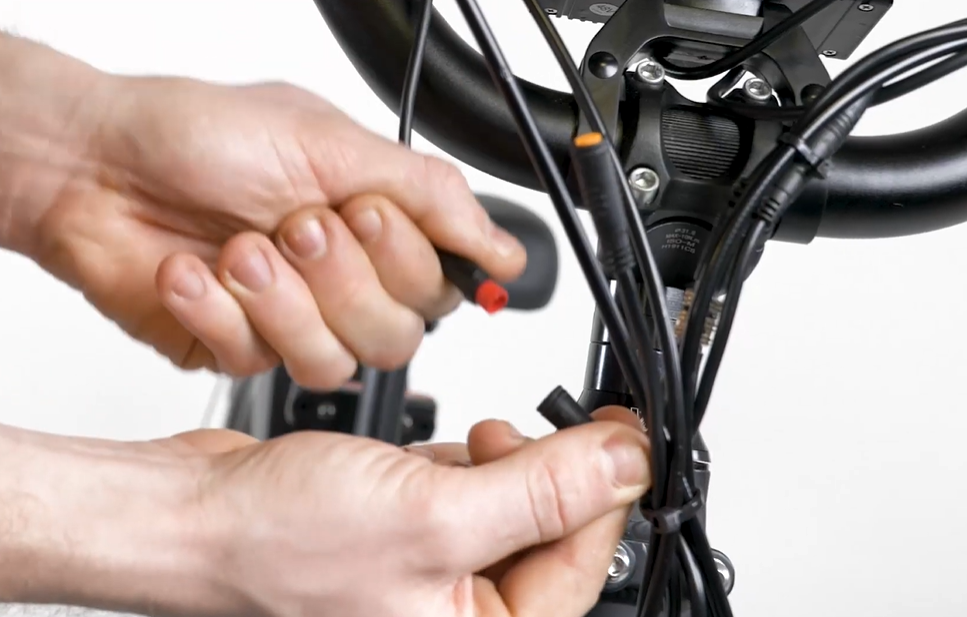
- Unplug the twist power assist connector. Trace the cable from the twist power assist to the connector. Snip the zip tie and pull the connector directly apart, without twisting, to unplug.
- Loosen the twist power assist clamp bolt. Use a 3 mm Allen wrench to loosen the twist power assist clamp bolt.
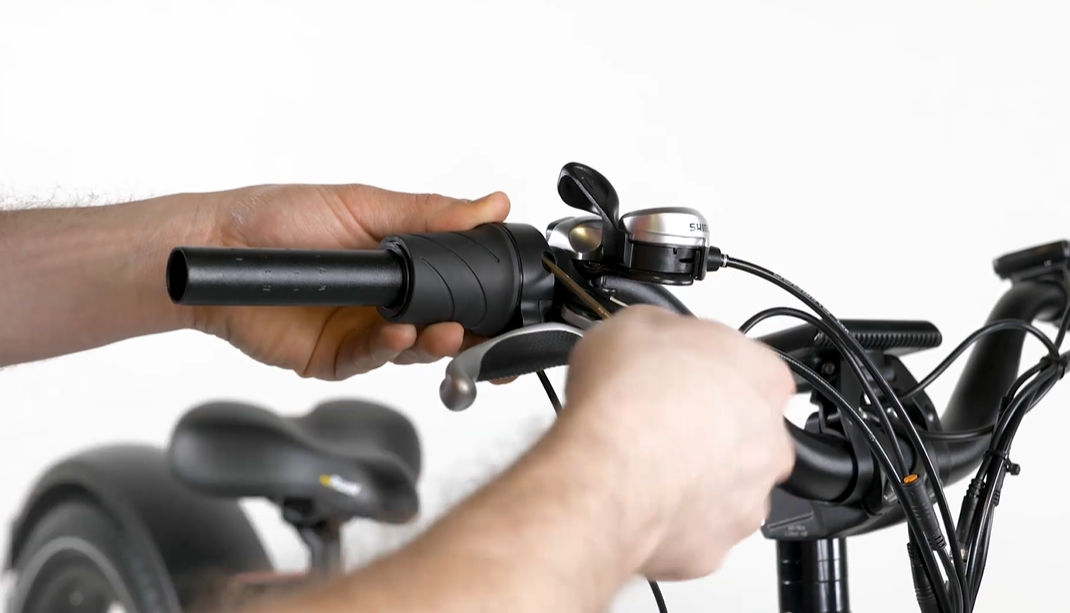
- Remove the spacer and then the twist power assist. Slide the spacer and twist power assist off the handlebar end, making note of the spacer orientation, which is critical for reinstallation.
- Unplug the twist power assist connector. Trace the cable from the twist power assist to the connector. Snip the zip tie and pull the connector directly apart, without twisting, to unplug.
Remove the Old Brake Lever
- Locate the brake caliper and add brake cable slack. The right lever connects to the rear caliper and the left lever connects to the front caliper. Use a 5 mm Allen wrench to loosen (but not remove) the cable pinch bolt one full turn.
- Align the barrel adjuster and lock nut slits at the brake lever. Twist the barrel adjuster and lock nut until the slits line up with the slot on the brake lever housing.
- Remove the brake cable from the lever. Pull the brake cable housing out of the brake lever. Squeeze the brake lever and lift the cable stop up and out of the brake housing.
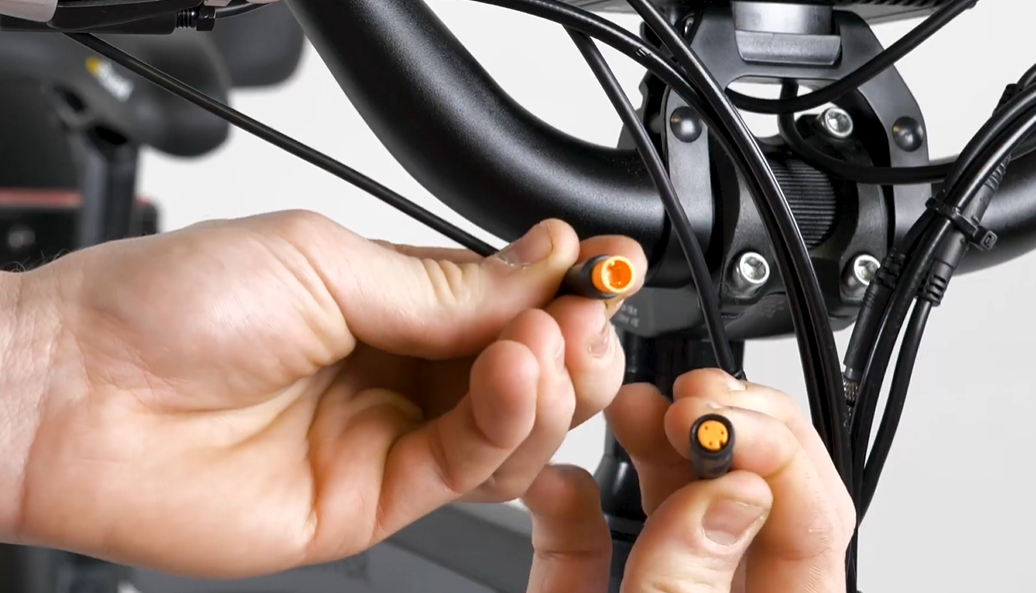
- Unplug the brake connector. Trace the cable from the lever to the connector, then pull directly apart, without twisting, to unplug.
- Remove the old brake lever. Use a 5 mm Allen wrench to loosen the brake lever clamp bolt, then slide the lever off of the handlebar and recycle the part according to local rules.
Install the New Brake Lever
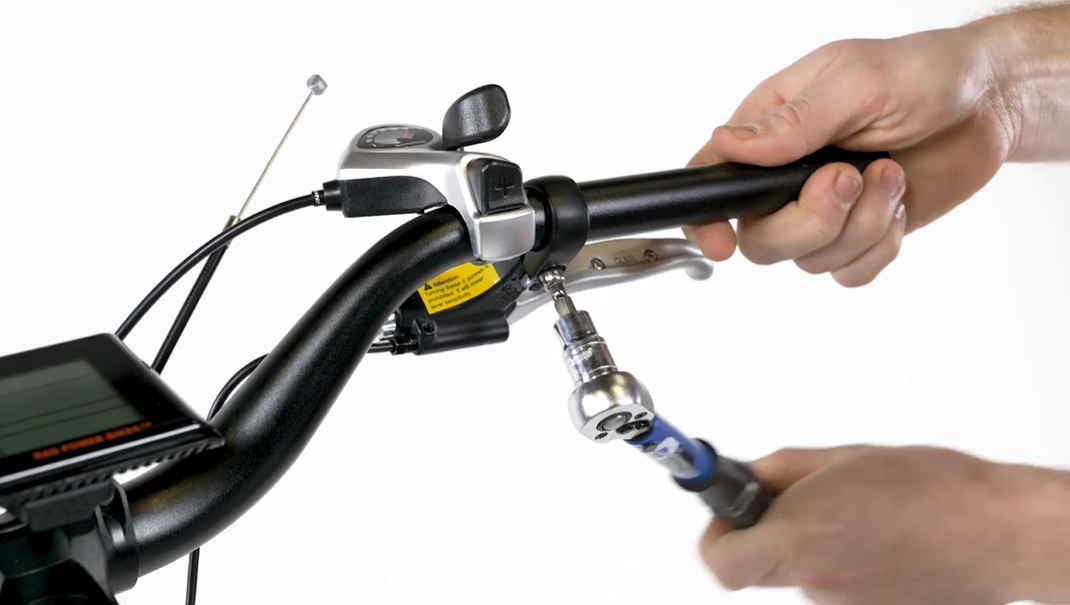
- Install the new brake lever. Slide the new brake lever onto the handlebar end and adjust it to be at the same angle as the other brake lever. Thread in the bolt by hand, then use a 5 mm Allen wrench to tighten the bolt. Torque to 6 Nm.
- Reconnect the brake cable. Line up the internal notches and pins (and external arrows) and press directly together, without twisting, to reconnect.
- Install the brake cable into the new lever.
- Line up the barrel adjuster, lock nut, and lever housing slits.
- Squeeze the brake lever to reveal the mounting point for the cable stop at the end of the lever. Place the cable stop into the mount and pass the cable through the slits at the front of the lever, lock nut, and barrel adjuster.
- Press the brake cable housing end into the barrel adjuster.
- Rotate the barrel adjuster and lock nut to secure the cable. Twist the lock nut away from the barrel adjuster until it is flush against the brake lever housing to secure it in place.
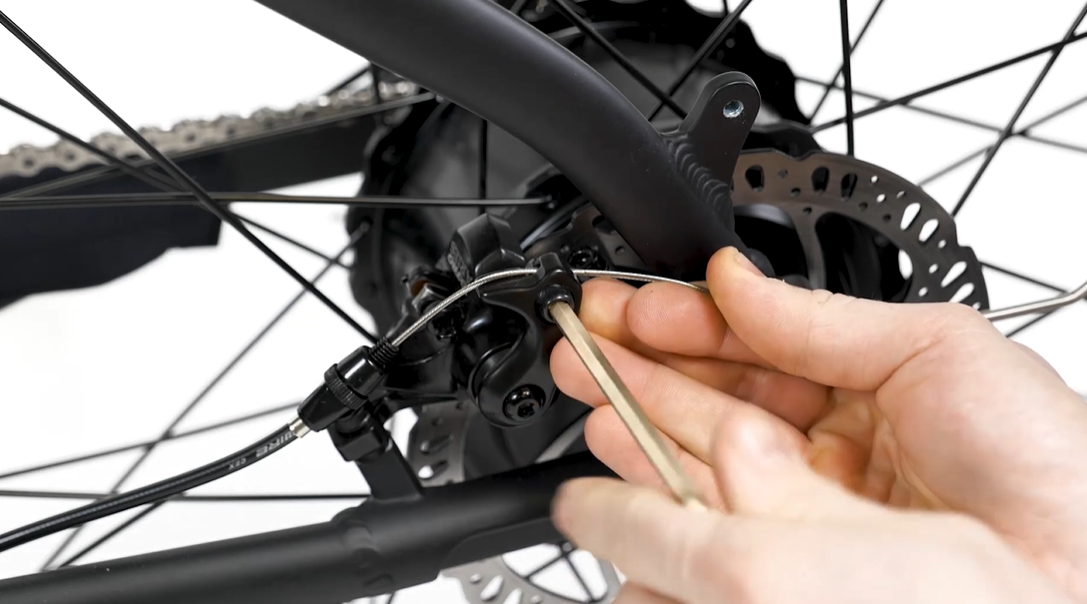
- Add tension to the brake cable. At the brake caliper, pull and hold the brake cable end and use a 5 mm Allen wrench to tighten the cable pinch bolt. Torque to 6 Nm.
- Squeeze the brake lever a few times to fully seat the cable housing and test the brake cable adjustment. The brake lever should cause the brake pads to contact the rotor about halfway between the lever's neutral position and the handlebar grip. If the brake lever is too close to the grip when squeezed, as shown below, use the steps below to add tension to the brake cable and increase the distance between the lever and the handlebar.
- Make minor brake adjustments if the brake lever is too close to the grip.
- Turn the barrel adjuster at the brake lever or brake caliper to add cable tension, then twist the lock nut away from the barrel adjuster to secure it in place.
Brake lever barrel adjuster:
Brake caliper barrel adjuster:
- Test the brake by squeezing the lever to check if the space between the lever and the handlebar has increased.
- Repeat if needed to achieve proper cable tension so that when squeezed, the brake lever causes the brake pads to contact the rotor about halfway between the lever's neutral position and the handlebar grip.
- Turn the barrel adjuster at the brake lever or brake caliper to add cable tension, then twist the lock nut away from the barrel adjuster to secure it in place.
- Make larger brake adjustments if the brake lever is still too close to the grip. If adding tension in small increments with the barrel adjusters doesn't provide enough cable tension to get proper brake lever feel, adjust the tension with an Allen wrench at the brake caliper.
- First, back in the barrel adjusters at the brake lever and the brake caliper.
Note: This will immediately loosen the cable tension, but once you have adjusted the cable tension described in the step below, it will allow you to add tension to the cable with the barrel adjusters (and without tools) as the cables stretch with future use. - Use a 5 mm Allen wrench to loosen (but not remove) the cable pinch bolt at the caliper. Pull the cable tight, slide the caliper arm slightly away from the cable end, and tighten the bolt.
- Test the brake, repeat if needed, and torque the bolt to 6 Nm.
- First, back in the barrel adjusters at the brake lever and the brake caliper.
- Reinstall the twist power assist if it was removed.
- Slide the twist power assist and then the spacer onto the handlebar. The spacer must be properly installed between the twist power assist and the handlebar grip for the bike to operate safely. Use a 3 mm Allen wrench to tighten the twist power assist clamp bolt. Torque to 3 Nm.
- Plug in the twist power assist connector. Line up the internal notches and pins (and external arrows) and press directly together, without twisting, to connect.
- Slide the twist power assist and then the spacer onto the handlebar. The spacer must be properly installed between the twist power assist and the handlebar grip for the bike to operate safely. Use a 3 mm Allen wrench to tighten the twist power assist clamp bolt. Torque to 3 Nm.
- Reinstall the handlebar grip. Orient the grip so the narrower end points toward the center of the bike. Apply a small amount of isopropyl alcohol to the handlebar. Twist the grip into place and reinstall the end cap. Once the alcohol dries, the grip should not move easily.
- Replace snipped zip ties. Secure the cables with zip ties and trim them to be flush and smooth.
- Reinstall the battery and test the bike fully before riding.
If you are not confident in your ability to safely and successfully perform all steps, we recommend having the work performed or checked by a local, certified, and reputable bike mechanic.