RadRunner LCD Display Upgrade Installation Guide
The RadRunner is equipped with an LED display and is compatible with an LCD display upgrade.
Watch the video below and follow the instructions to learn how to install the LCD display upgrade on the RadRunner.
Tools Needed
- 3 mm Allen wrench
- Flat side cutters
- A few zip ties
- The LCD display
Uninstall the LED Display
- Prepare the bike for maintenance. Press and hold the power button on the display until the bike turns off, remove the battery, then press and hold power again to discharge remaining power.

- Locate the display connector. Remove the cable cover at the front of the bike and trace the cable coming out of the display to the silver metal connector.
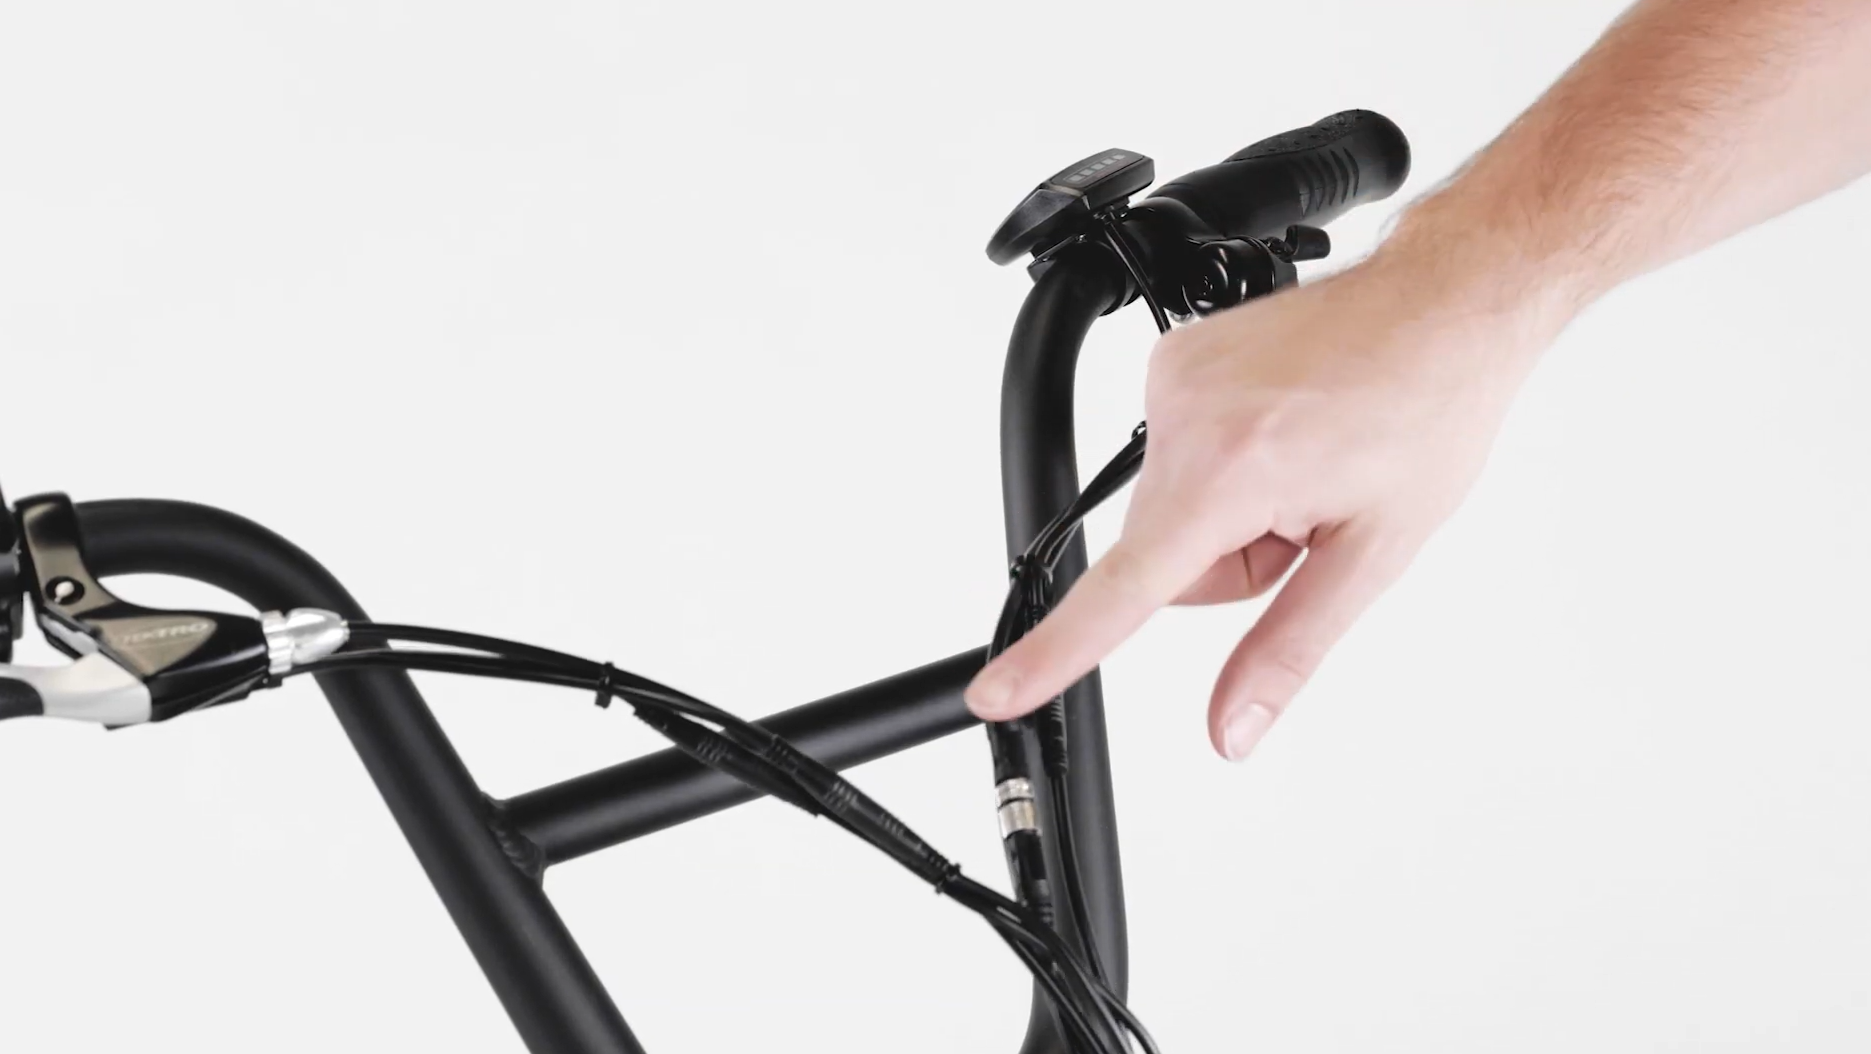
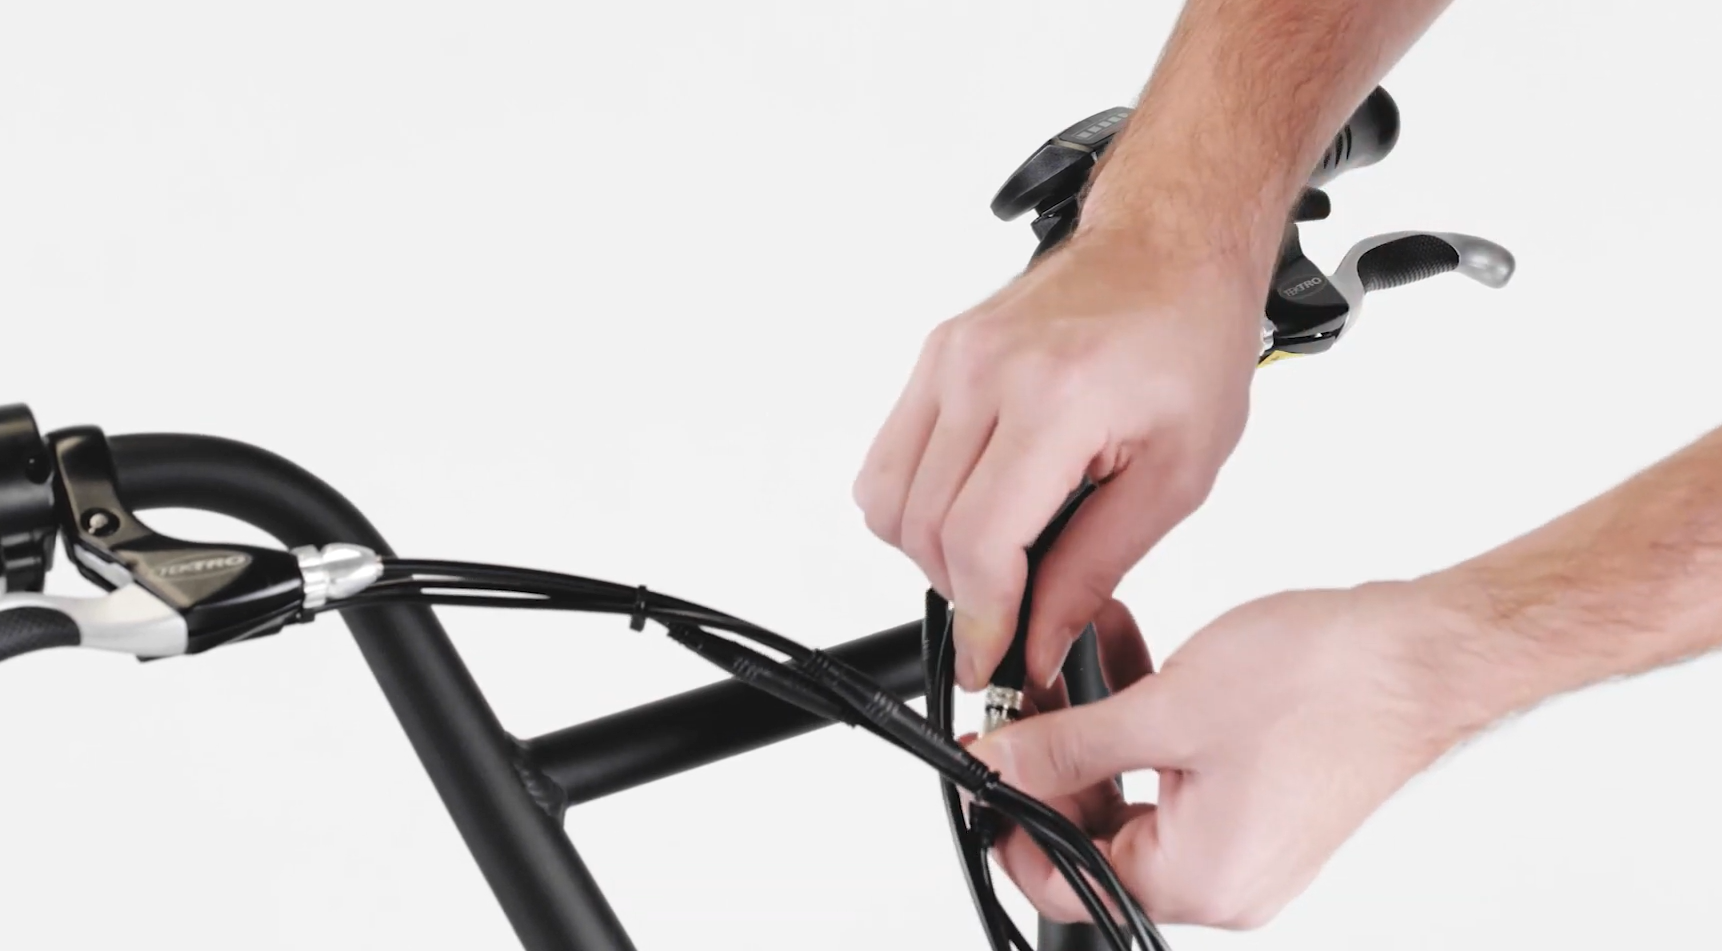
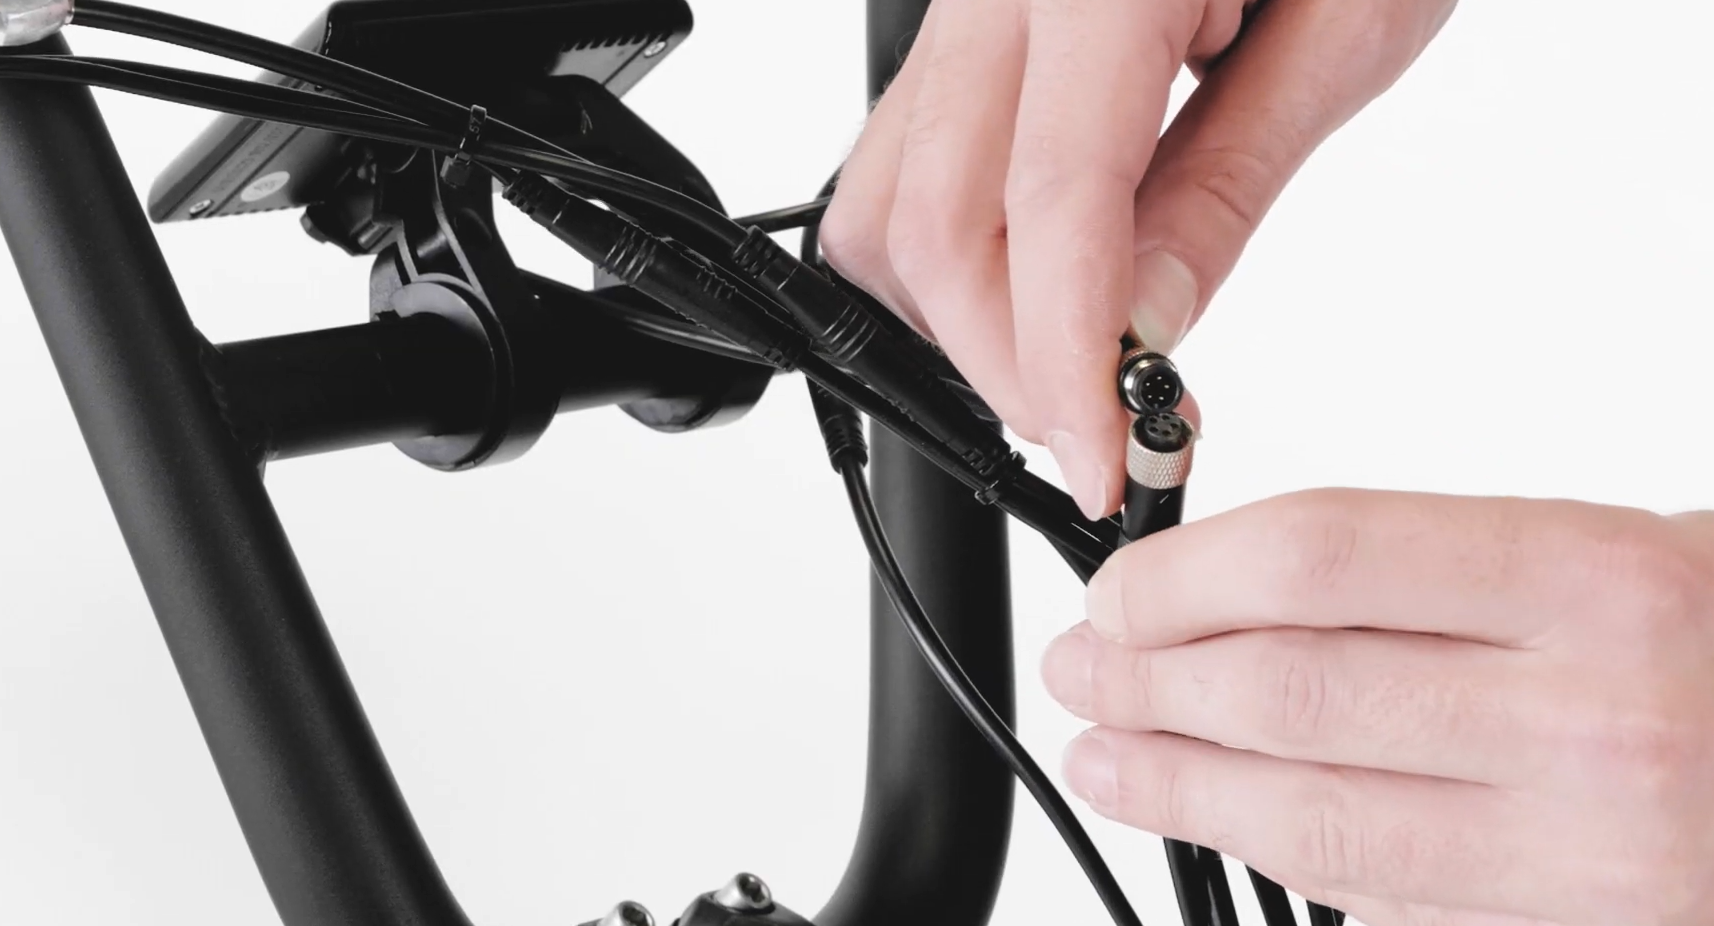
- Unplug the display connector. If needed, snip the zip ties along the display cable. Unscrew the metal part of the connector until the threaded portion releases, then pull directly apart, without twisting, to unplug.
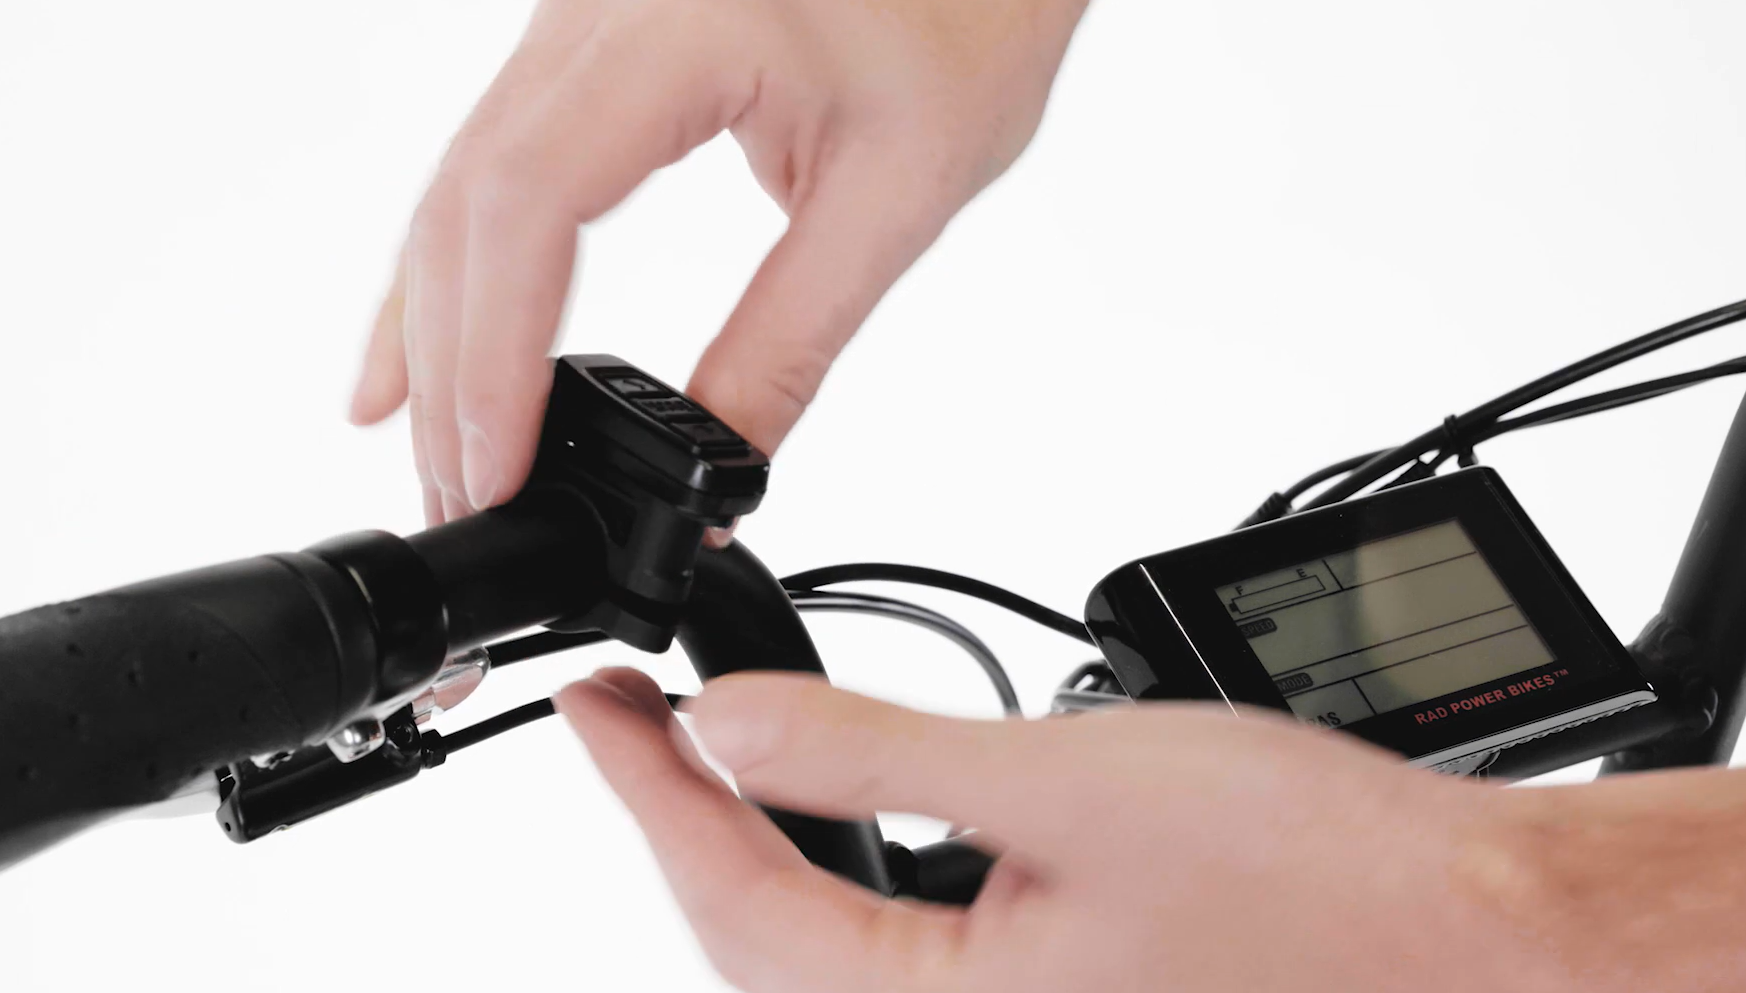
- Remove the display from the handlebar. Use a 3 mm Allen wrench to remove the display clamp bolt, then carefully remove the display from the handlebar.
Tip: Keep the LED display in case you want to reinstall it later, or recycle the display according to local rules.
Proceed to the next section for LCD display installation instructions.
Install the LCD Display
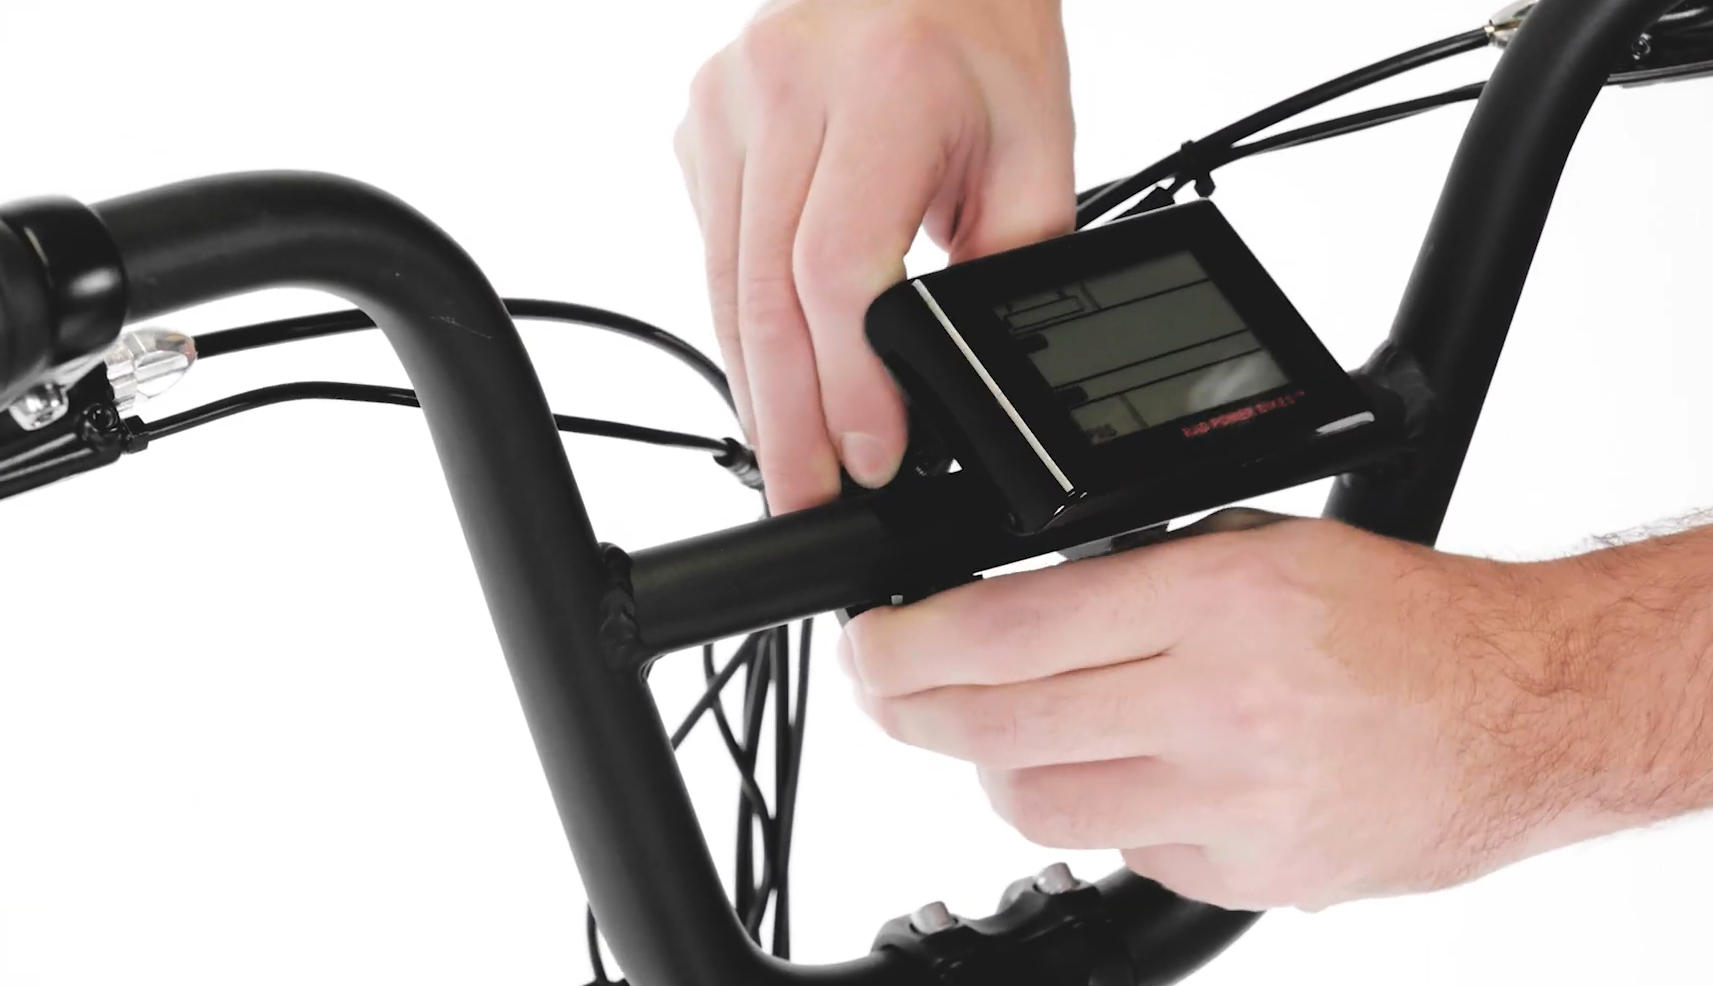
- Install the new LCD display. Carefully pass the LCD display clamps (and spacers) over the crossbar. Orient the display so it's easily visible to the rider and thread in the bolts by hand. Use a 3 mm Allen wrench to tighten securely.
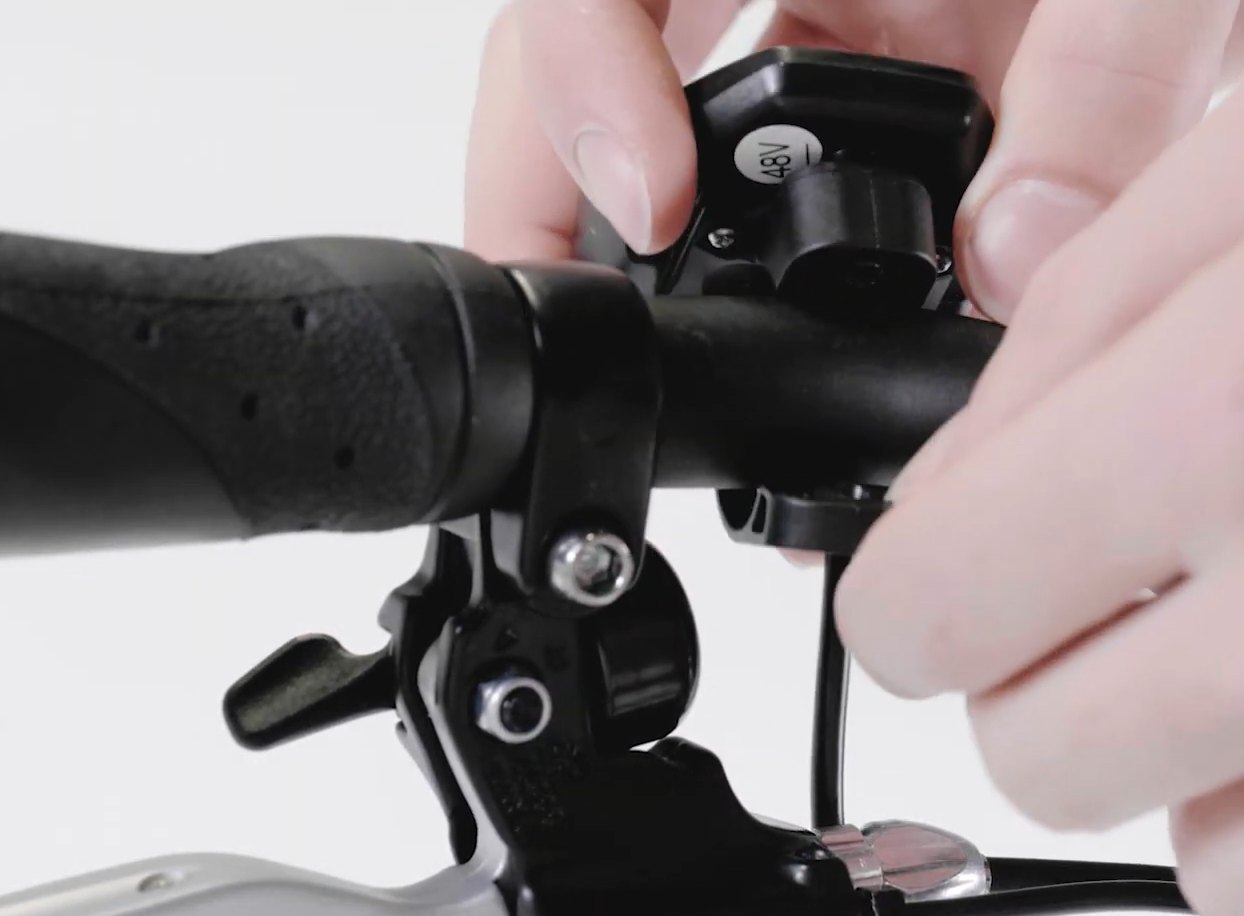
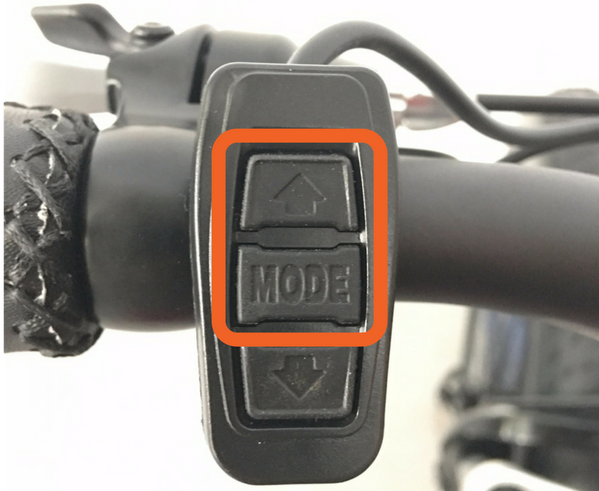
- Install the LCD display remote. Carefully pass the clamp of the LCD display remote over the left side of the handlebar. Orient the remote so the buttons are easy to press by the rider, and thread in the bolt by hand. Use a 3 mm Allen wrench to tighten securely.
- Plug in the display connector. Align the internal notch and pins and press together, without twisting, then twist the metal portion together until the connector is secure.
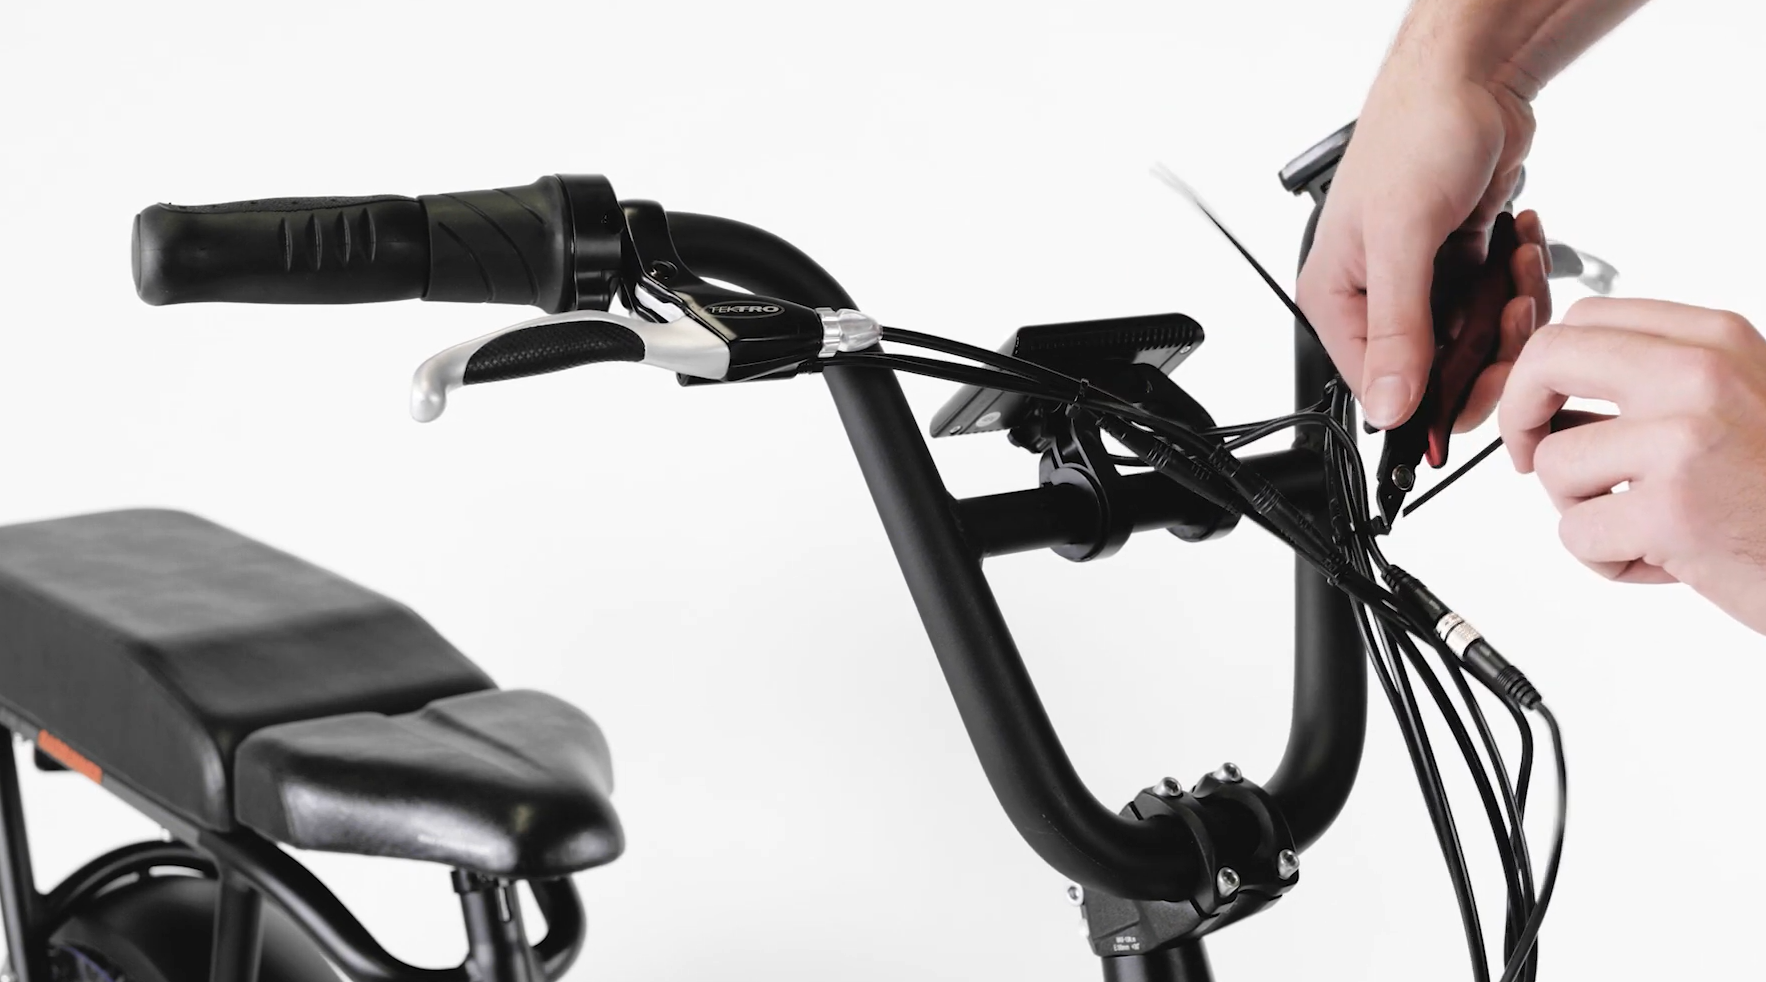
- Secure the cables. Replace zip ties and trim them to be flush and smooth. Reinstall the cable cover at the front of the bike.
- Reinstall the battery and test the bike fully before riding.
Continue to the next sections to learn how to set up and use the LCD Display and remote, or watch our LCD Display Features video HERE.
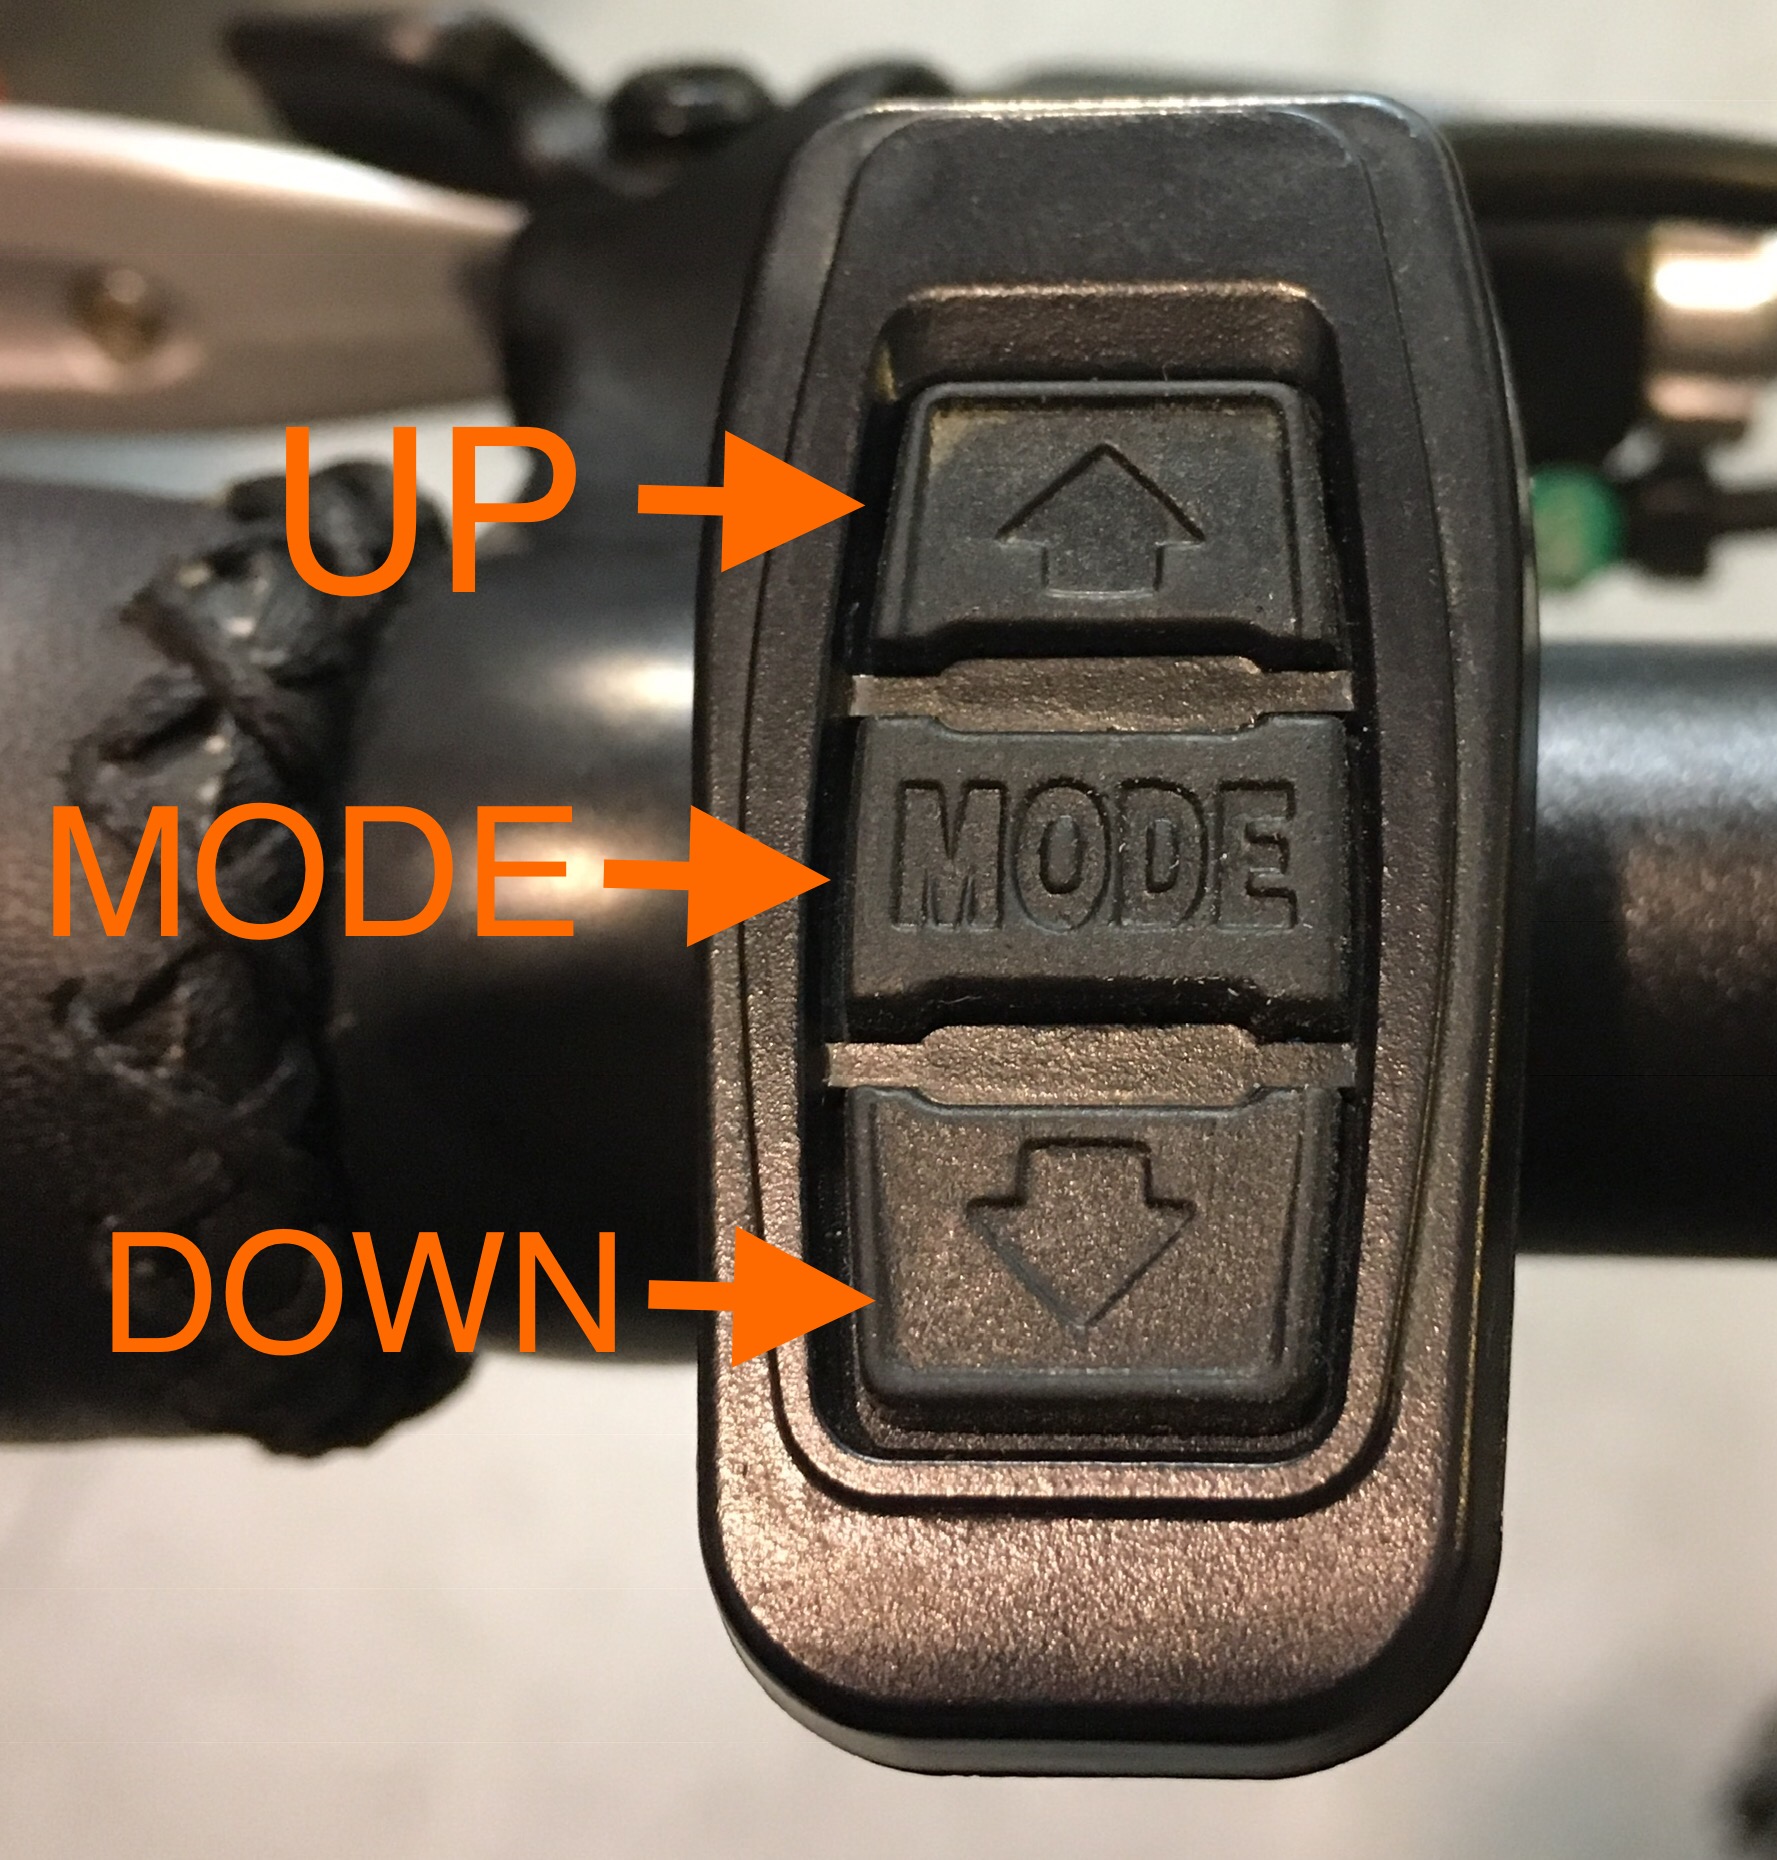
Use the LCD Display and Remote
LCD Display Features
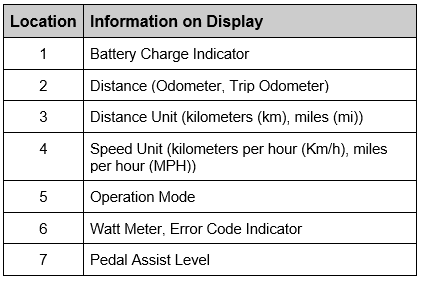
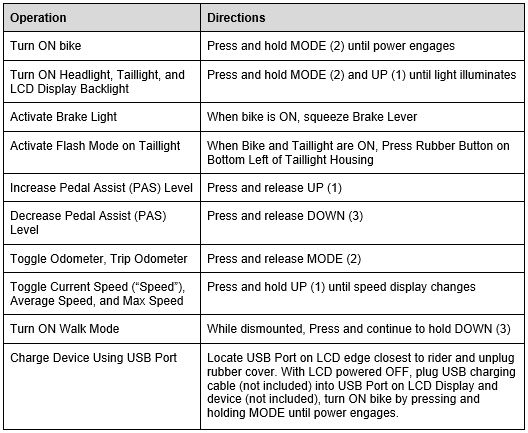
Take a look at the table below for what you can expect to see on your LCD display once it is turned on.

Turn the Bike ON or OFF
To turn ON the bike: Turn on the battery. On the display remote, press and hold the MODE button for about 2 seconds until the LCD display turns on.
To turn OFF the bike: Press and hold the MODE button on the display remote for about 2 seconds until the LCD display turns off. Turn off the battery.
Always check that the battery is securely locked to the battery mounting tray before riding.
Turn ON the Headlight, Taillight, and LCD Display Backlight
Models released in 2019 and after are equipped with an integrated taillight that is activated when the bike is turned on and a brake lever is squeezed. Use the headlight and taillight when riding with limited visibility.
- Angle your headlight slightly downward. The headlight should light up the ground and not blind oncoming traffic.
- Turn ON the bike. Press and hold MODE to turn on the bike.
- Push the UP arrow and MODE button at the same time. This will activate the front headlight, the taillight (when a brake lever is squeezed), and the LCD display backlight.
- Squeeze a brake lever to test the taillight. Always test the taillight before riding in limited visibility conditions.
Turn ON Flash Mode
Flash Mode allows the taillight to flash with or without the headlight being turned on.
- Turn ON the bike. Press and hold MODE to turn on the bike.
- Press the Flash Mode button on the taillight. Press the rubber button on the left underside of the taillight.
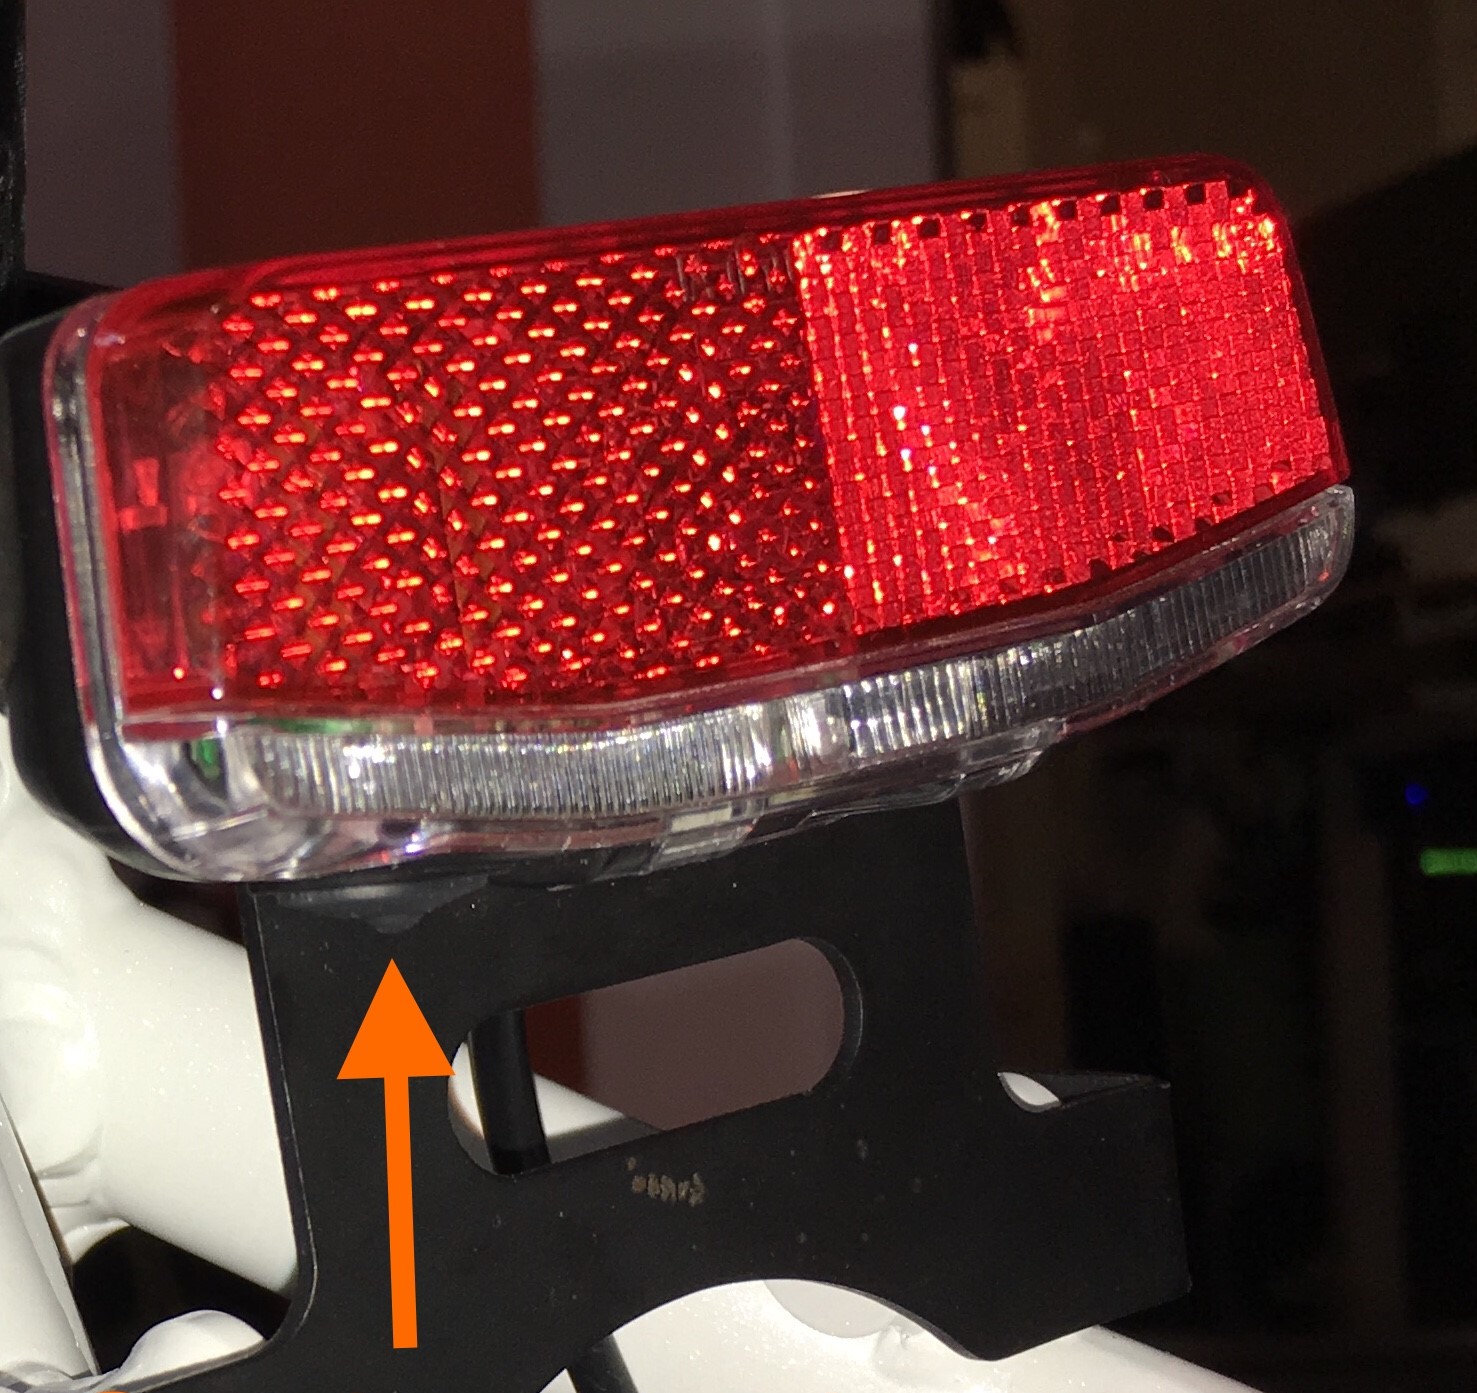
- Squeeze a brake lever to test the taillight. When a brake lever is squeezed, the taillight will illuminate a brighter, solid brake light. Always test the taillight before riding in limited visibility conditions.
If enabled while the headlight is powered on, Flash Mode will continue if the headlight is turned off. When the bike is turned off and back on again, Flash Mode will need to be enabled again by pressing the Flash Mode button on the taillight.
Riding a bicycle at night is much more dangerous than riding during the day. Ride at night only when necessary. If you choose to ride in poor visibility conditions, first check to ensure you comply with all local laws regarding night riding. Check reflectors/lighting equipment and their mounting hardware before each ride to make sure they are clean, installed properly, functional, visible, and secure. Wear reflective and light-colored clothing, slow down, and use familiar roads with street lighting when possible while riding at night.
Control the Bike with the Remote and LCD Display
Check out the table below to see how you can view different information on your display with the touch of a button!
Click HERE to learn more about walk mode.
Walk mode should only be used while dismounted from the bike and with both hands on the handlebar. Always keep at least one hand on a brake lever to allow quick cutoff of the motor assistance if necessary and to maintain control of the bike.
Charge a Device with USB Charging
The LCD display has a built-in USB charging port, so you can charge while you ride!
To charge:
- Turn OFF the LCD display. Press and hold MODE until the display turns off.
- Connect the device to the charging port using a USB cable. Plug a USB cable into the charging port on the display, then plug the other end into your device.
- Turn ON the LCD display. Press and hold MODE until the display turns on.
For more information about the LCD display upgrade, check out our How Well Do You Know Your LCD Display? post on The Scenic Route.
If you are not confident in your ability to safely and successfully perform all steps, we recommend having the work performed by a local, certified, and reputable bike mechanic.