RadMission Chain Tensioner Replacement Guide
The RadMission chain tensioner can be replaced if instructed to do so by Rad Power Bikes Product Support. Follow the instructions below to replace the chain tensioner.
If you are not confident in your ability to successfully and safely perform all steps, we recommend having the work performed or checked by a local, certified, and reputable bike mechanic.
Tools Needed:
- 2.5 mm Allen wrench
- 4 mm Allen wrench
- Digital camera
- Paper towel or shop towel
- Wood blocks to protect the display when the bike is flipped over
- Nitrile gloves (optional)
- The replacement chain tensioner from Rad Power Bikes
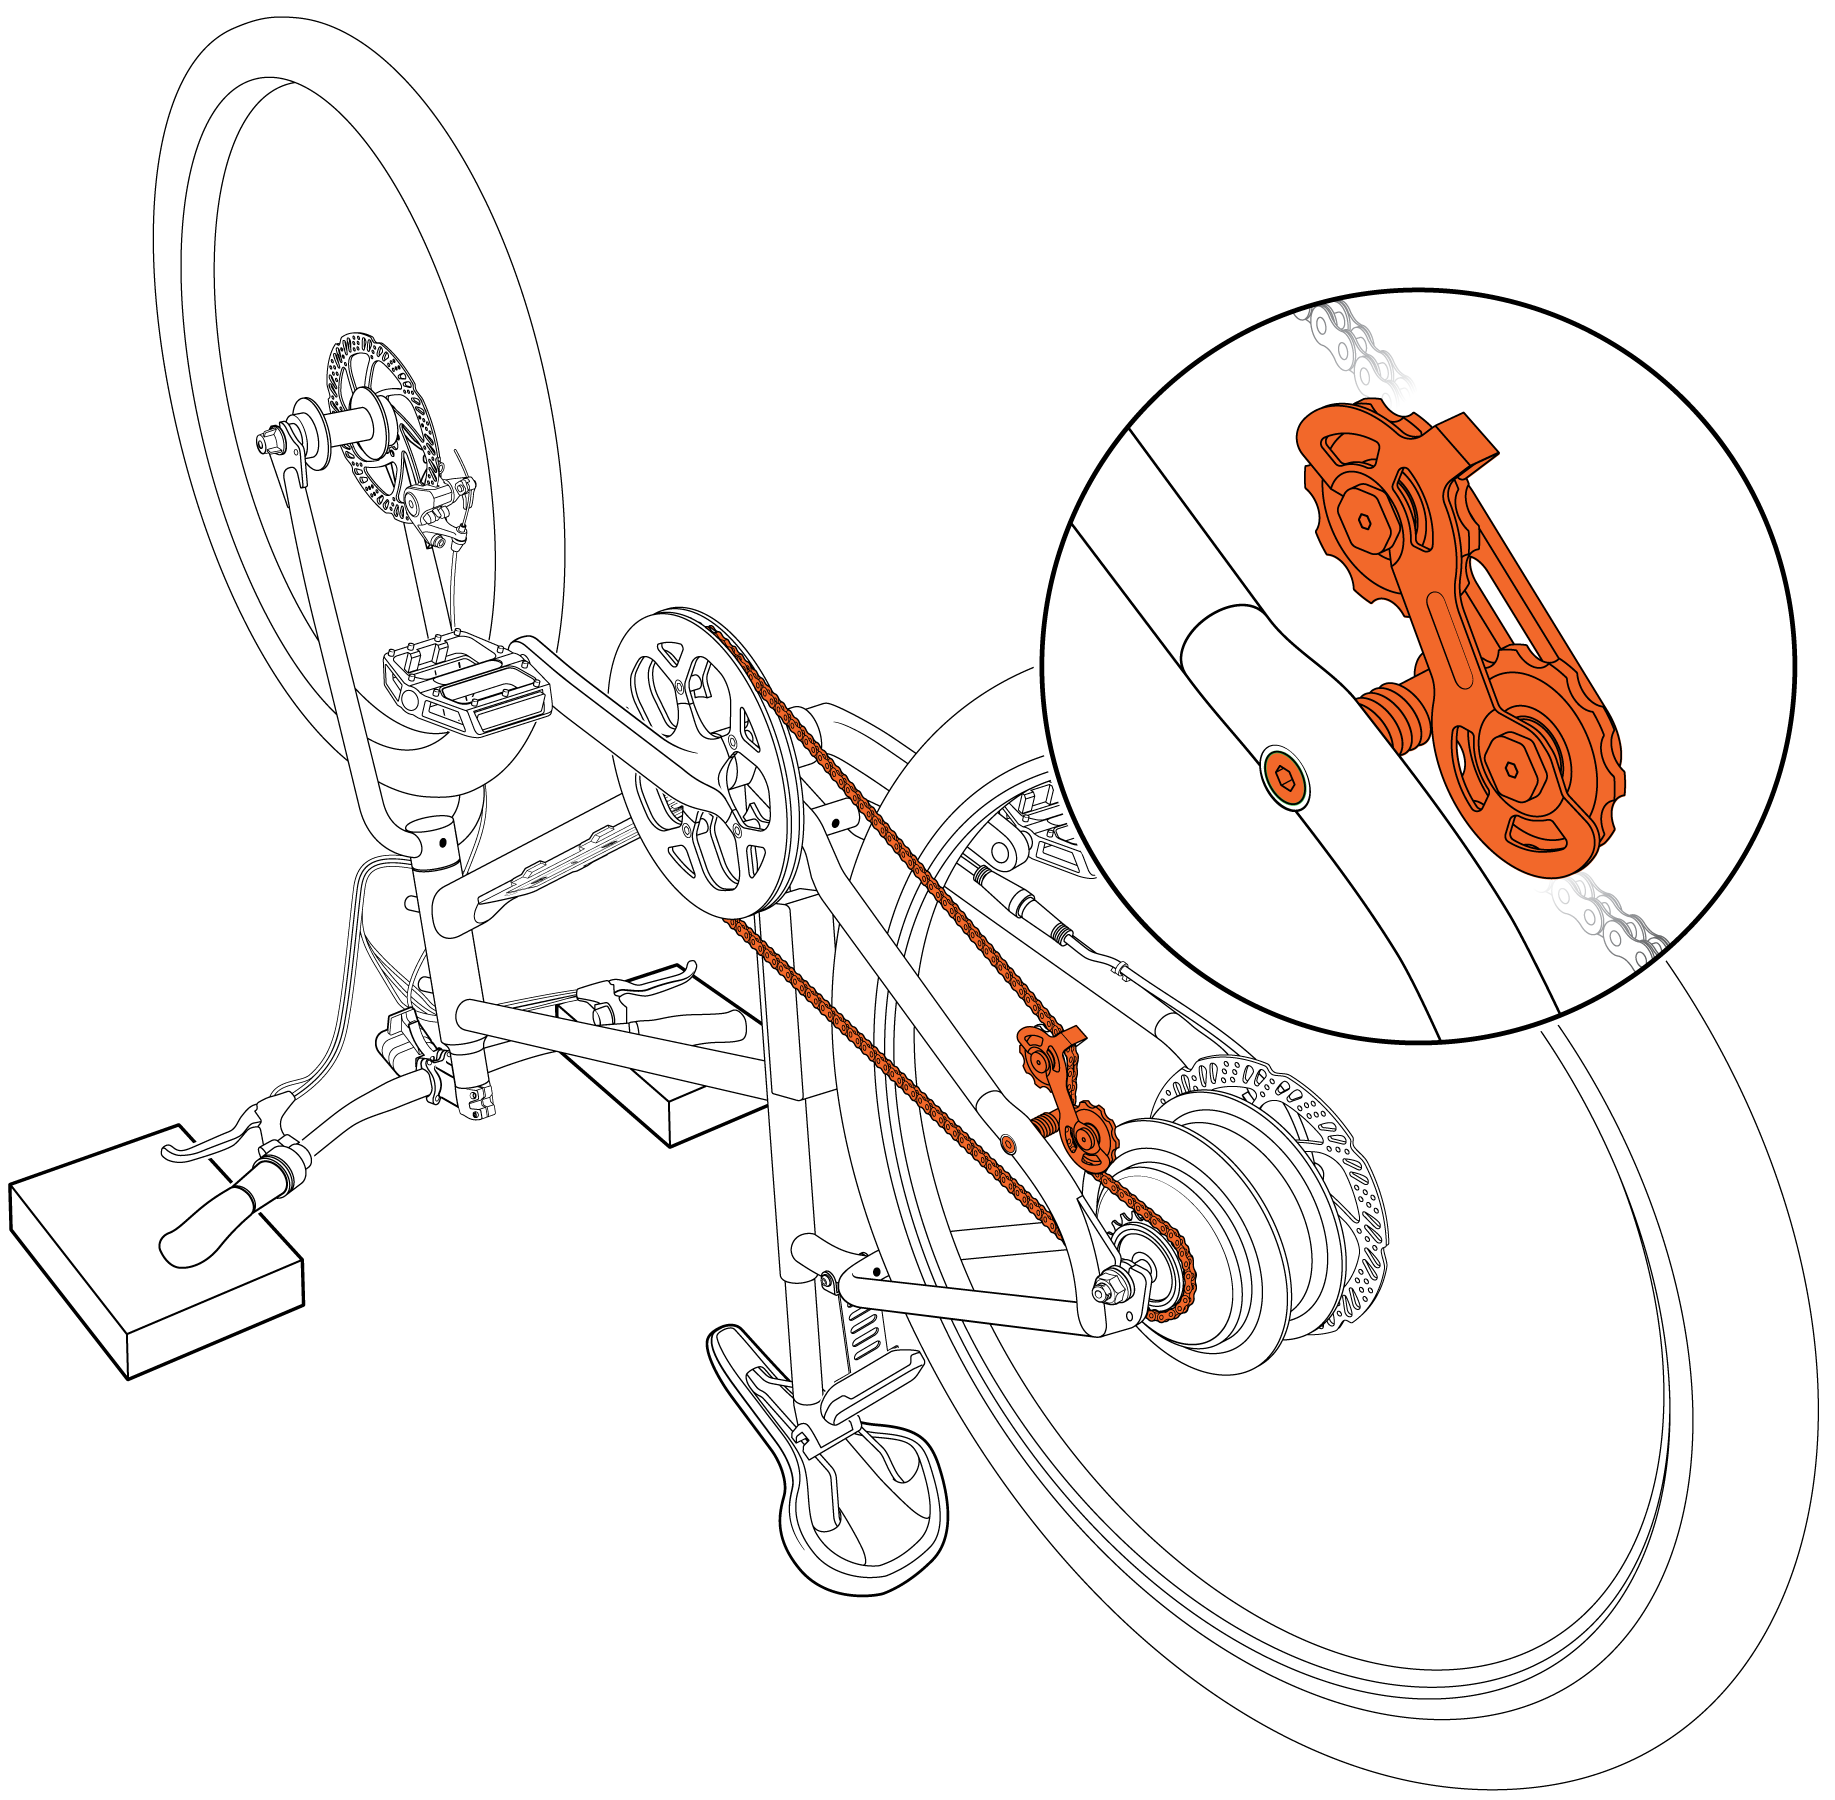
Remove the Old Chain Tensioner
- Get the bike ready for maintenance. Turn off the bike, remove the battery, and press and hold the power button to discharge remaining power.
- Carefully flip the bike over. Prop the handlebar grips on blocks to protect the display.
- Take a photo of the chain tensioner to help with installation of the new chain tensioner at a later step.
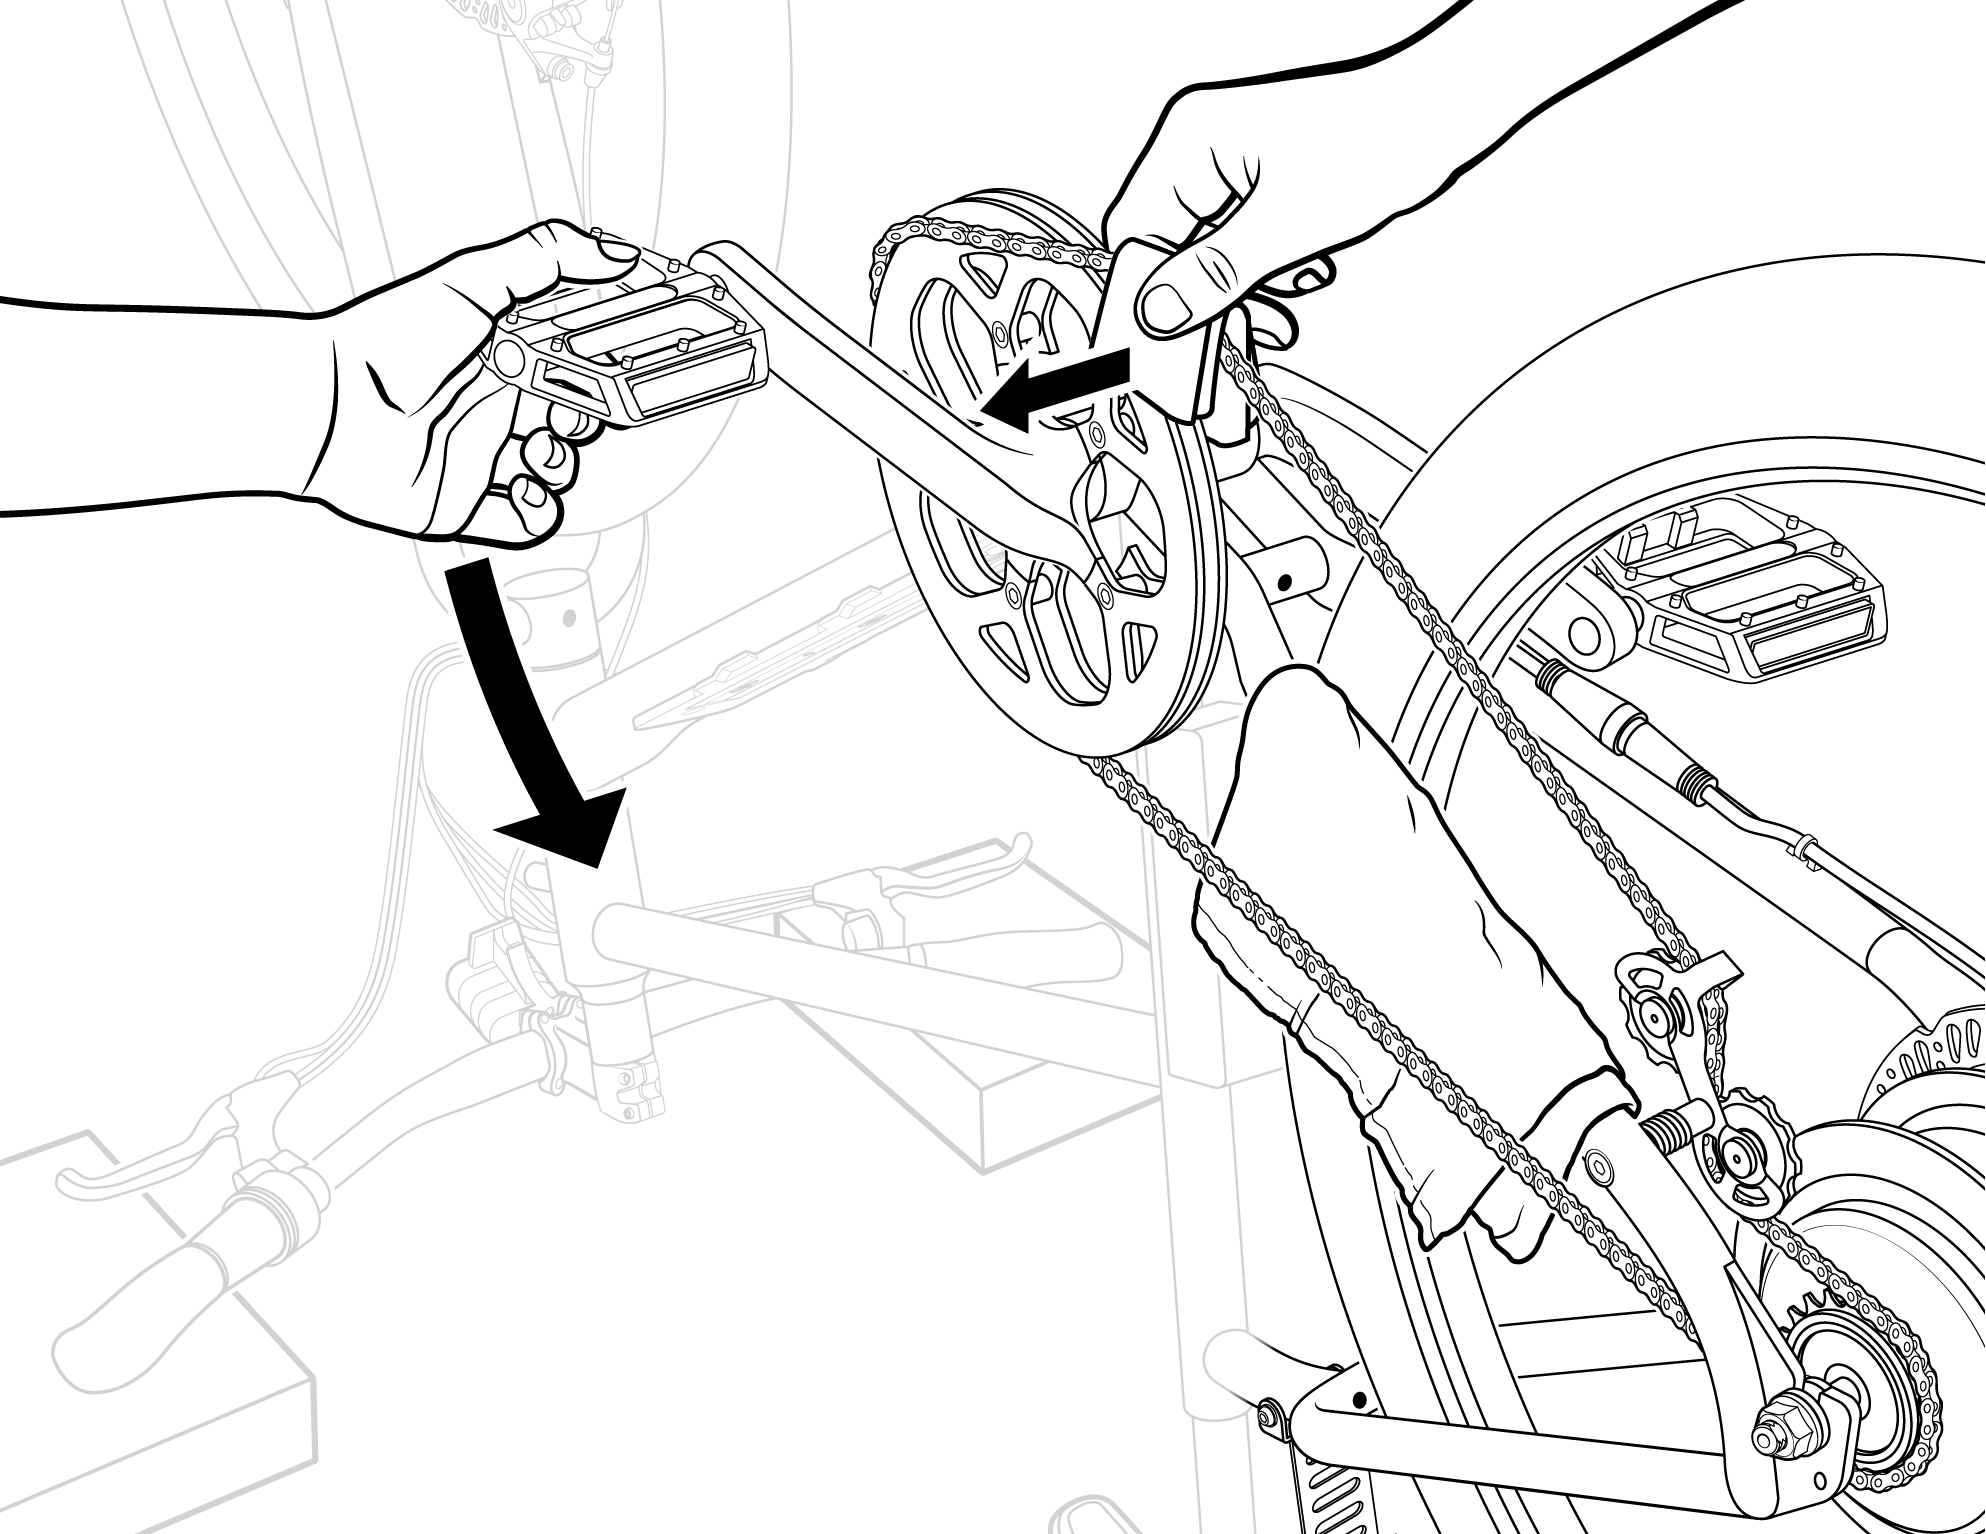
- Roll the chain off the chainring. Push the chain tensioner toward the front of the bike to provide slack. Use a paper towel or shop towel to grab the chain, and carefully roll the chain off of the chainring.
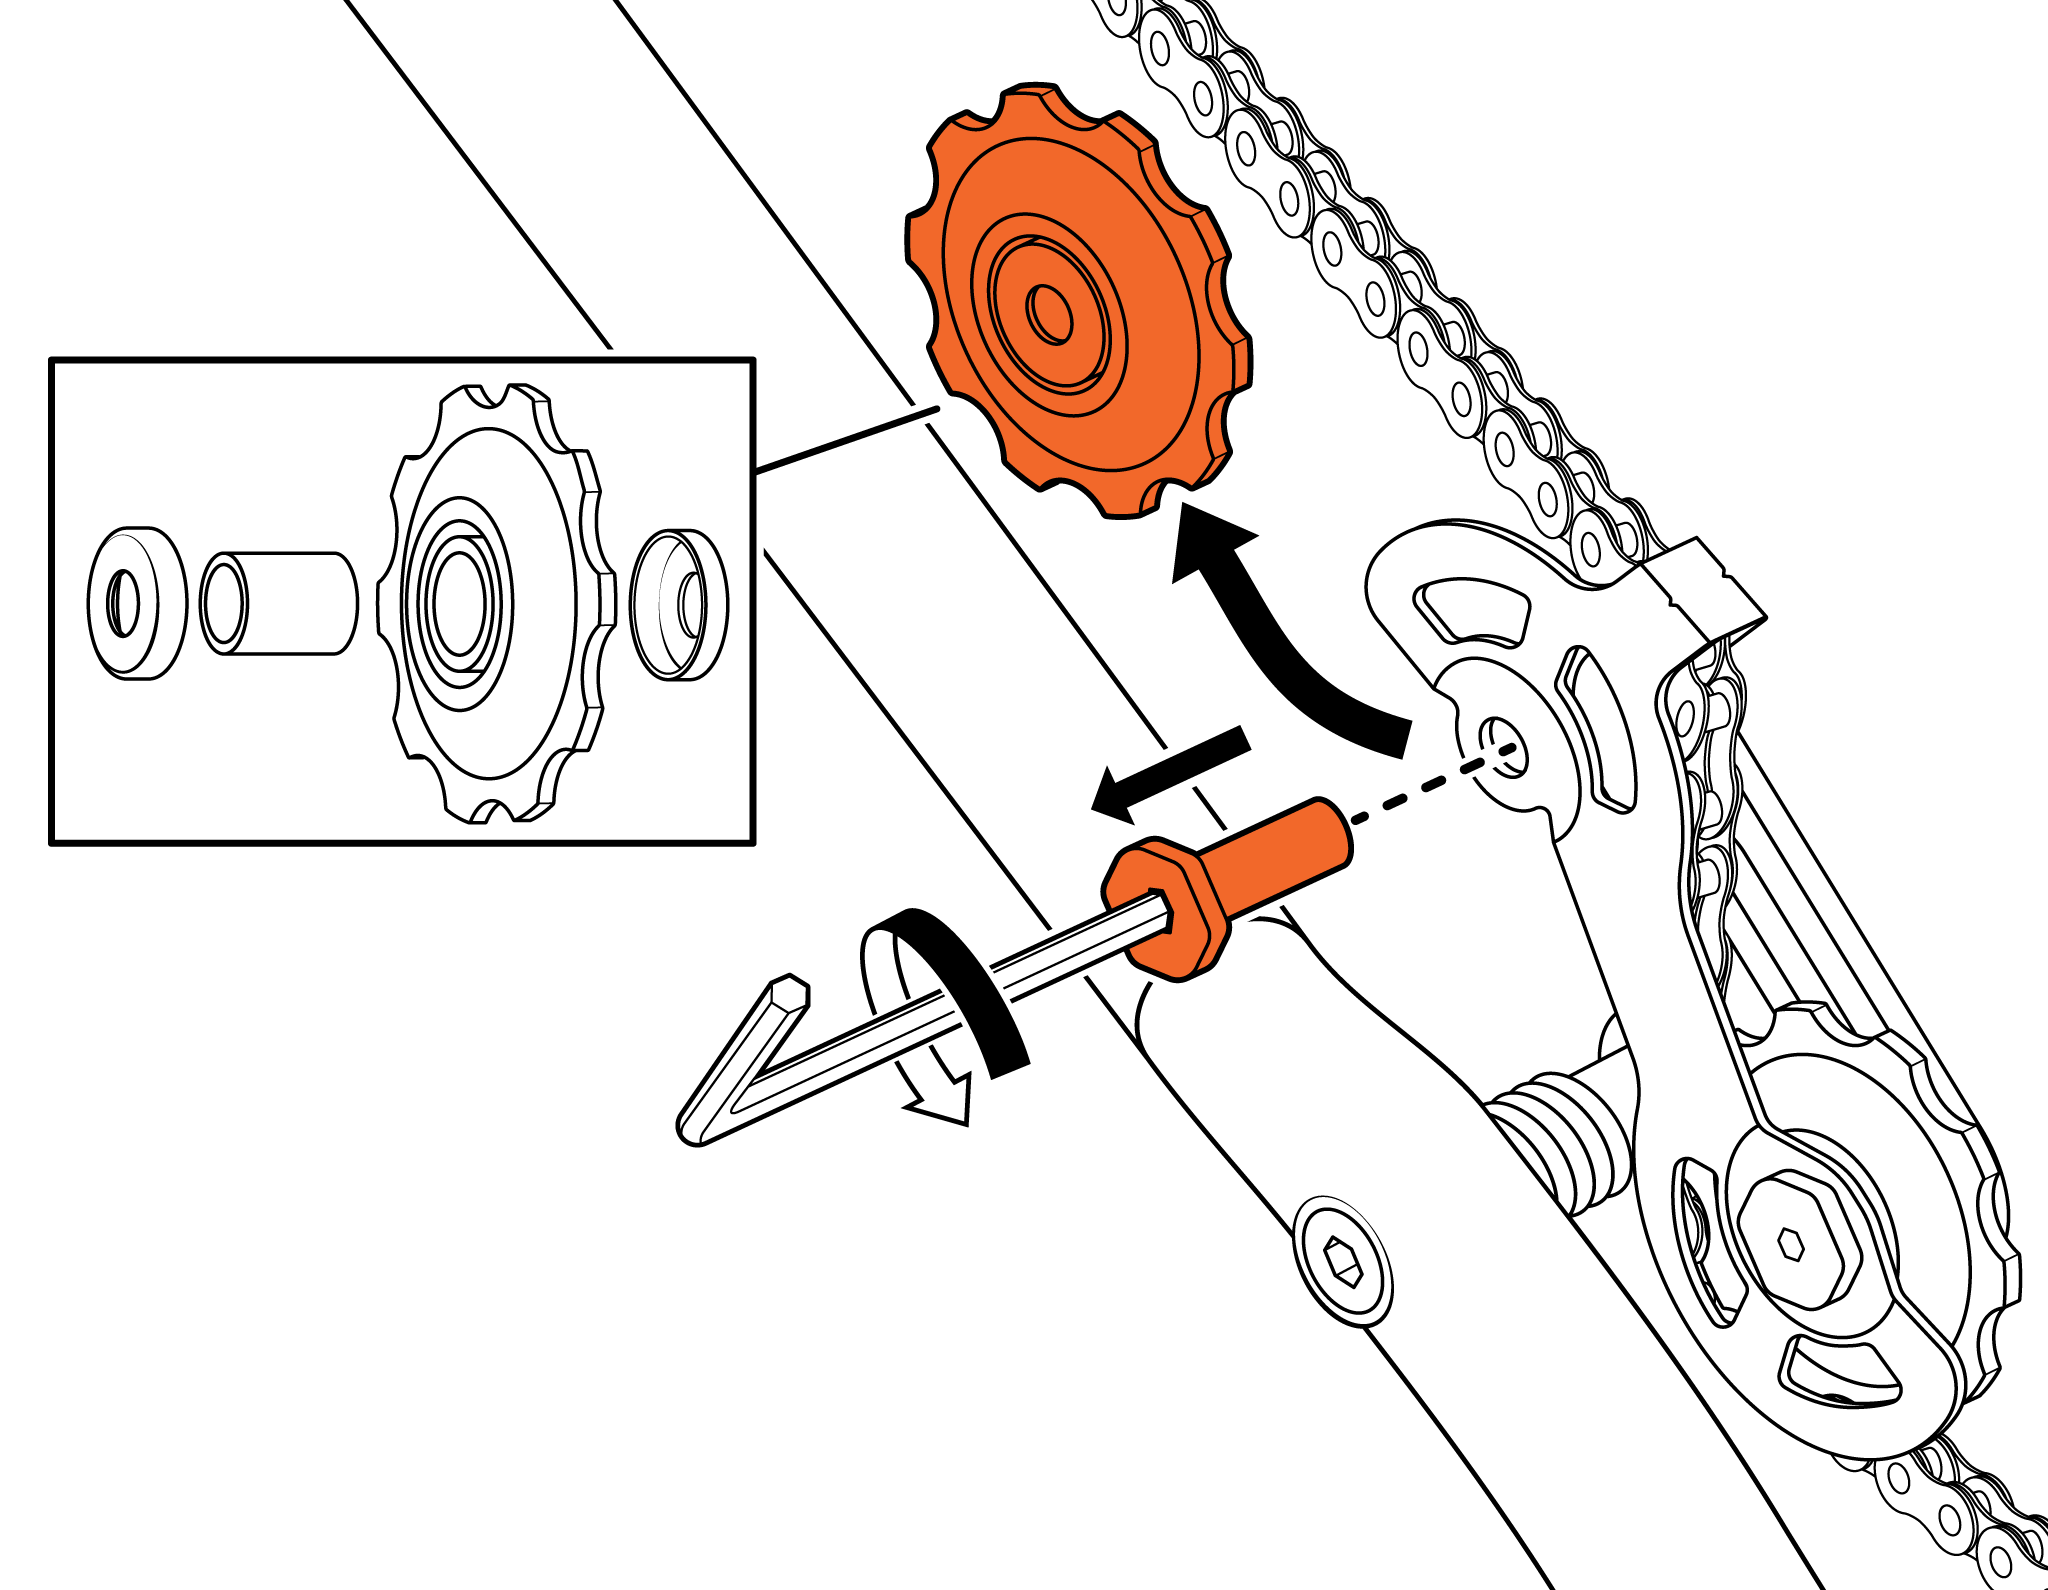
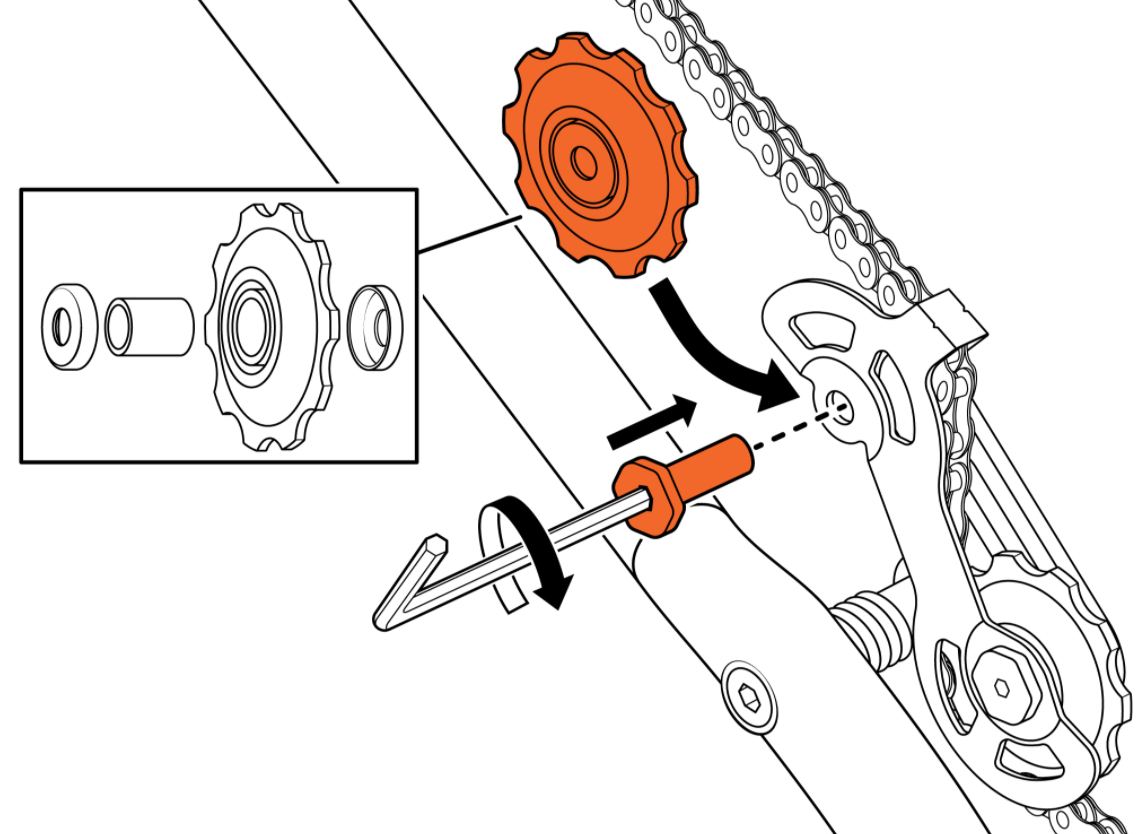
- Remove the lower pulley wheel. Use a 2.5 mm Allen wrench to remove the bolt holding the pulley wheel in place. Note: The pulley wheel has a metal bushing held in place by a metal washer on either side of the wheel.

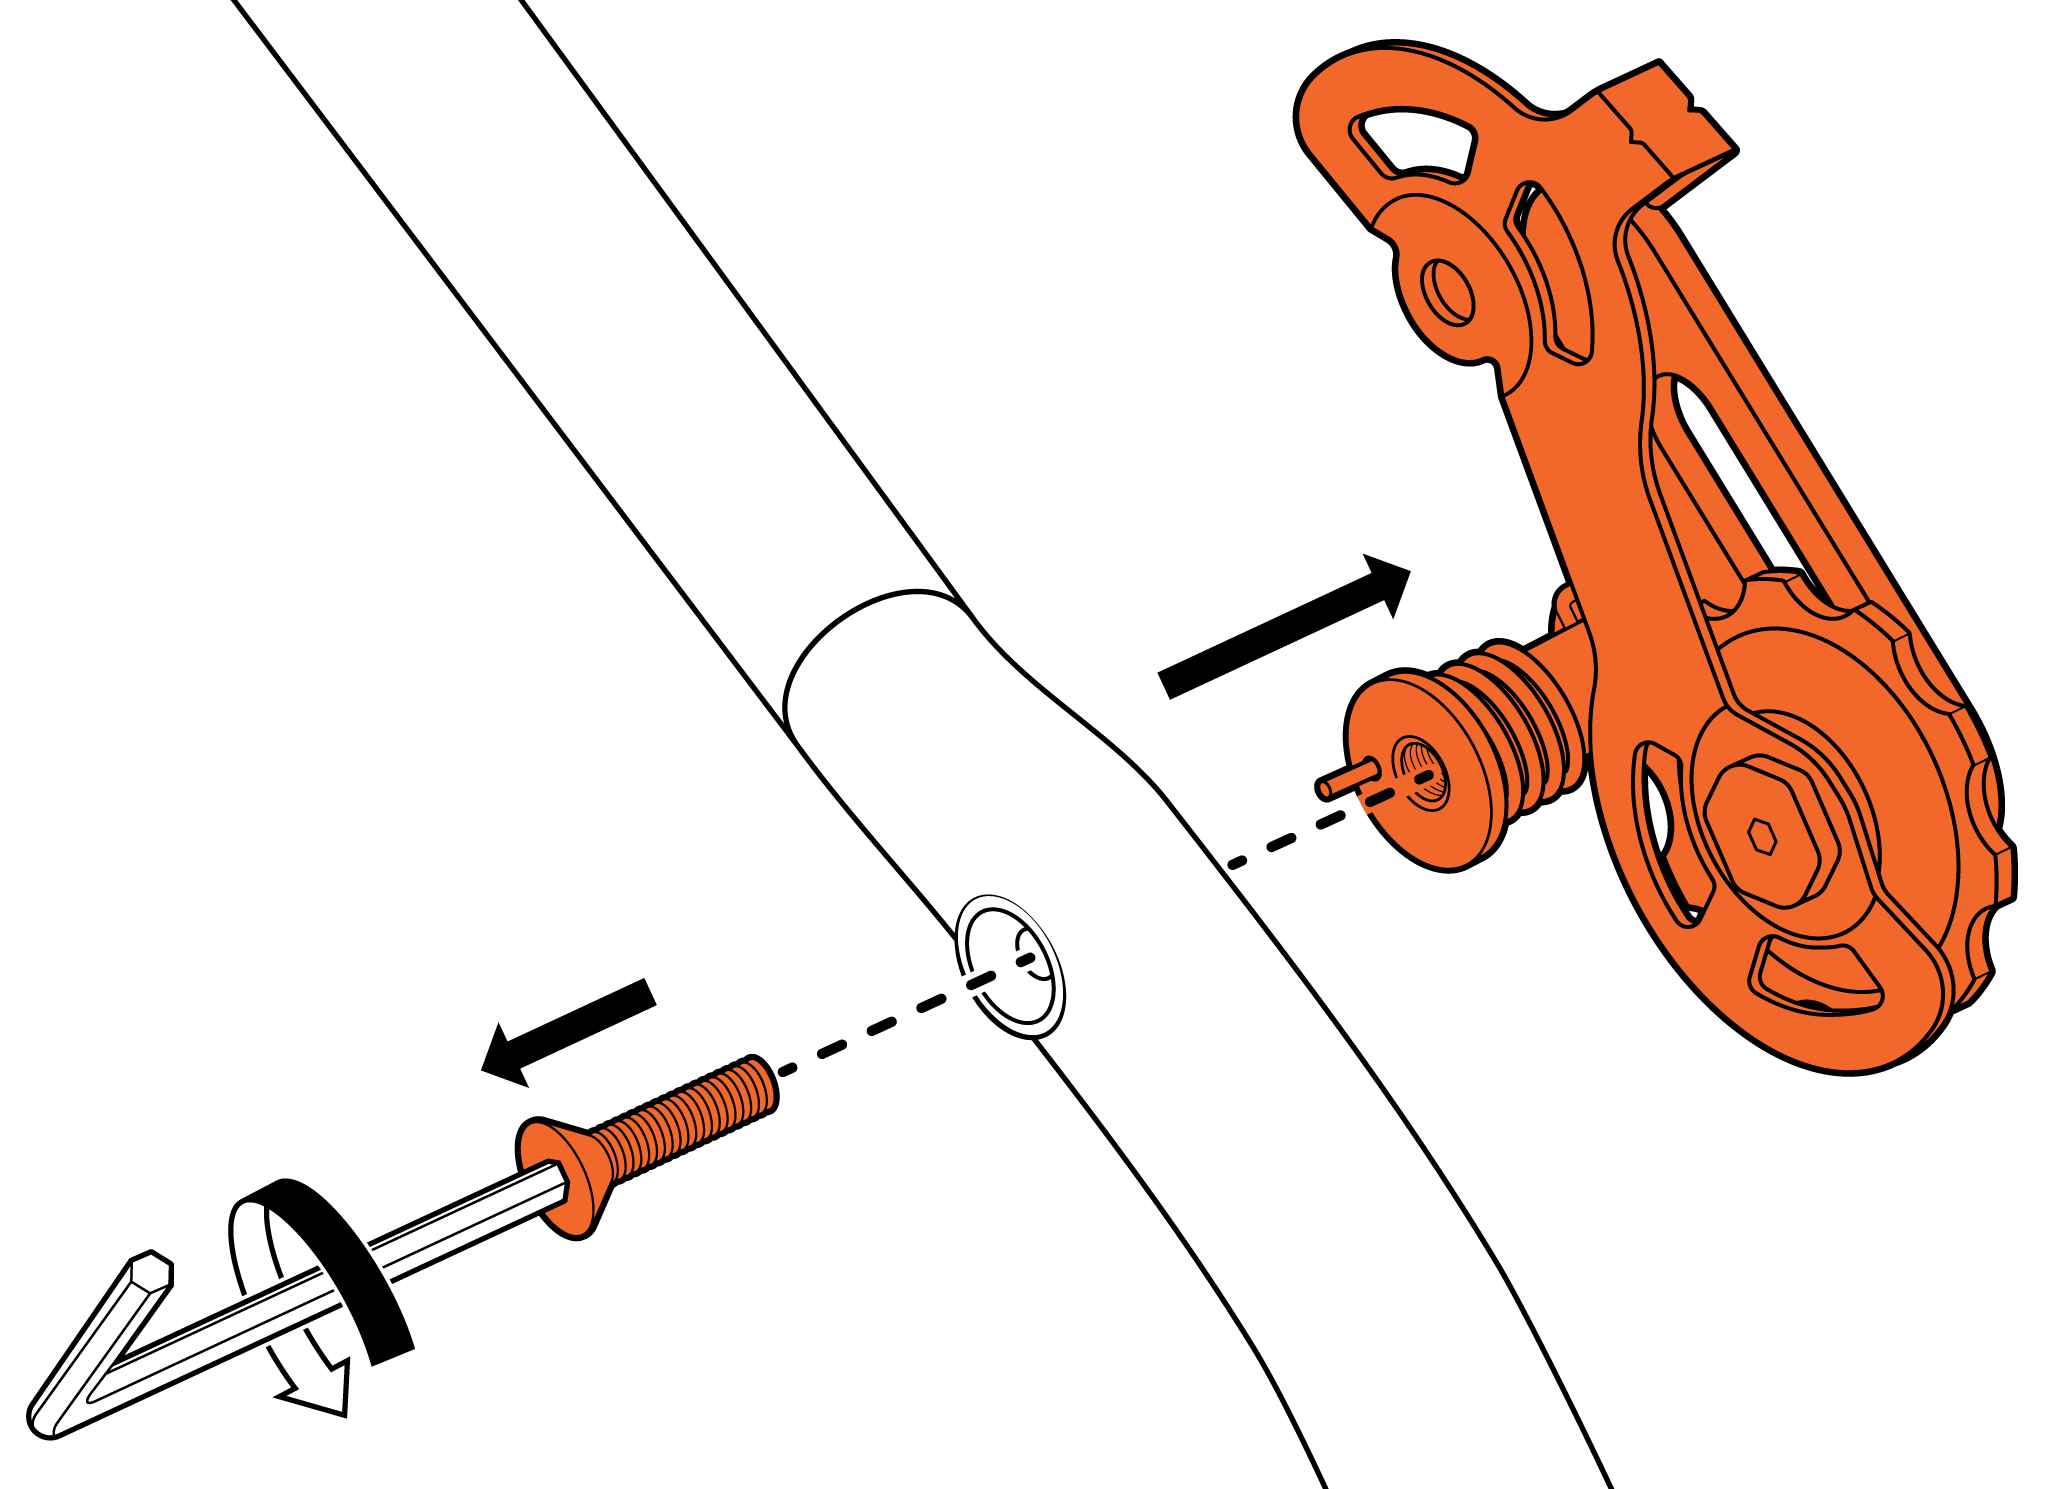
- Remove the chain tensioner from the chainstay. Use a 4 mm Allen wrench to remove the chain tensioner mounting bolt. Set the bolt aside; it will be used to install the new chain tensioner. Recycle the old chain tensioner and lower pulley wheel according to local rules.
Continue to the next section to install the new chain tensioner.
Install the New Chain Tensioner
- Remove the lower pulley wheel from the new chain tensioner. Locate the new chain tensioner and the bolt set aside earlier. Use a 2.5 mm Allen wrench to remove the bolt holding the pulley wheel in place. Note: The pulley wheel has a metal bushing held in place by a metal washer on either side of the wheel. Set the pulley wheel and hardware aside.
Take a photo of the pulley wheel, metal bushing, and washers to help with installation at a later step.
- Place the chain tensioner in position.
- Place the chain tensioner in position on the chainstay and insert the torsion spring end into the middle hole on the chainstay.
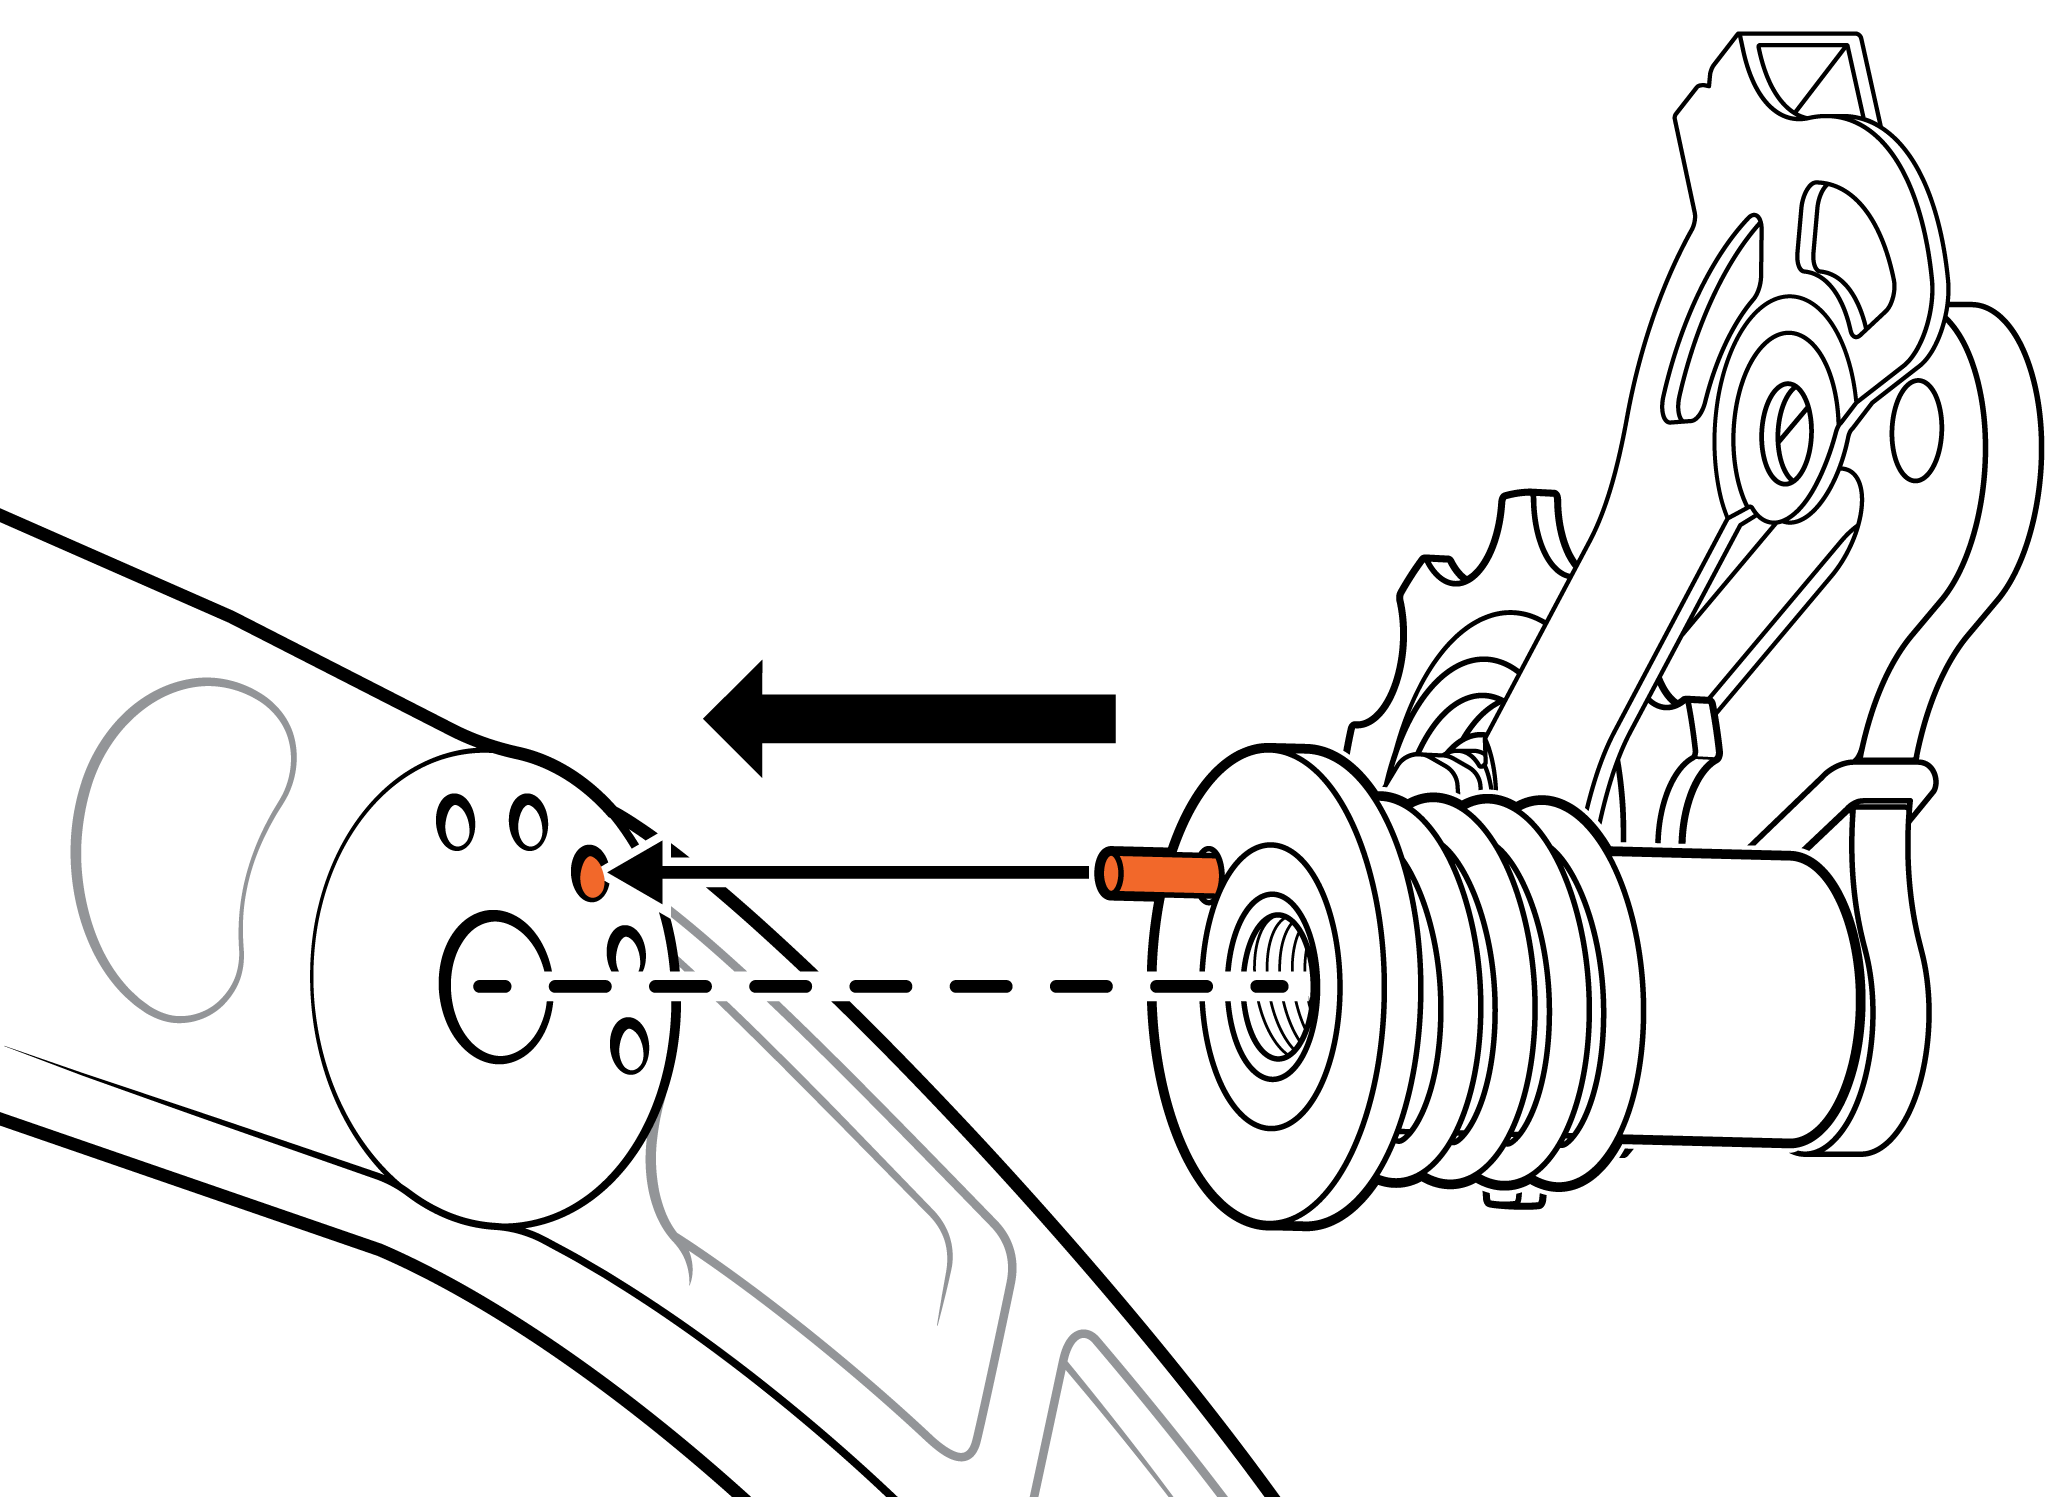
- Thread the chain tensioner mounting bolt into the chainstay. Use a 4 mm Allen wrench to tighten the bolt securely. Torque to 6 Nm.
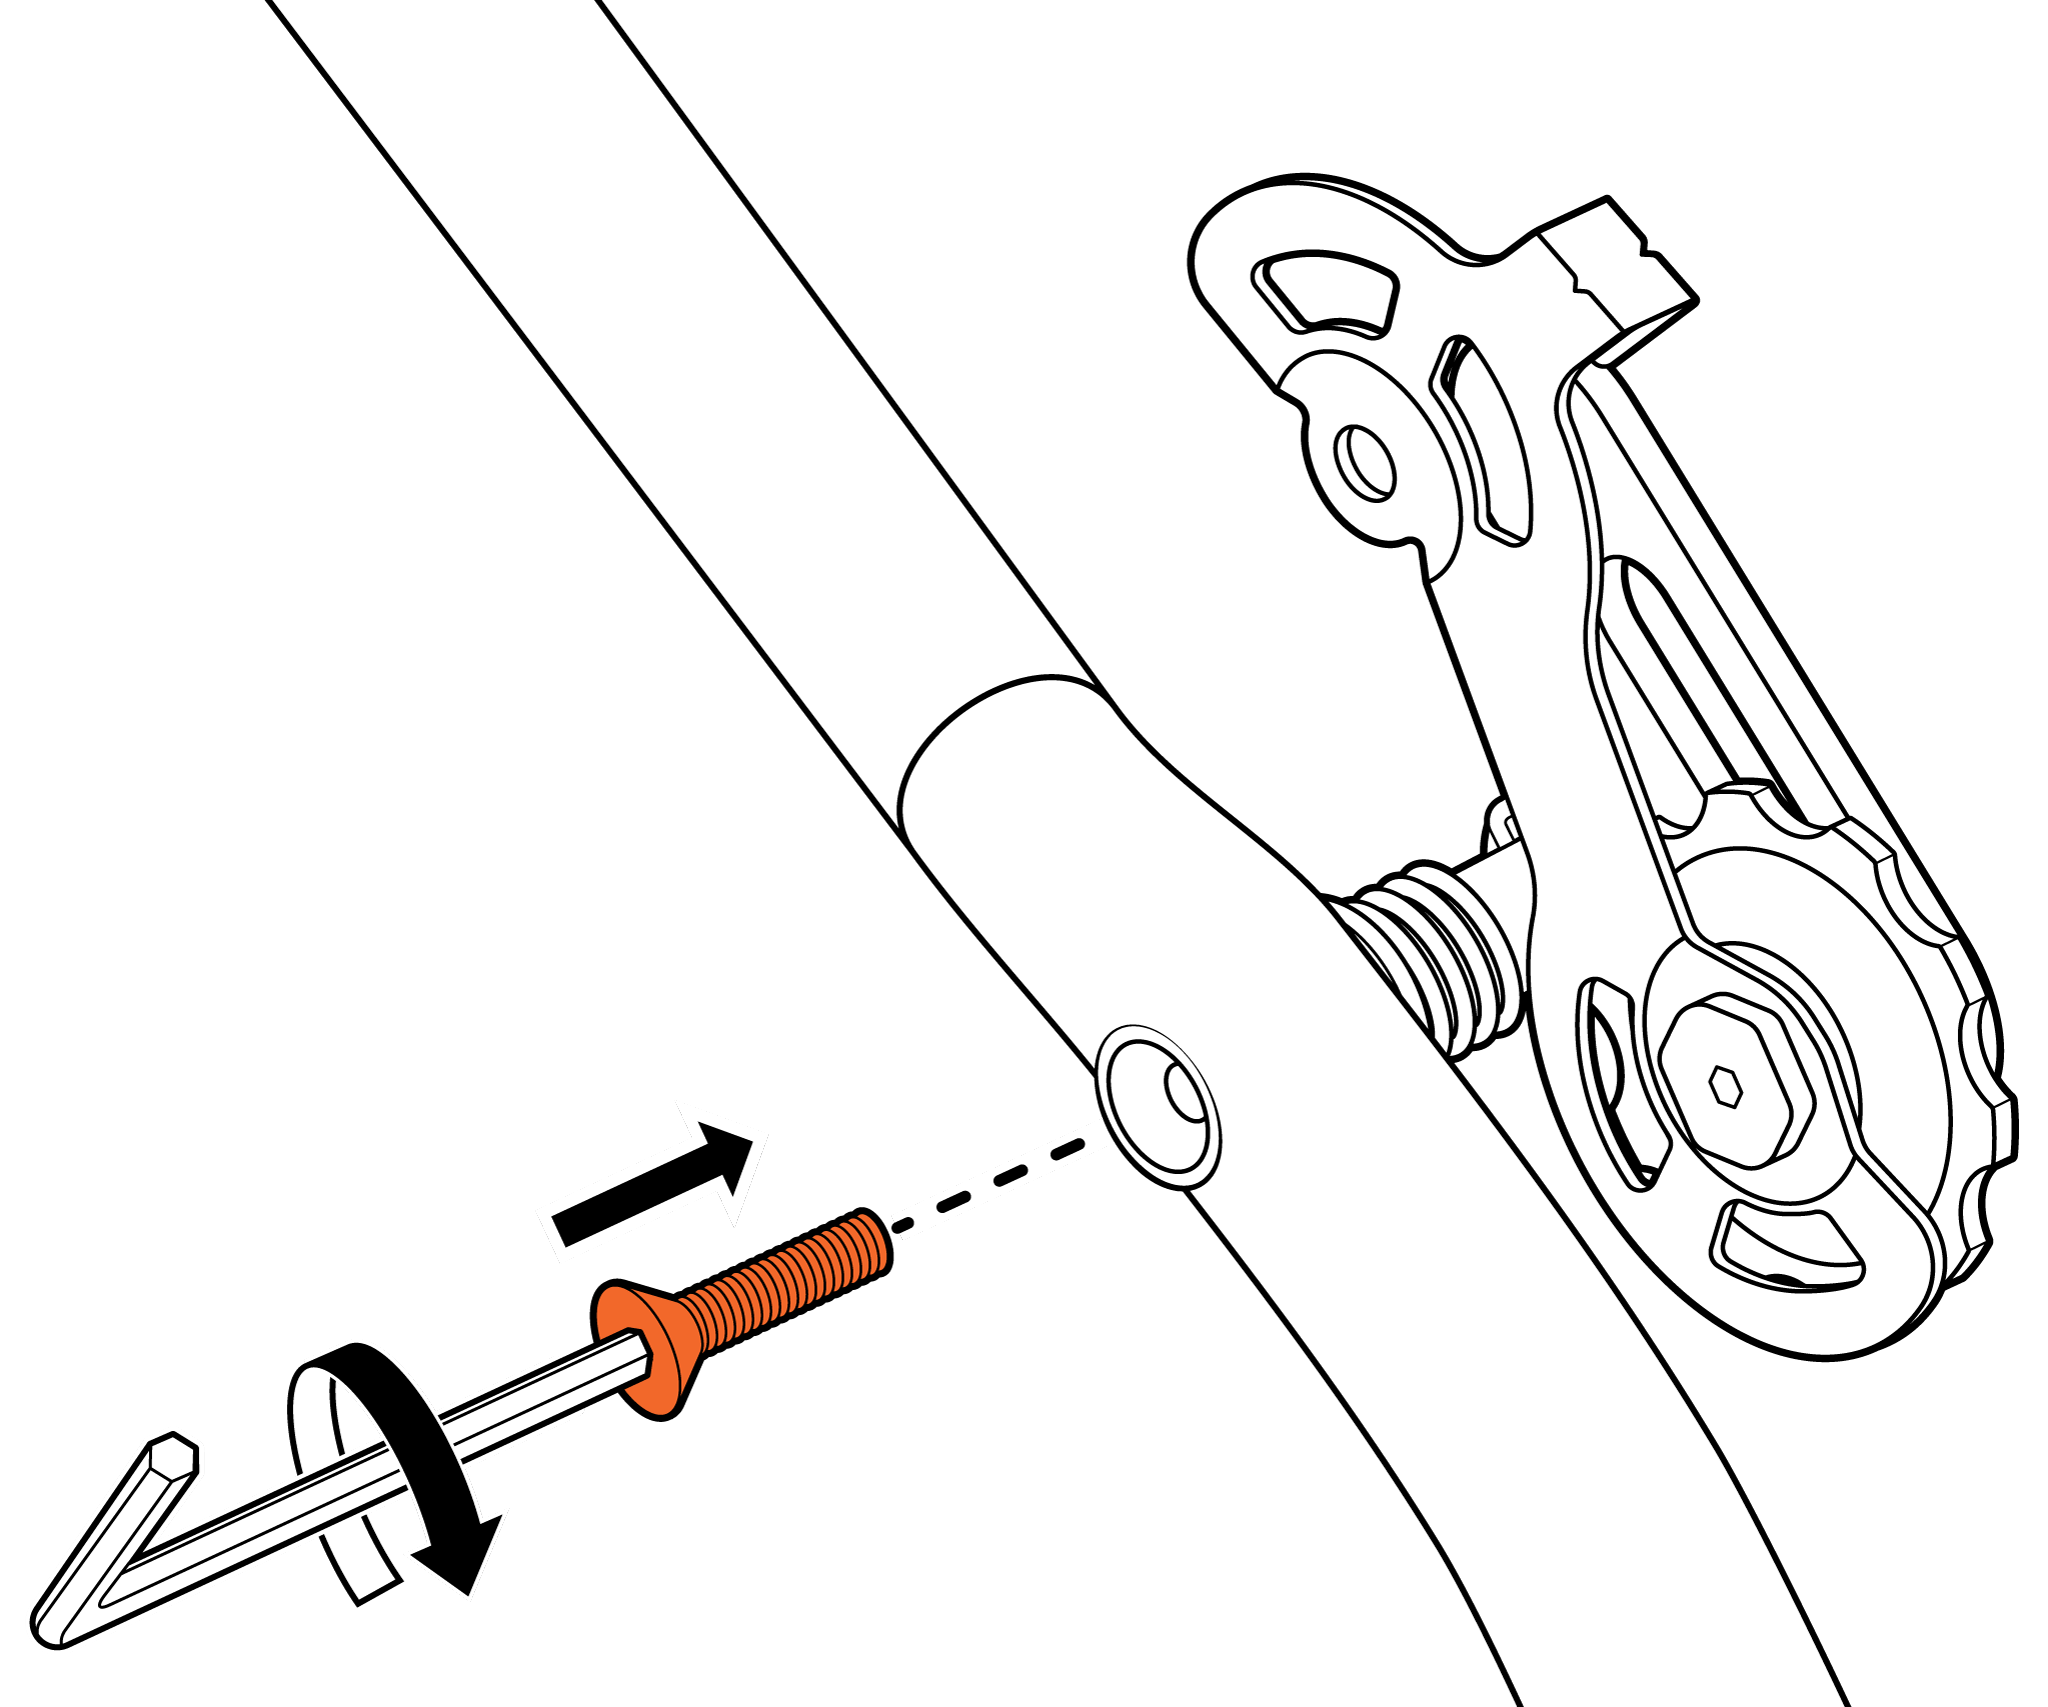
An improperly secured chain tensioner can lead to premature wear on components, or can cause loss of control, accidents, serious injury, or death.
- Place the chain tensioner in position on the chainstay and insert the torsion spring end into the middle hole on the chainstay.
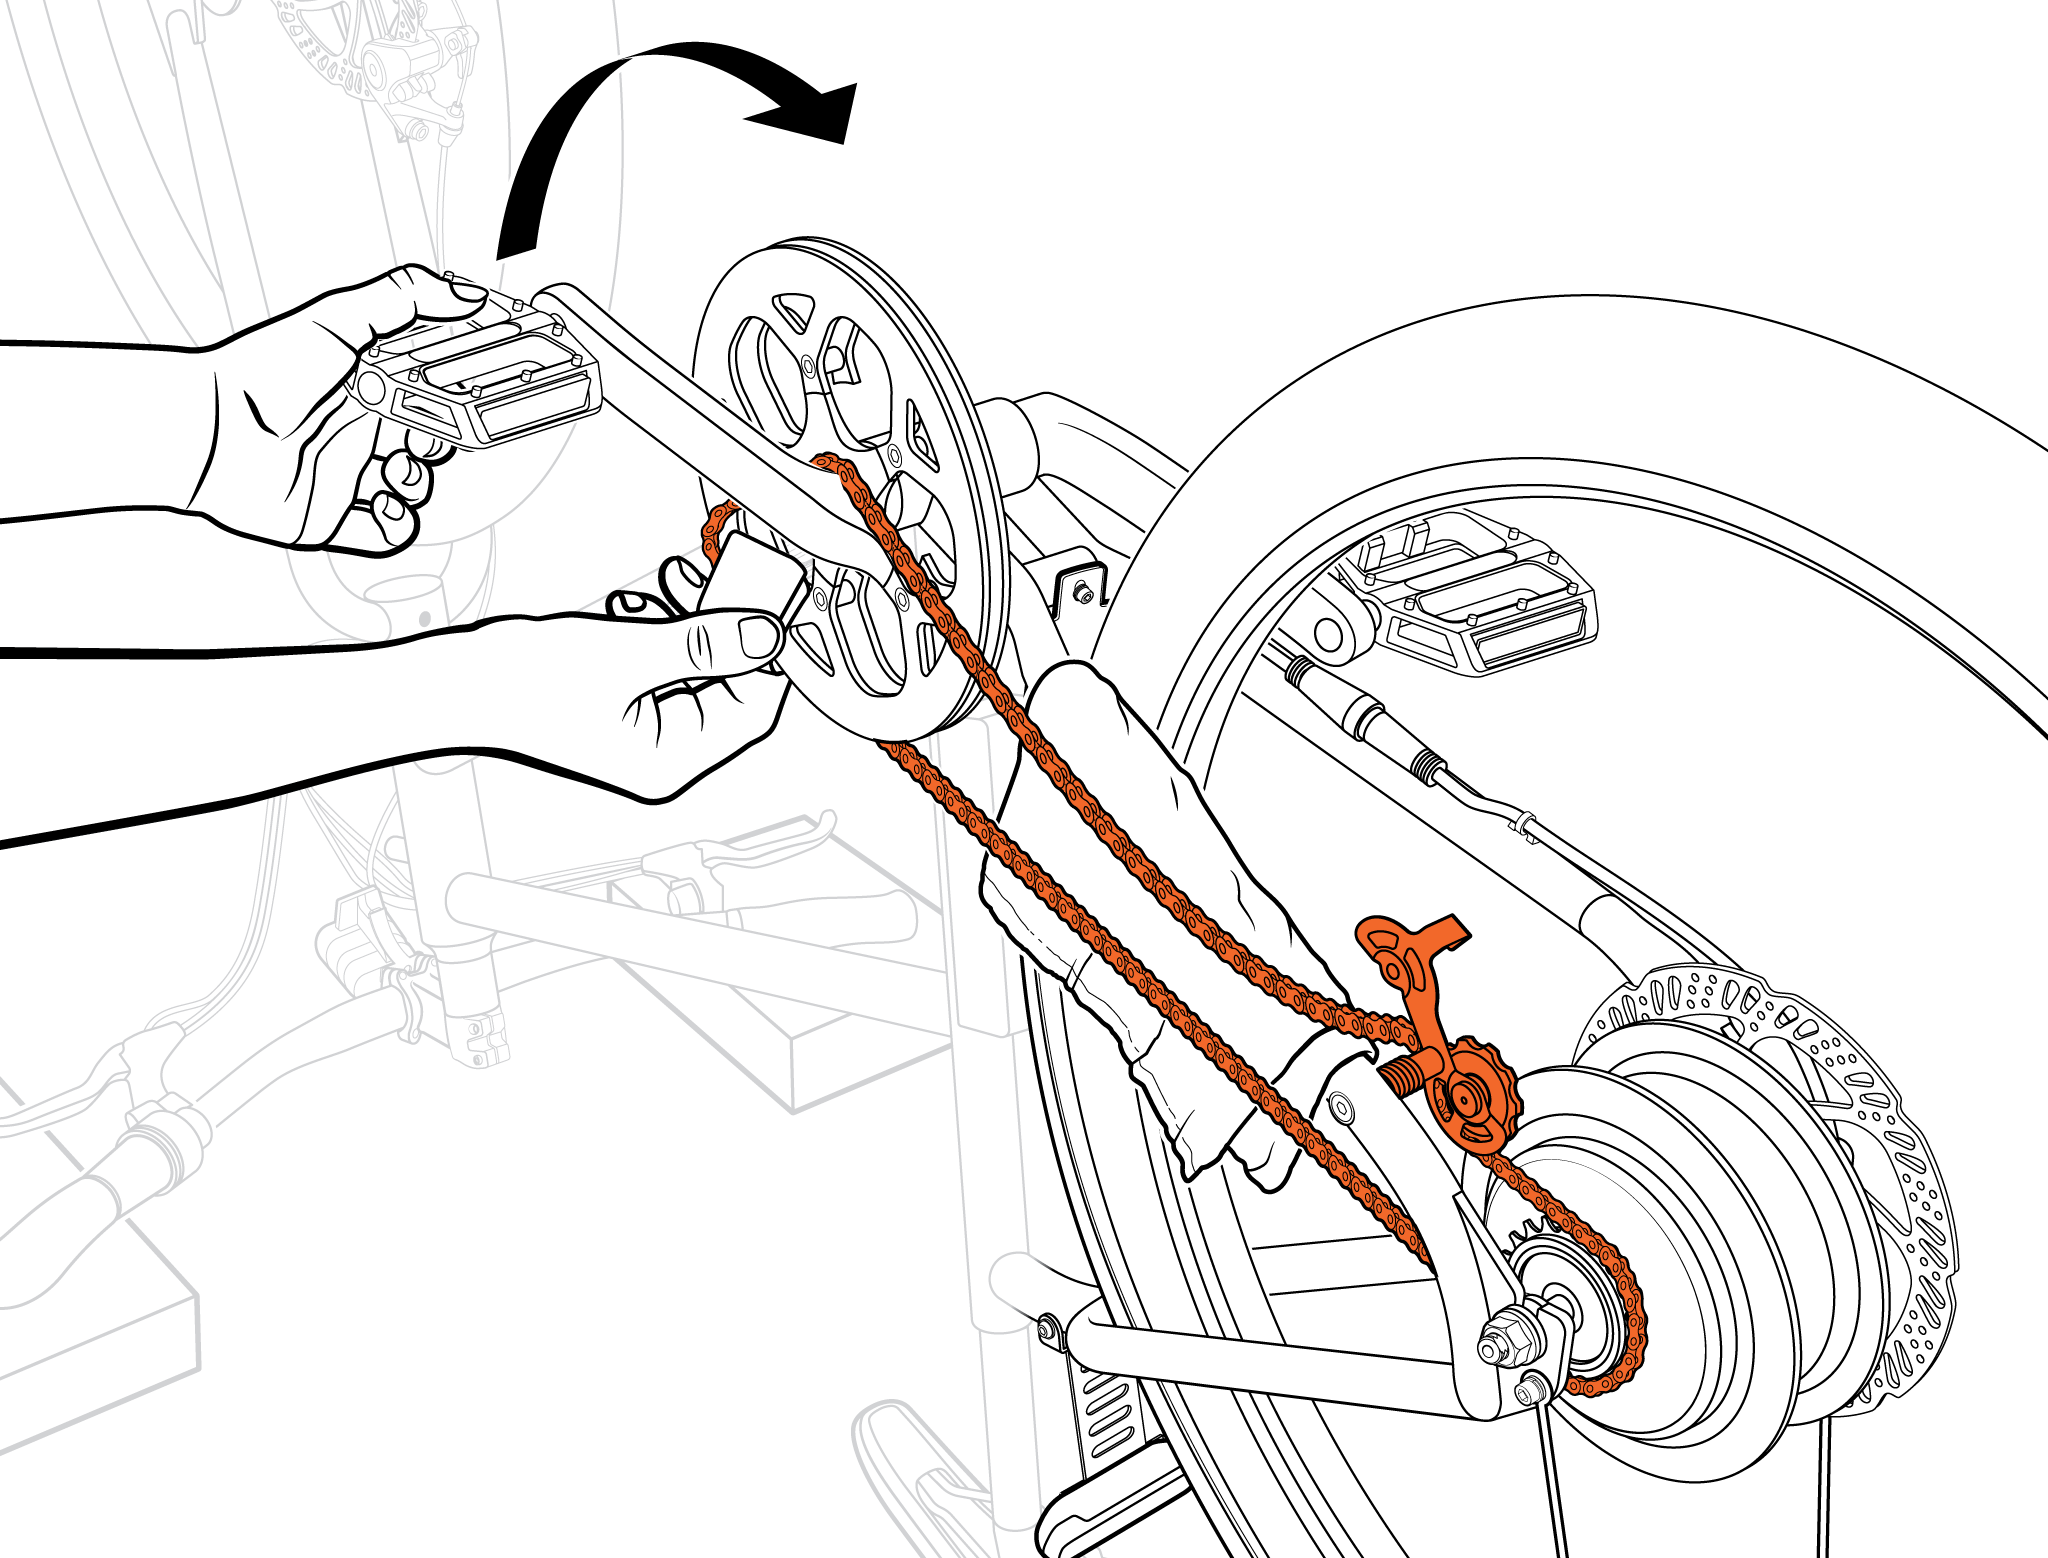
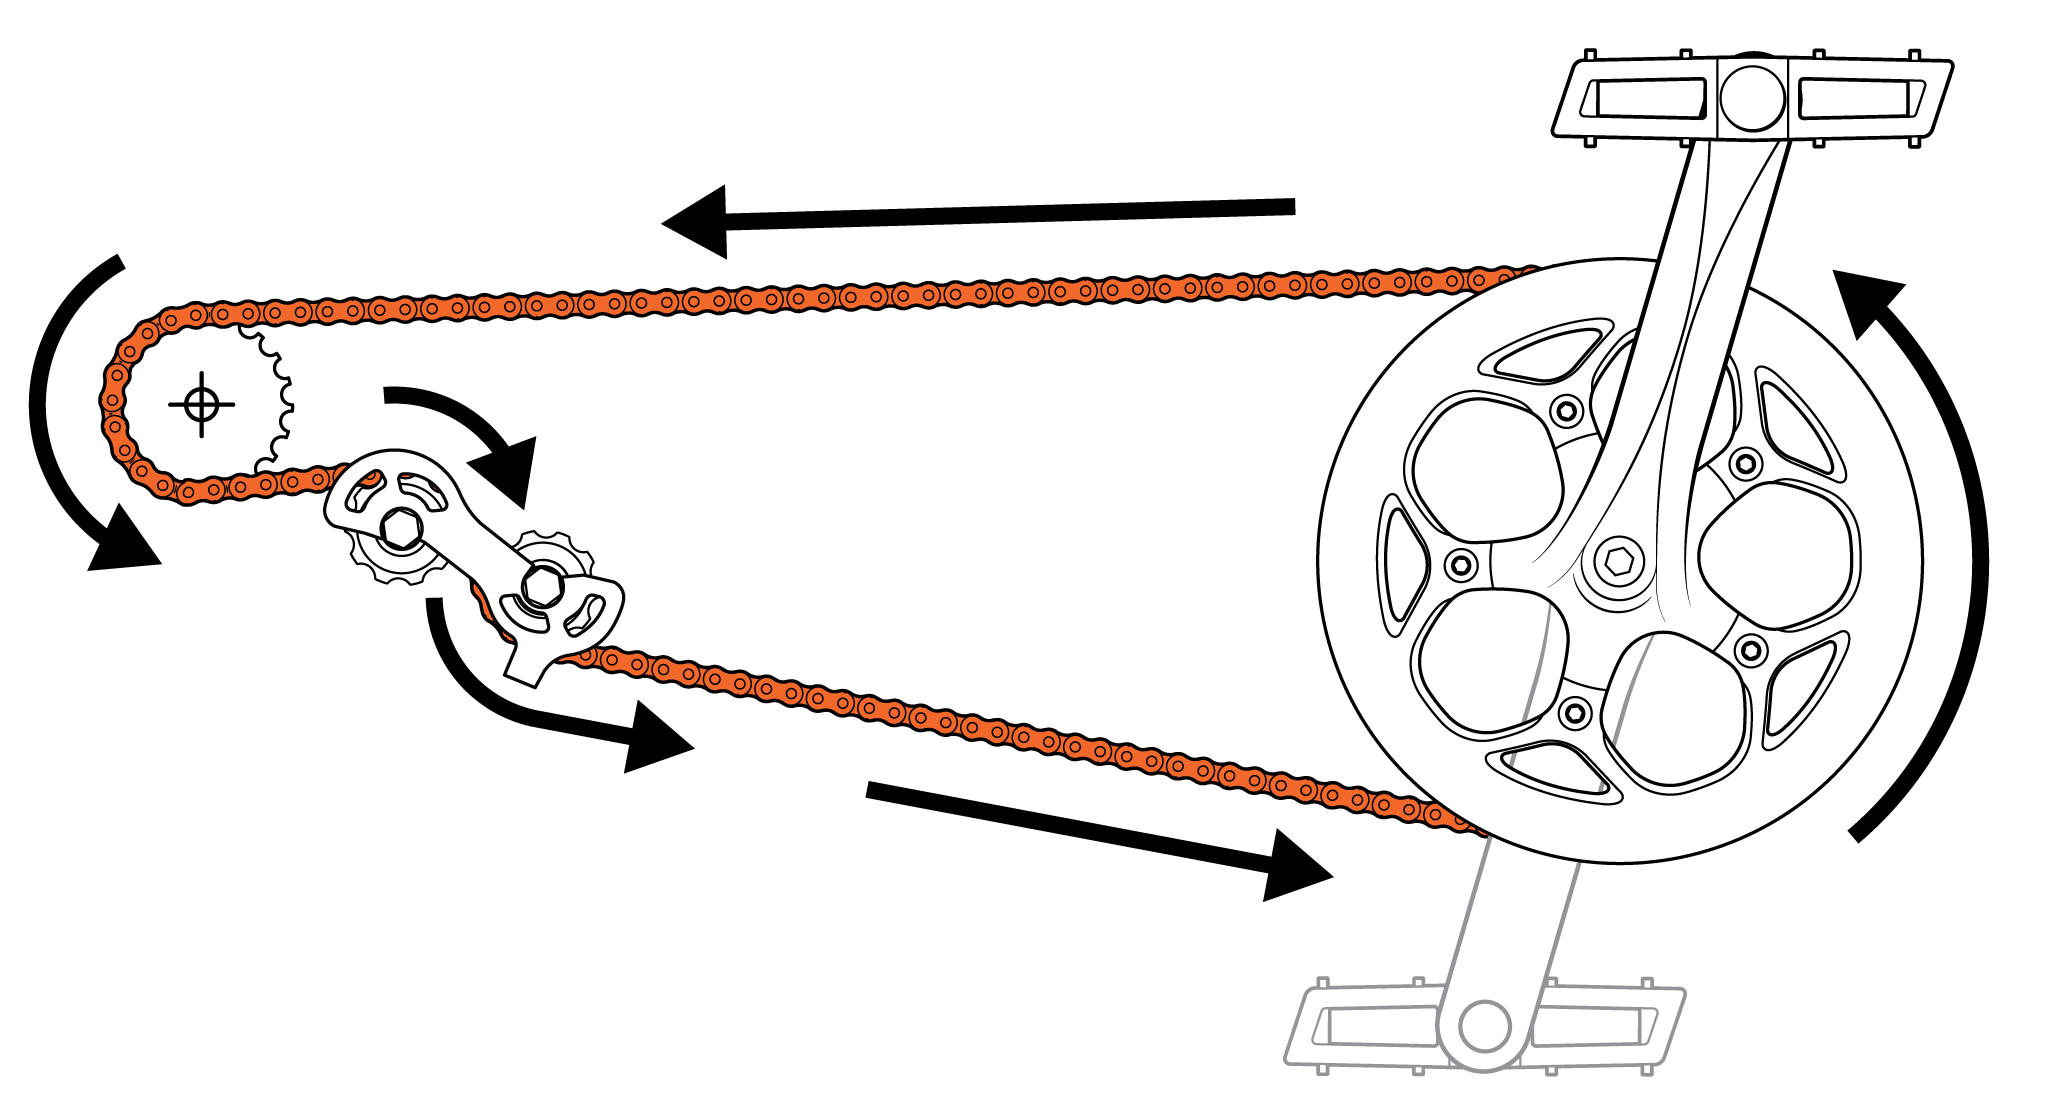
- Reinstall the chain on the front chainring and ensure there is adequate chain tension. Press the chain tensioner forward. Use a paper towel to grab the chain and carefully align the chain with the chainring. Rotate the crank toward the back of the bike to install the chain.
- Place the chain in position on the chain tensioner and reinstall the pulley wheel.
- Route the chain on the chain tensioner. Refer to the photo taken earlier to see the correct chain position.
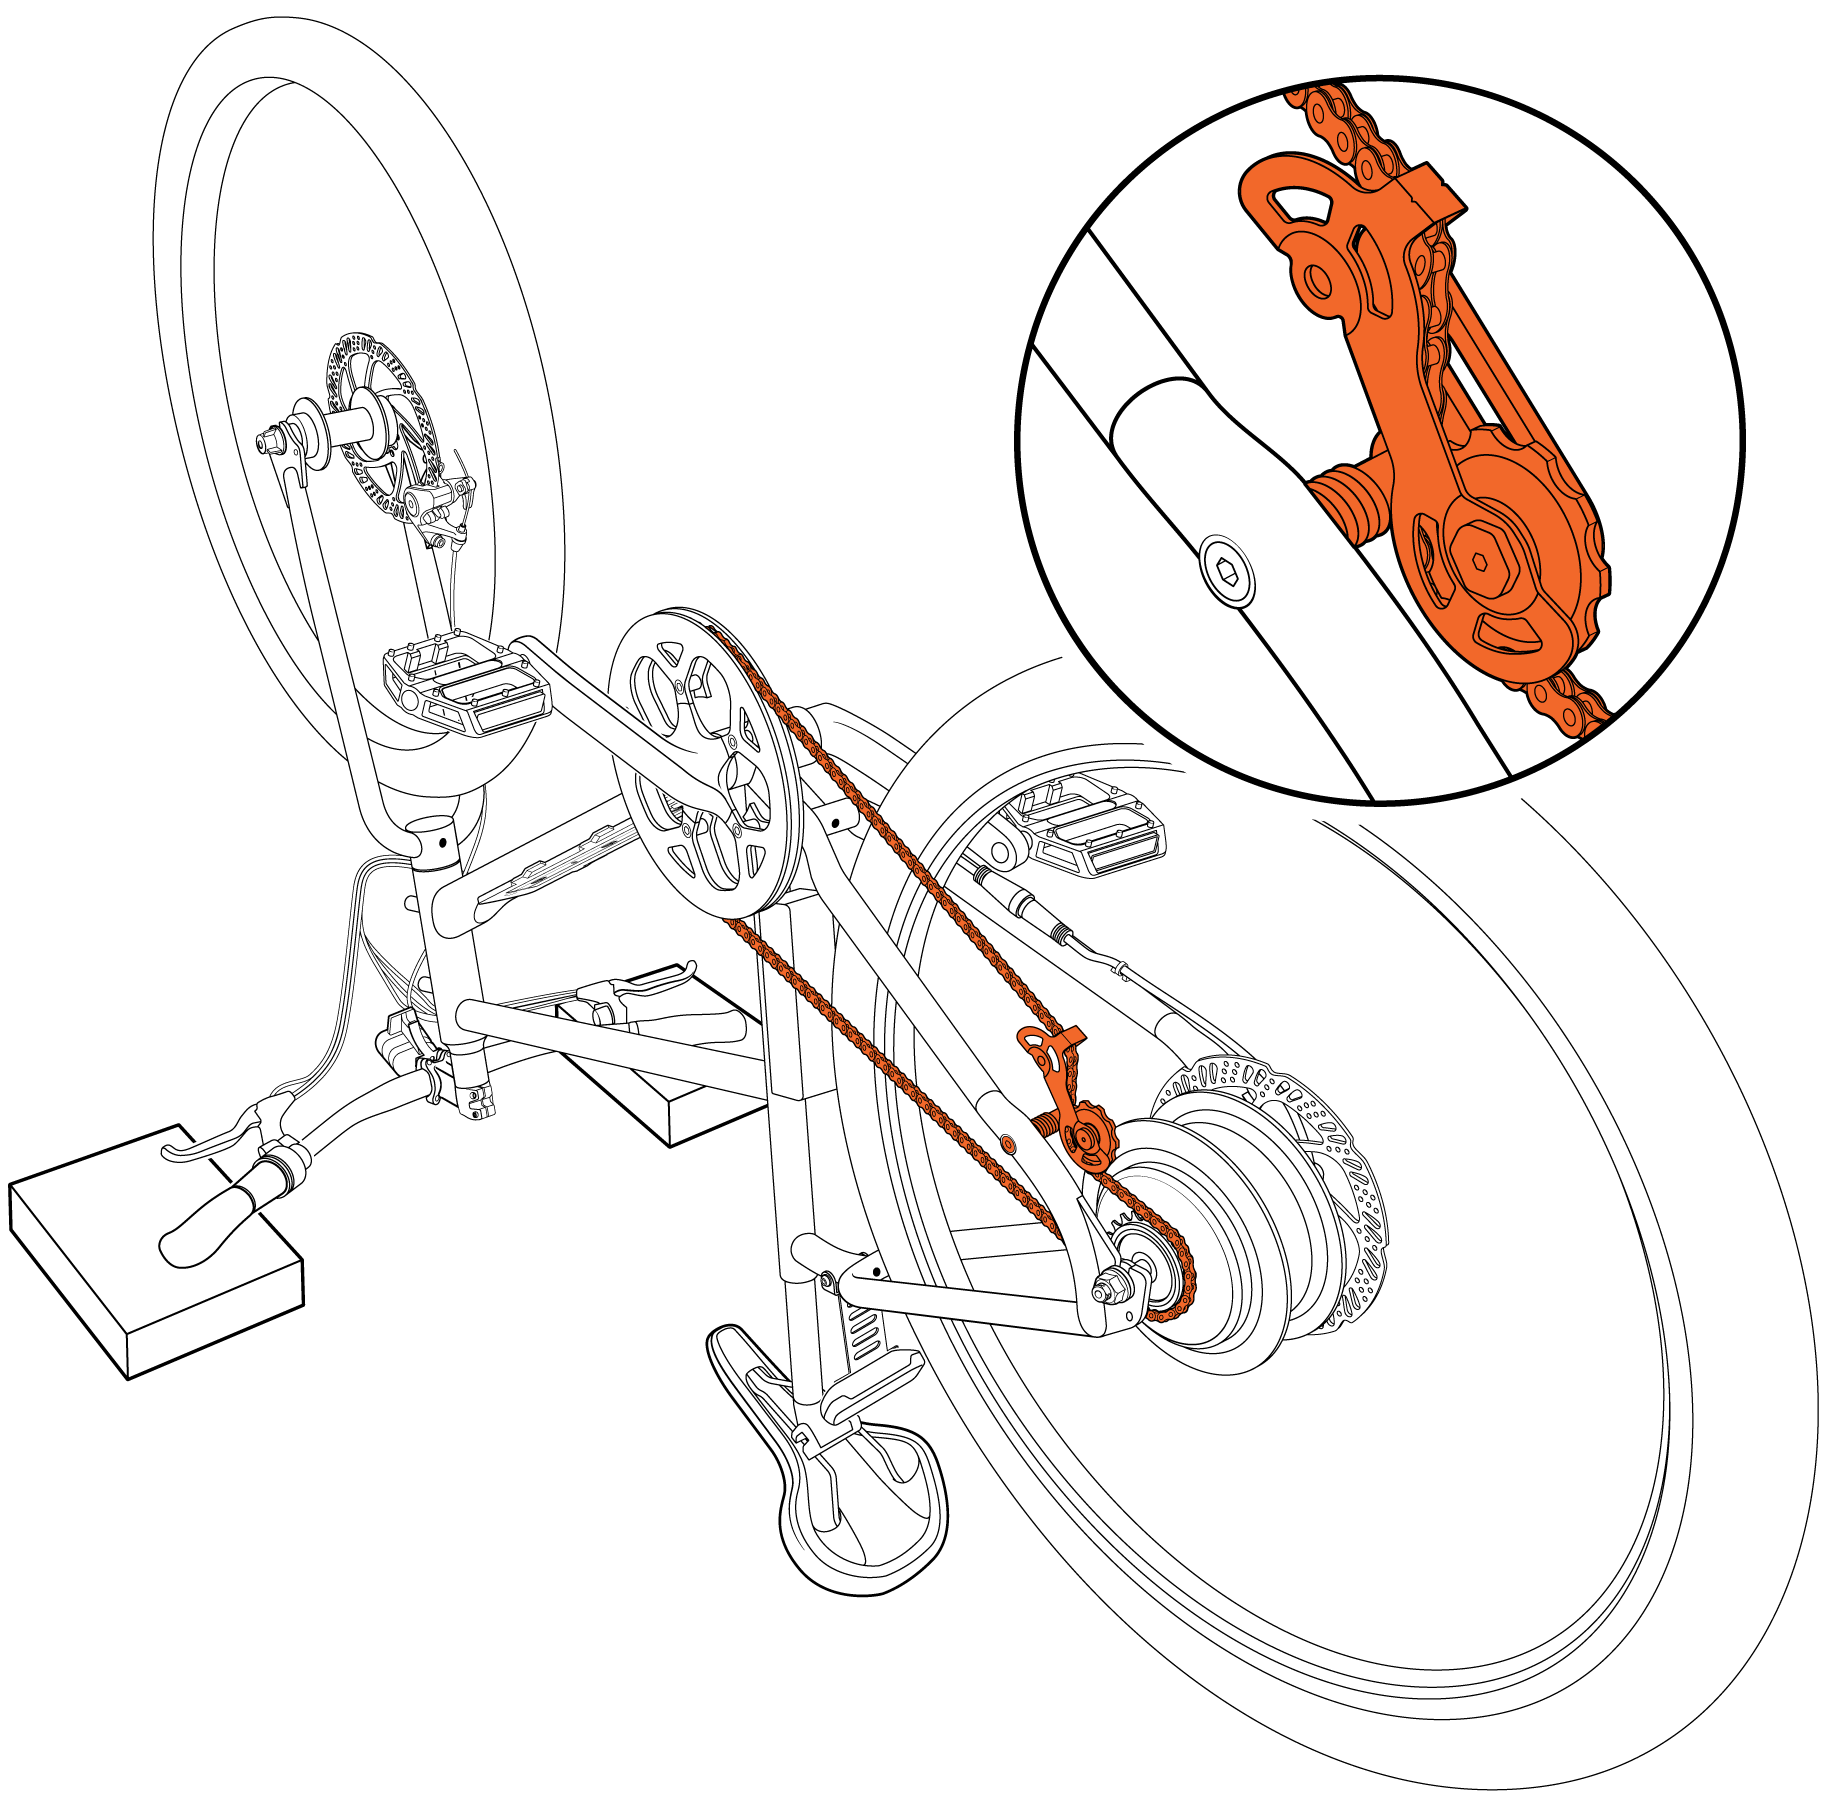
- Place the pulley wheel in position, making sure the metal bushing has a washer on either side. Refer to the photo taken earlier, if needed. Thread in the bolt by hand and use a 2.5 mm Allen wrench to tighten the bolt securely. Torque to 5 Nm.
- Route the chain on the chain tensioner. Refer to the photo taken earlier to see the correct chain position.
- Rotate the crank toward the back of the bike to ensure the chain is properly routed on the front chainring and chain tensioner.
- Stand the bike upright, reinstall the battery, and test the bike fully before riding. Ride Rad!