RadRunner Rear Wheel Removal Guide
This guide will show you how to remove and reinstall the rear wheel on a RadRunner. This guide uses a RadRunner 1, but the steps will be similar for a RadRunner Plus.
Tools Needed:
- Wooden blocks to prop up the bike
- Flat side cutters
- 4 mm Allen wrench
- 18 mm wrench
- A torque wrench with a 4 mm Allen bit
- A few zip ties
- Nitrile gloves (optional)
Follow the instructions below to remove and reinstall the rear wheel.
Remove the Wheel
- Get the bike ready for maintenance. Turn off the bike, remove the battery, and press and hold power (if your RadRunner has the LCD display upgrade, press and hold MODE on the remote) to discharge remaining power. The display may flash on briefly.
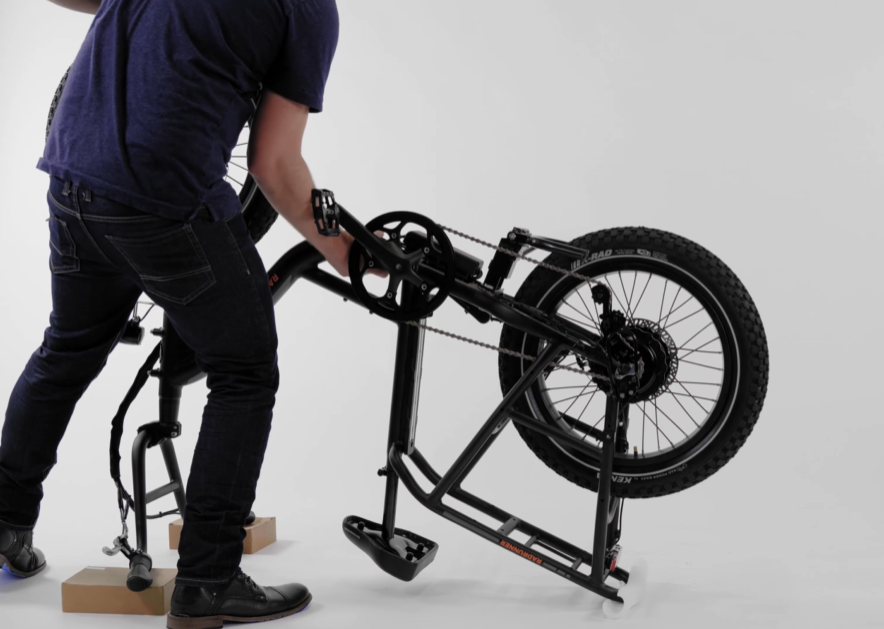
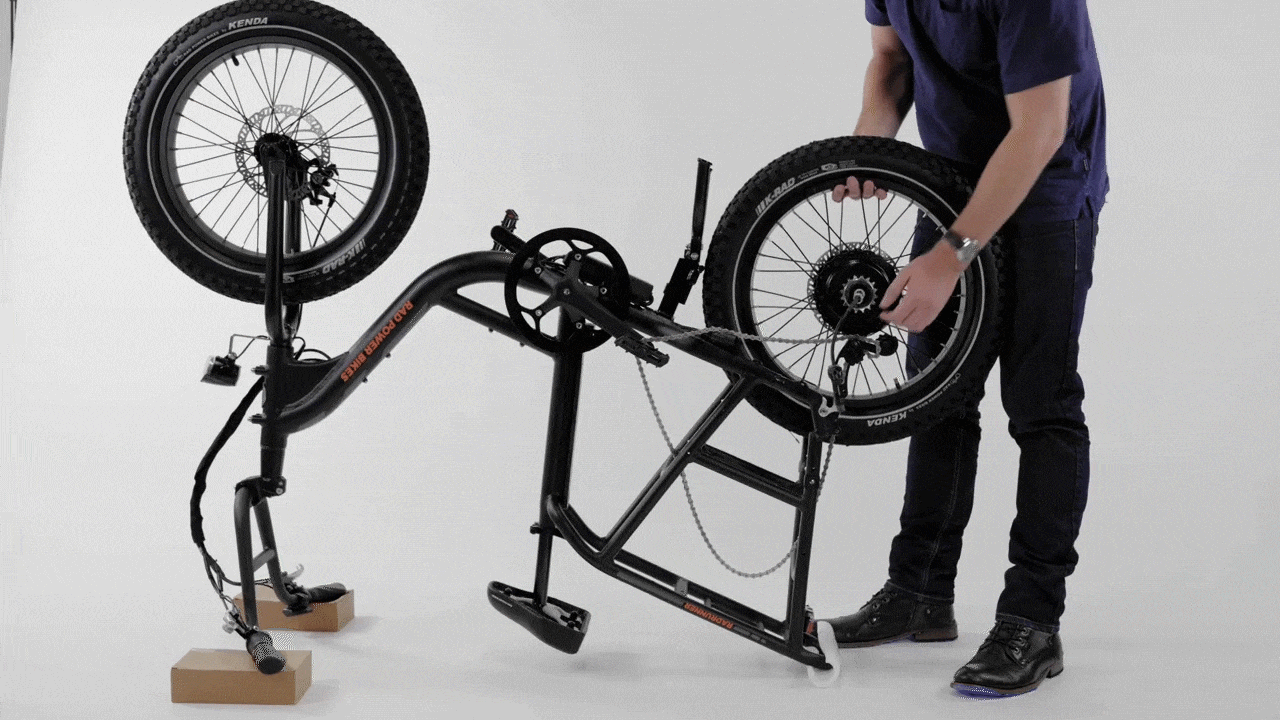
- Flip over the bike. Set the handlebar grips on the blocks to protect the display from damage while performing maintenance.
- Locate and unplug the motor cable. The motor cable is located by the chainstay. Snip zip ties as needed and pull the connector directly apart, without twisting, to unplug.
- Remove the bashguard. Use a 4 mm Allen wrench to remove the bashguard mounting bolts and set the bashguard and the hardware aside.
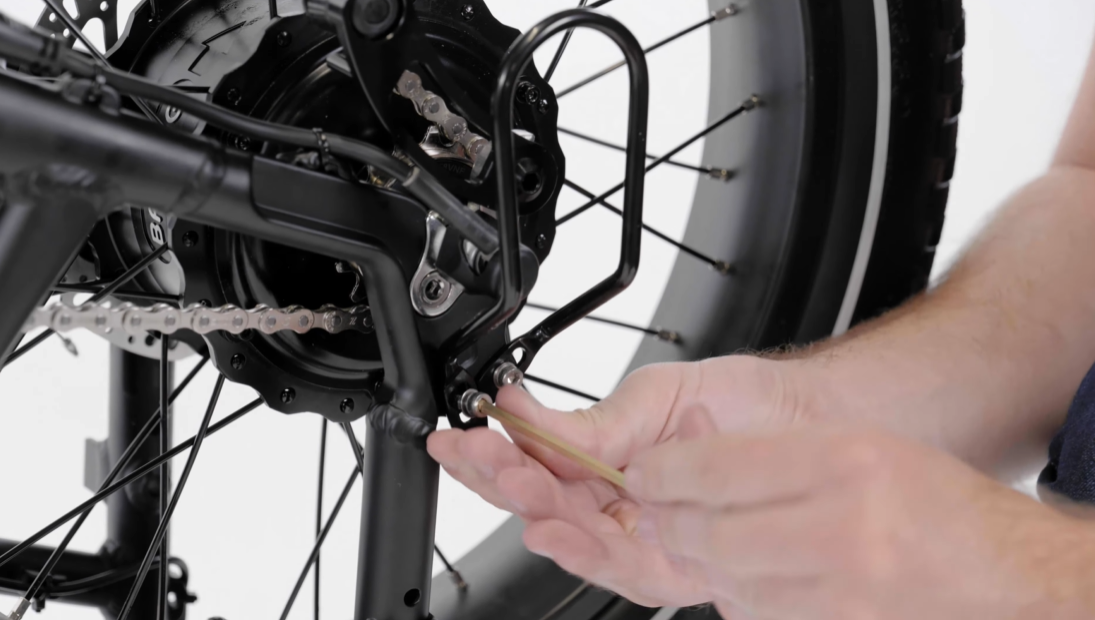
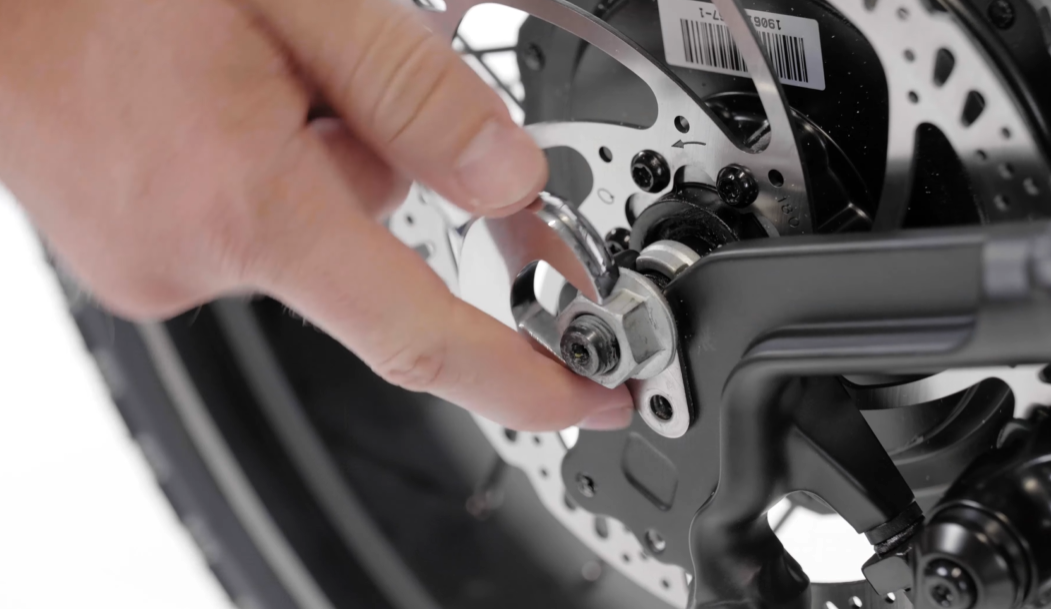
- Remove the torque arm bolt. Use a 4 mm Allen wrench to remove the torque arm bolt and washers.
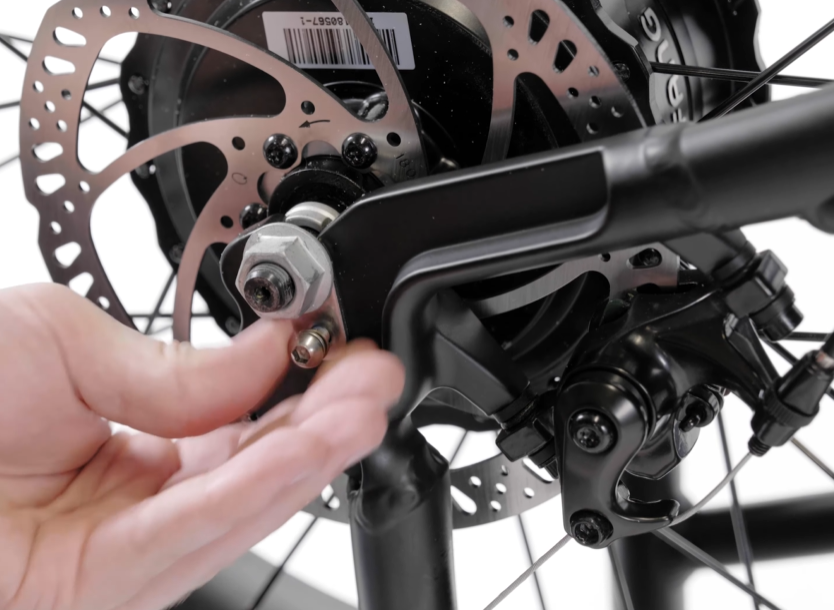
- Loosen the axle nuts. Use an 18 mm wrench to loosen (but not remove) the axle nuts just enough so the wheel can be removed. Do not remove the axle nut or washers completely because the orientation of the hardware is very important for safety. Take a photo of the orientation of the washers on the motor axle for reinstallation.
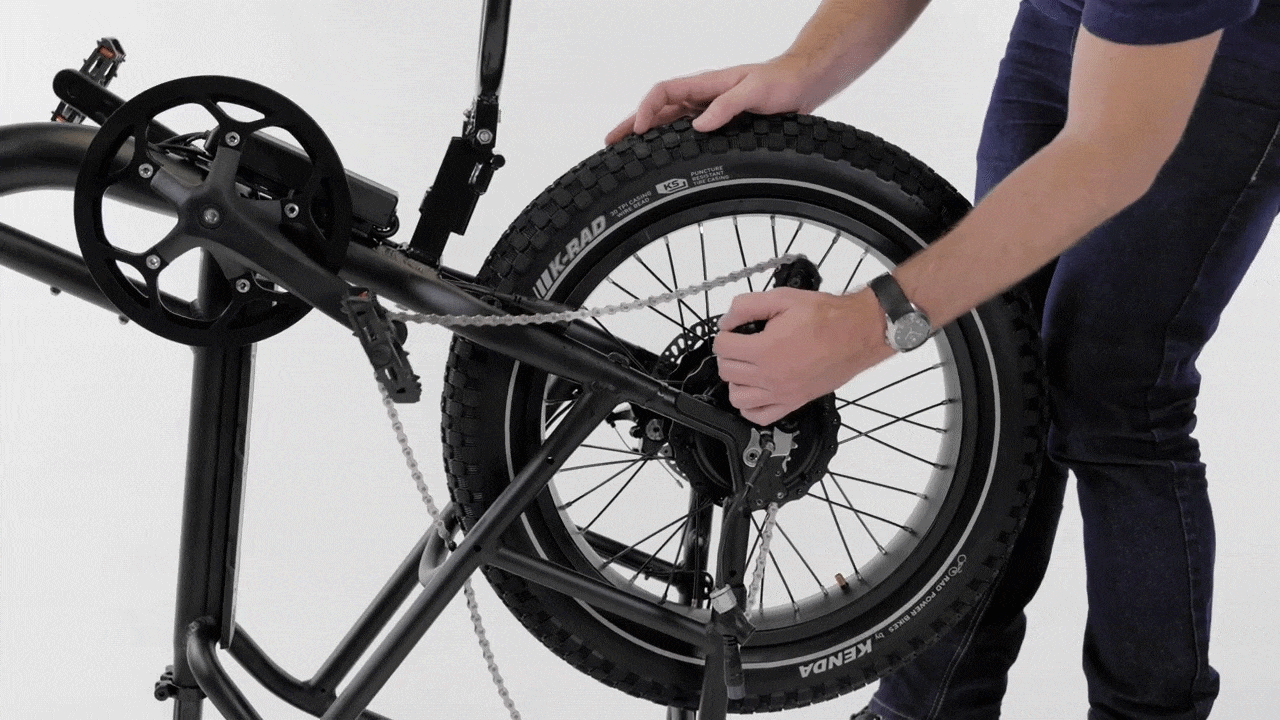
- Drop the chain off the chainring, pull the chain tensioner body toward the back of the bike, and remove the wheel. If the rear wheel is difficult to remove, stabilize the bike and rock the wheel side to side while lifting. Lift the chain off of the cog. Be sure not to touch the brake rotor with bare hands.
- Perform necessary maintenance. Once the rear wheel is removed, change the tube or tire, swap in a new wheel, etc.
Reinstall the Wheel
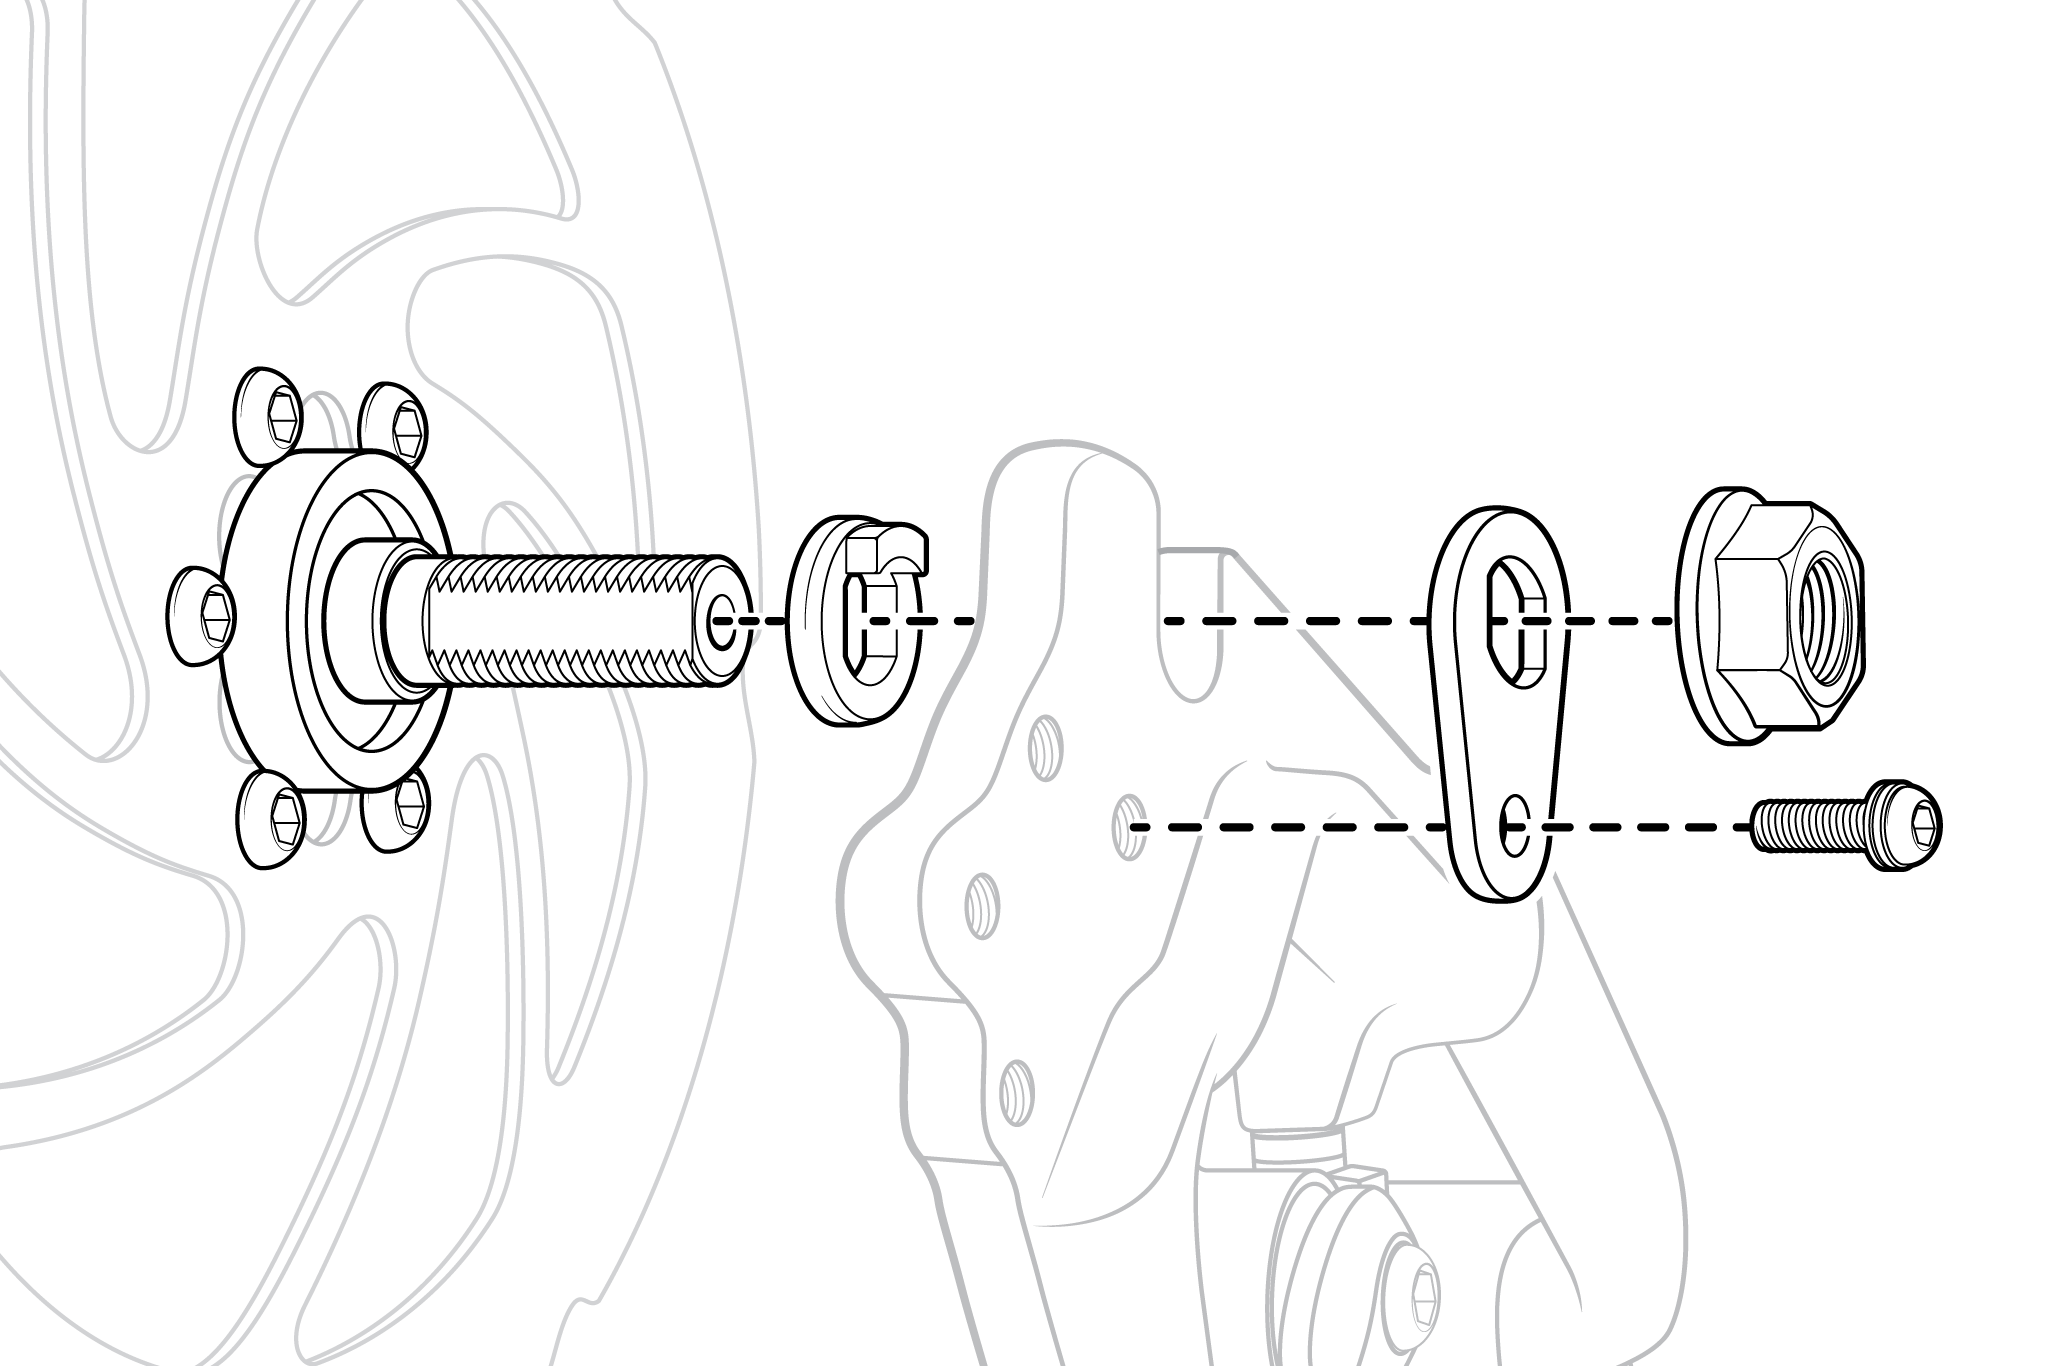
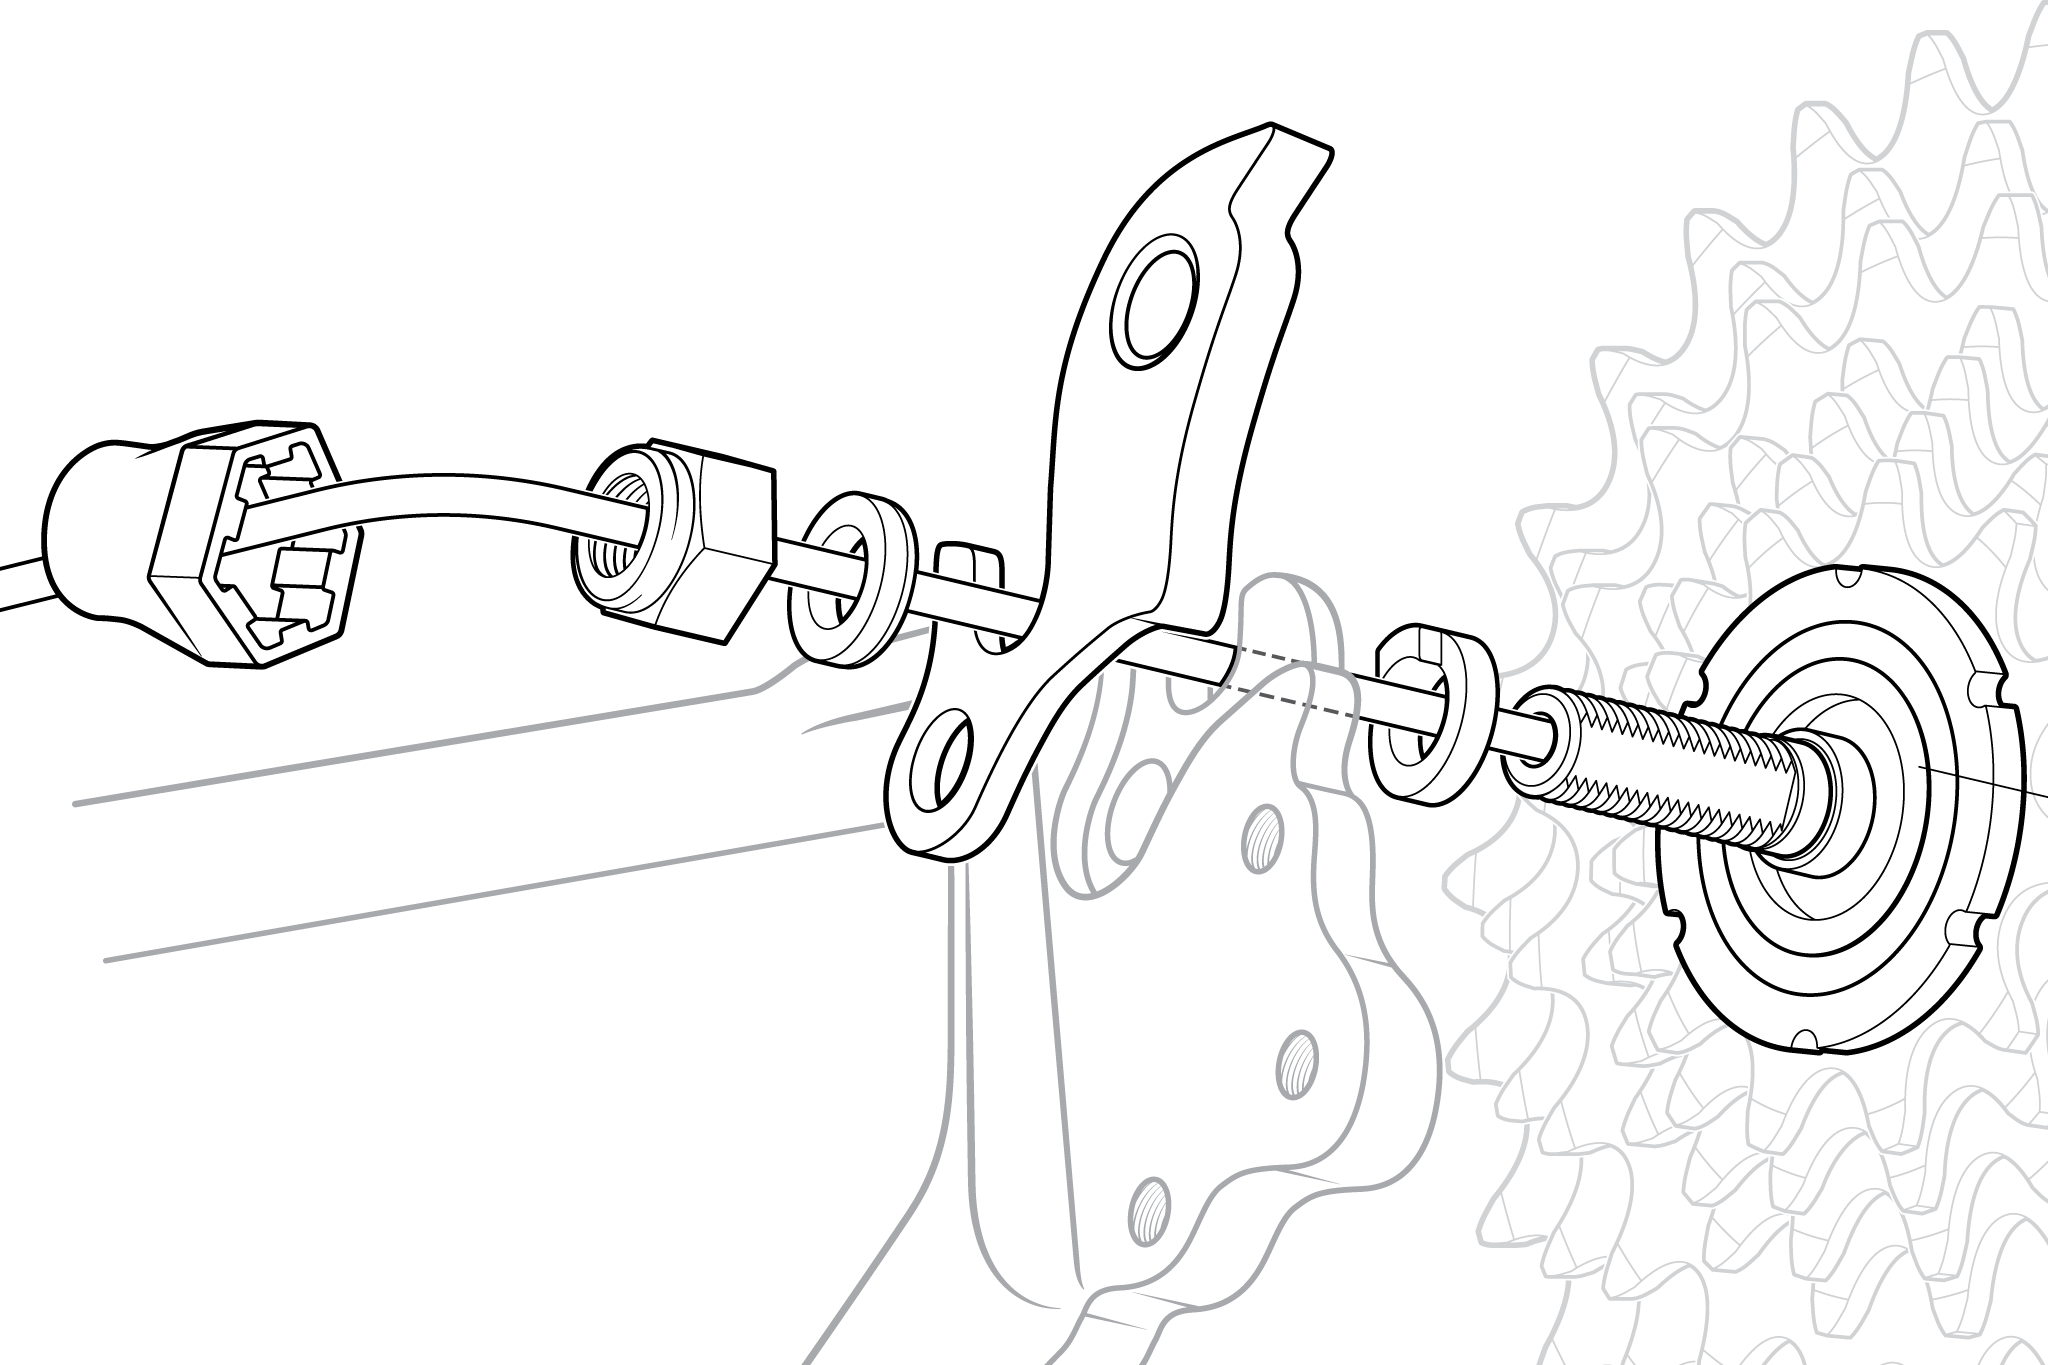
- Ensure all hardware is ready to be installed in the correct order. Refer to the images below, which apply to most models, or the photo taken in a previous step.
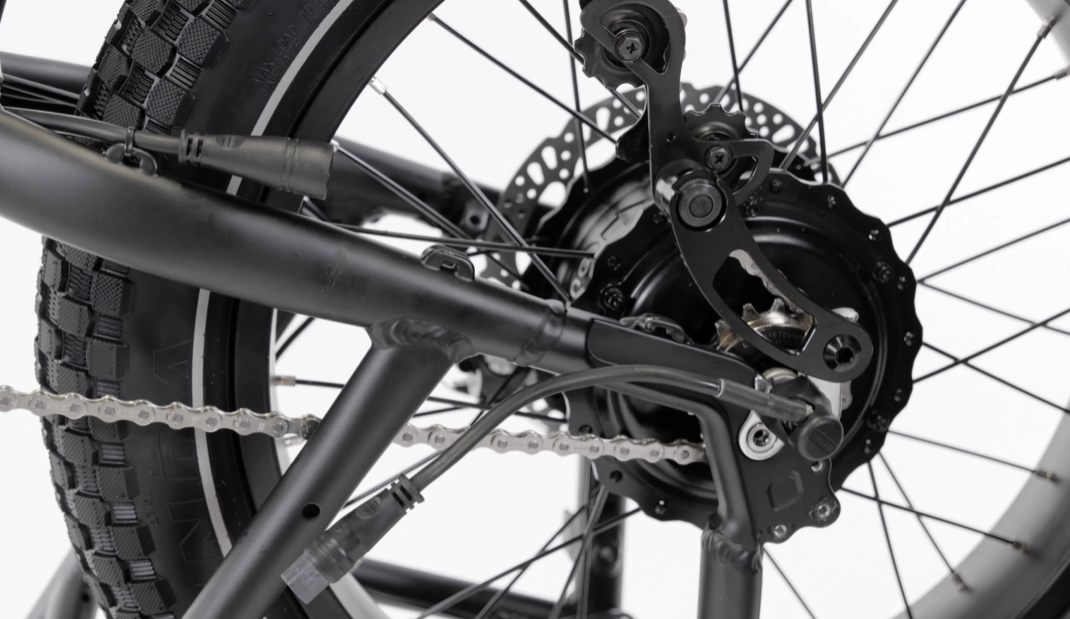
Brake rotor side of the wheel:
Chain tensioner side of the wheel:
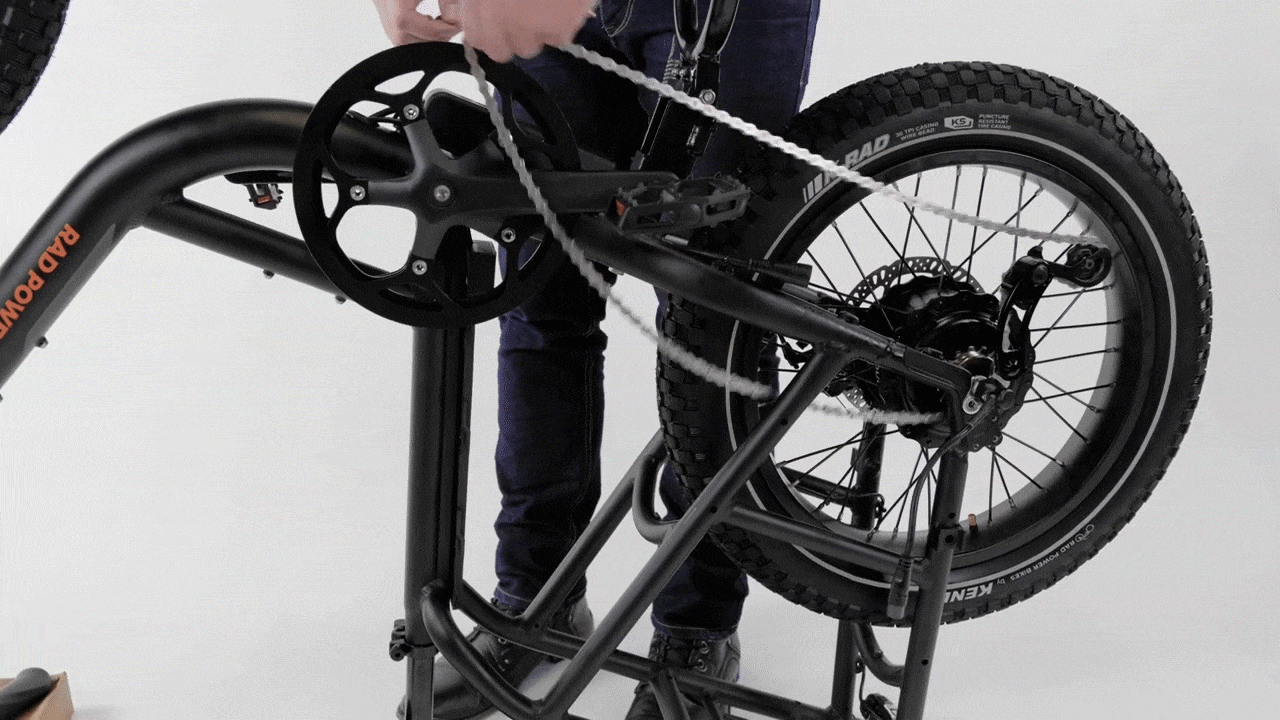
- Reinstall the wheel. Pull back on the chain tensioner body and route the chain onto the cog, then place the wheel in the dropouts.
- Check that the torque washer is in the correct position and the brake rotor is in position. Use the photo taken for reference, if needed. The brake rotor should slide between the brake pads in the brake caliper. If there is a gap between the axle and the dropout, use a 10 mm wrench to carefully turn the axle to line up the flat sides with the sides of the dropouts (as shown in the video), and adjust the wheel so it is fully seated in the dropouts.
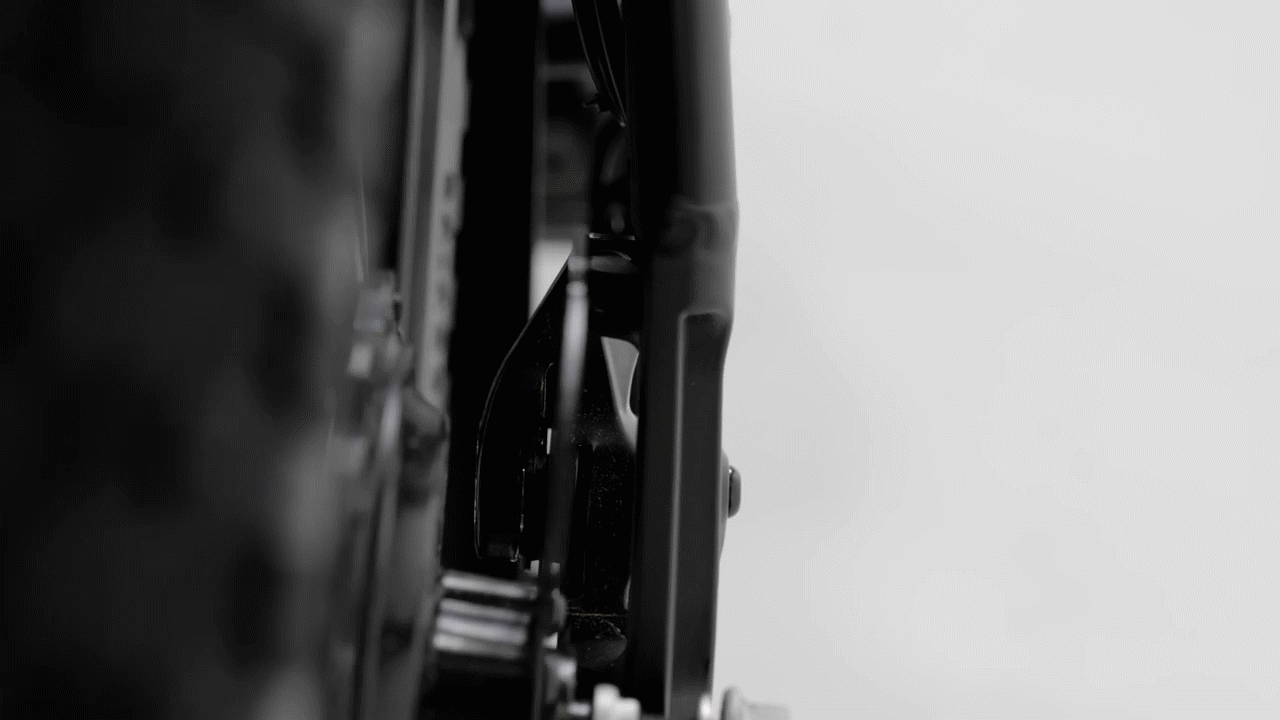
- Install the torque arm bolt. On the brake rotor side, install the torque arm bolt and use a 4 mm Allen wrench torque the bolt to 2-3 Nm.
- Tighten the axle nuts. Tighten the axle nut on the brake rotor side first, then check that the chain tensioner side is still in place in the dropout. Use an 18 mm wrench to torque both axle nuts to 40 Nm.
- Reinstall the chain on the chainring. Push the chain tensioner forward and route the chain onto the chainring.
- Plug in the motor connector. Line up the internal notches and pins (and external arrows), and press each side directly together, without twisting, to reconnect. Replace the zip tie and trim it to be flush and smooth.
- Reinstall the bashguard. Tighten the bolts securely.
- Reinstall the battery and test the bike fully before riding.
If you are not confident in your ability to successfully and safely perform all steps, we recommend having the work performed or checked by a local, certified, and reputable bike mechanic.