Adjusting Noisy or Rubbing Brakes
With a brand new bike, a small amount of brake rubbing and noise can occur during the break-in period. Rubbing and noise will usually resolve itself over time with normal brake use.
Brake Noise During the Break-in Period:
If the wheel spins freely (or mostly free) and makes no (or barely any) contact between the brake rotor and pads, we recommend putting around 25-50 miles on the bike to allow time for the pads and rotors to break in before making the first adjustment.
Brake Noise After the Break-in Period:
If the brakes squeak or rub after the 25-50 mile break-in period, you may need to increase the spacing between the brake rotor and the brake pads.
Follow the steps below to adjust your brakes, if needed.
If you are not confident in your ability to successfully and safely perform all steps, we recommend having the work performed or checked by a local, certified, and reputable bike mechanic.
You will need:
- A 5 mm Allen wrench
- A torque wrench with a 5 mm Allen bit
- The rear brake inner pad adjustment tool from Rad Power Bikes (for 2019 and earlier RadWagon models. Contact us to order the tool, if needed)
- Get the bike ready for maintenance. Turn off the bike, remove the battery, and press and hold MODE (or the power button) to discharge remaining power.
- Spin the wheel to check if it spins freely. If the wheel does not spin freely, the brakes are likely too tight and the brake pad should be adjusted using the instructions in this article.
- Prop the bike on the kickstand or tilt the bike so the front or rear wheel is off the ground.
- Spin the wheel and check for clearance between the brake pads and brake rotor.
- Check the condition of the brake rotor. If the rotor wobbles at the caliper, or if the rotor is damaged, it may need to be replaced. Contact us for more help.
Never touch the brake rotor, especially while the wheel is in motion. Touching the brake rotor while it is moving can cause serious injury, can reduce brake performance, and can cause squeaking.
- Use the brake lever to stop the wheel. Squeeze the left brake lever if testing the front brake and right brake lever if testing the rear brake.
- Repeat with the other wheel to see if it spins freely. Make note of which brake needs to be adjusted.
- Center the caliper. This will help ensure the caliper is in the correct position and that the inner pad adjustment dial is set to the optimal position.
- Loosen the cable pinch bolt at the caliper and let more cable through. Use a 5 mm Allen wrench to loosen (but not remove) the cable pinch bolt just enough to allow the brake cable to slide through the bolt.
- Tighten the cable pinch bolt to secure the cable, and torque to 5 Nm.
- Loosen the caliper. Use a 5 mm Allen wrench to loosen (but not remove) the two caliper mounting bolts.
- Tighten the inner pad adjustment dial. Use a 5 mm Allen wrench to turn the inner pad adjustment dial clockwise about 4 to 6 clicks to decrease the space between the inner pad and the brake rotor.
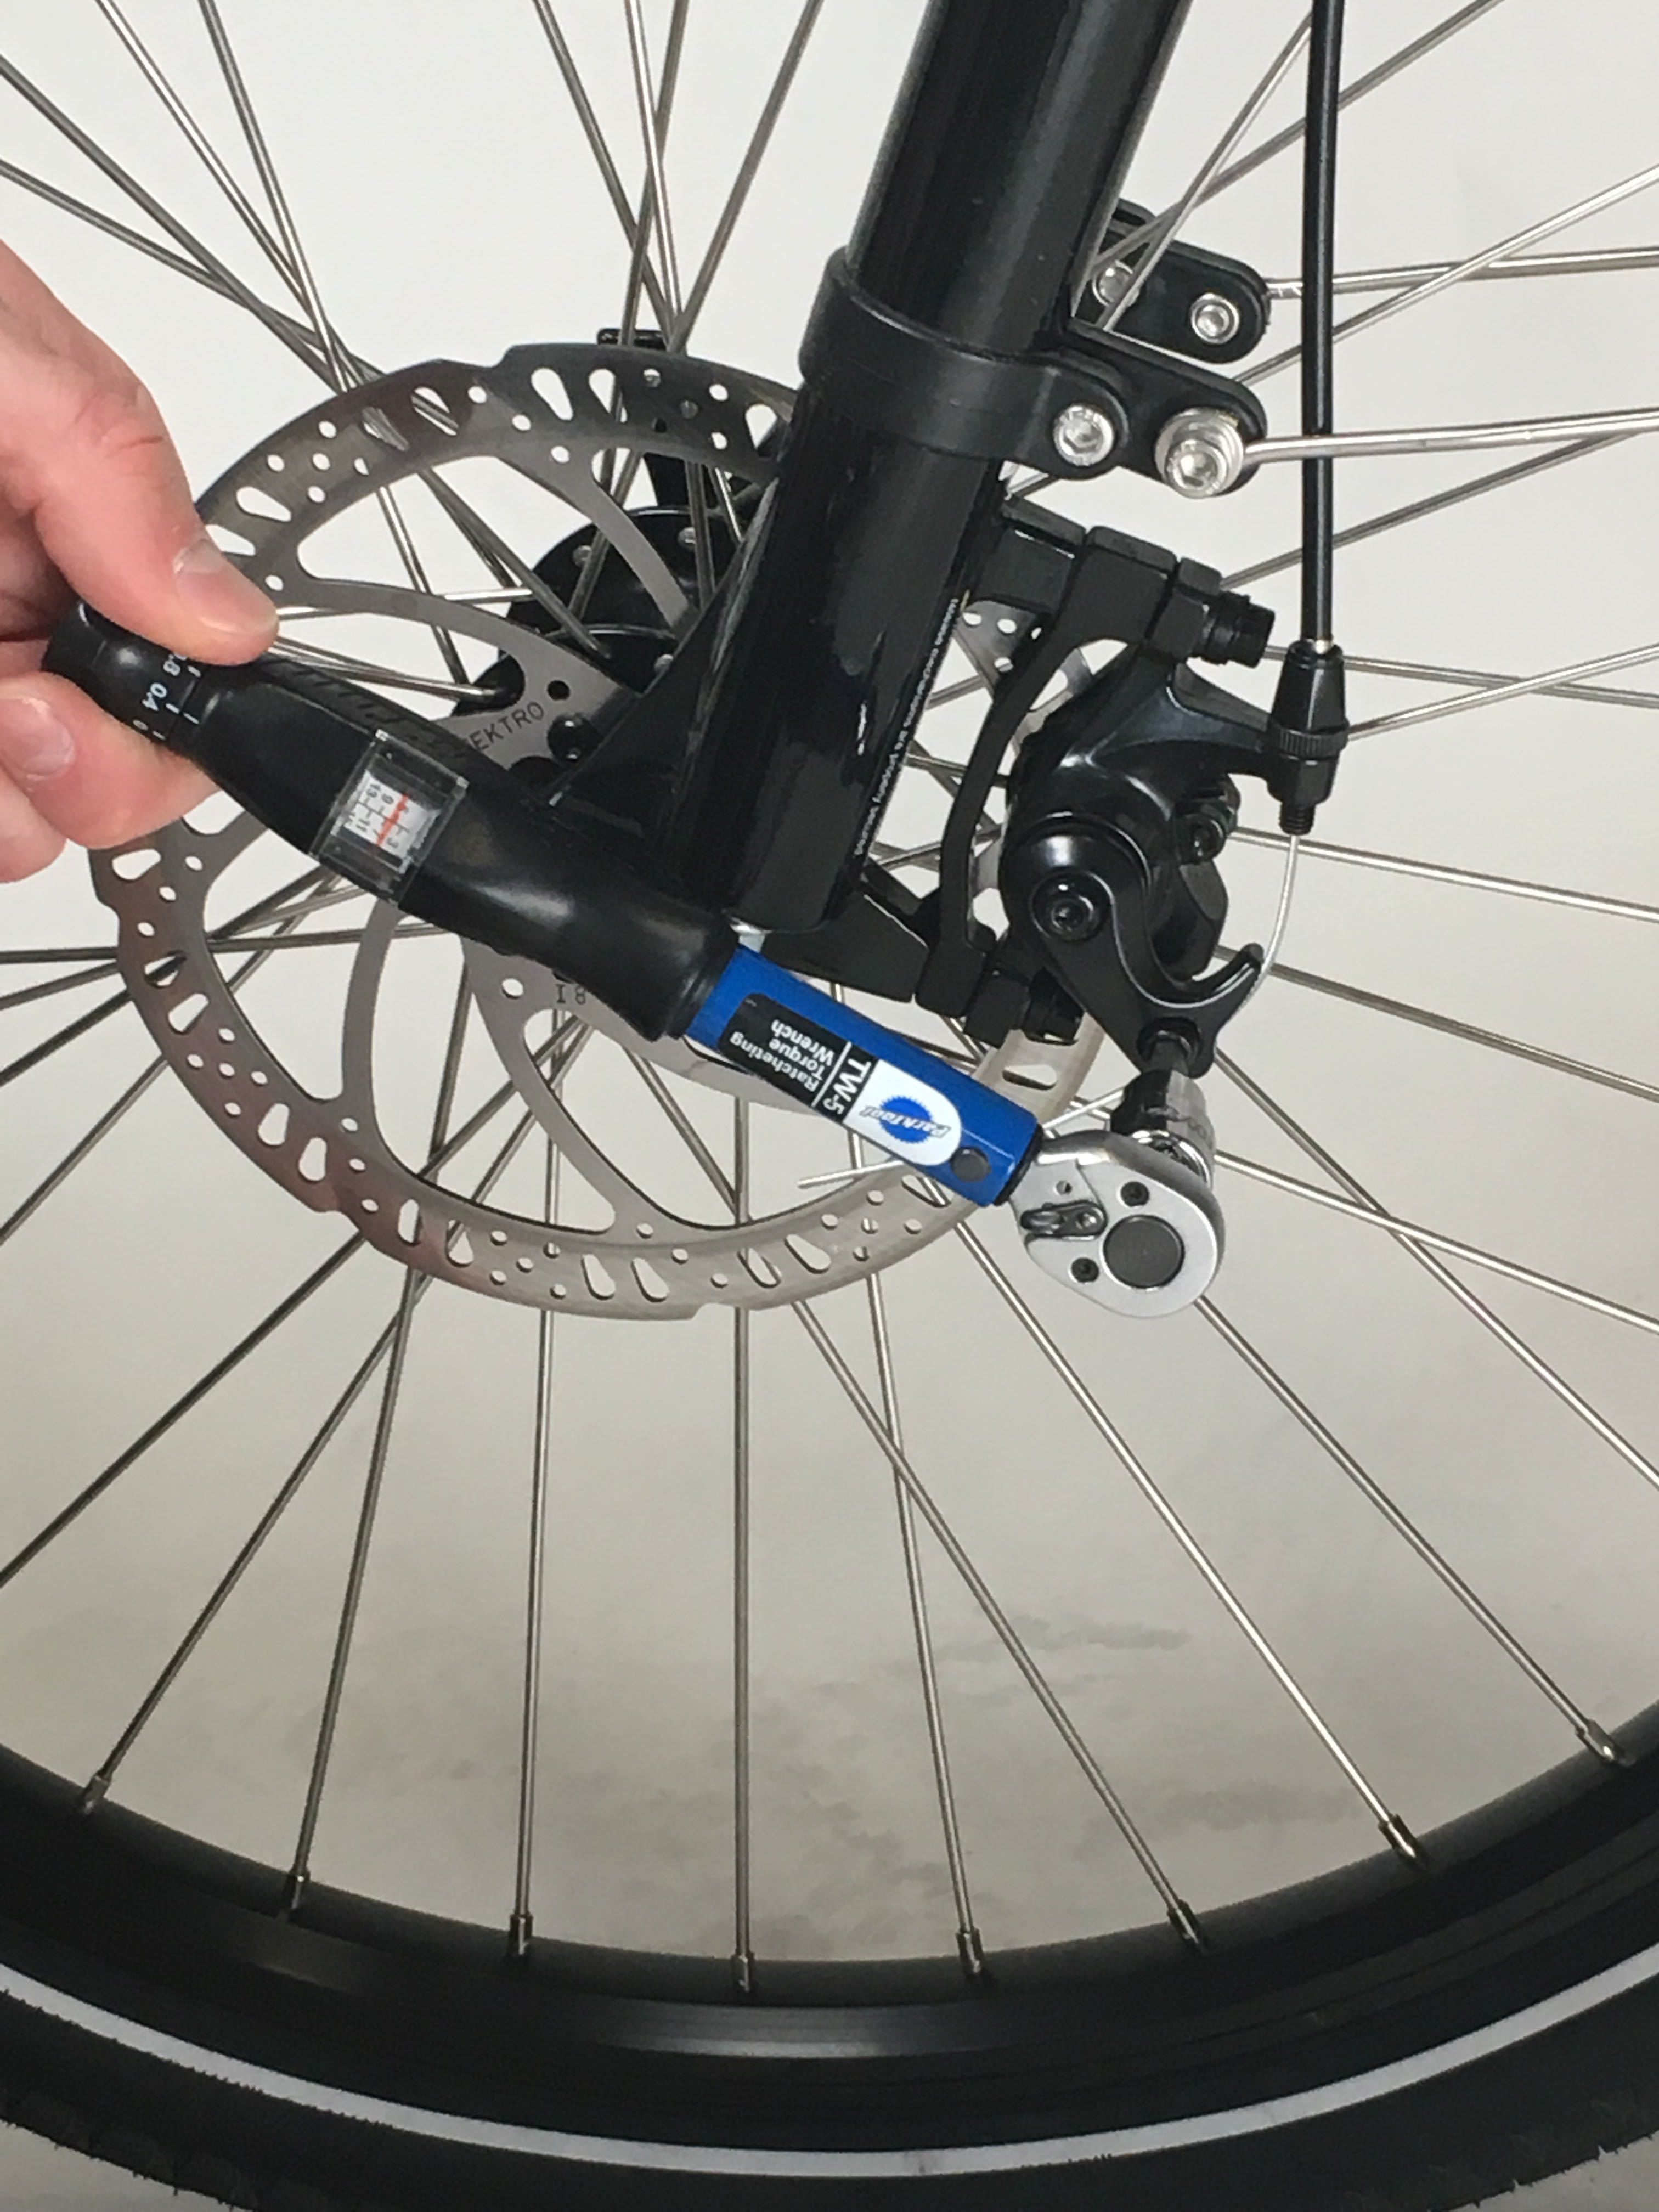
- Center and secure the caliper. Squeeze and hold the brake lever that corresponds to the loose caliper. At the same time, tighten both caliper mounting bolts evenly. Alternate between the bolts 1/4 turn at a time, and torque both bolts to 6-8 Nm.
- Use a 5 mm Allen wrench to loosen the cable pinch bolt. Gently push the brake caliper arm toward the back of the bike slightly and pull the brake cable downward so it is taut. Tighten the cable pinch bolt to secure the cable, and torque to 5 Nm.
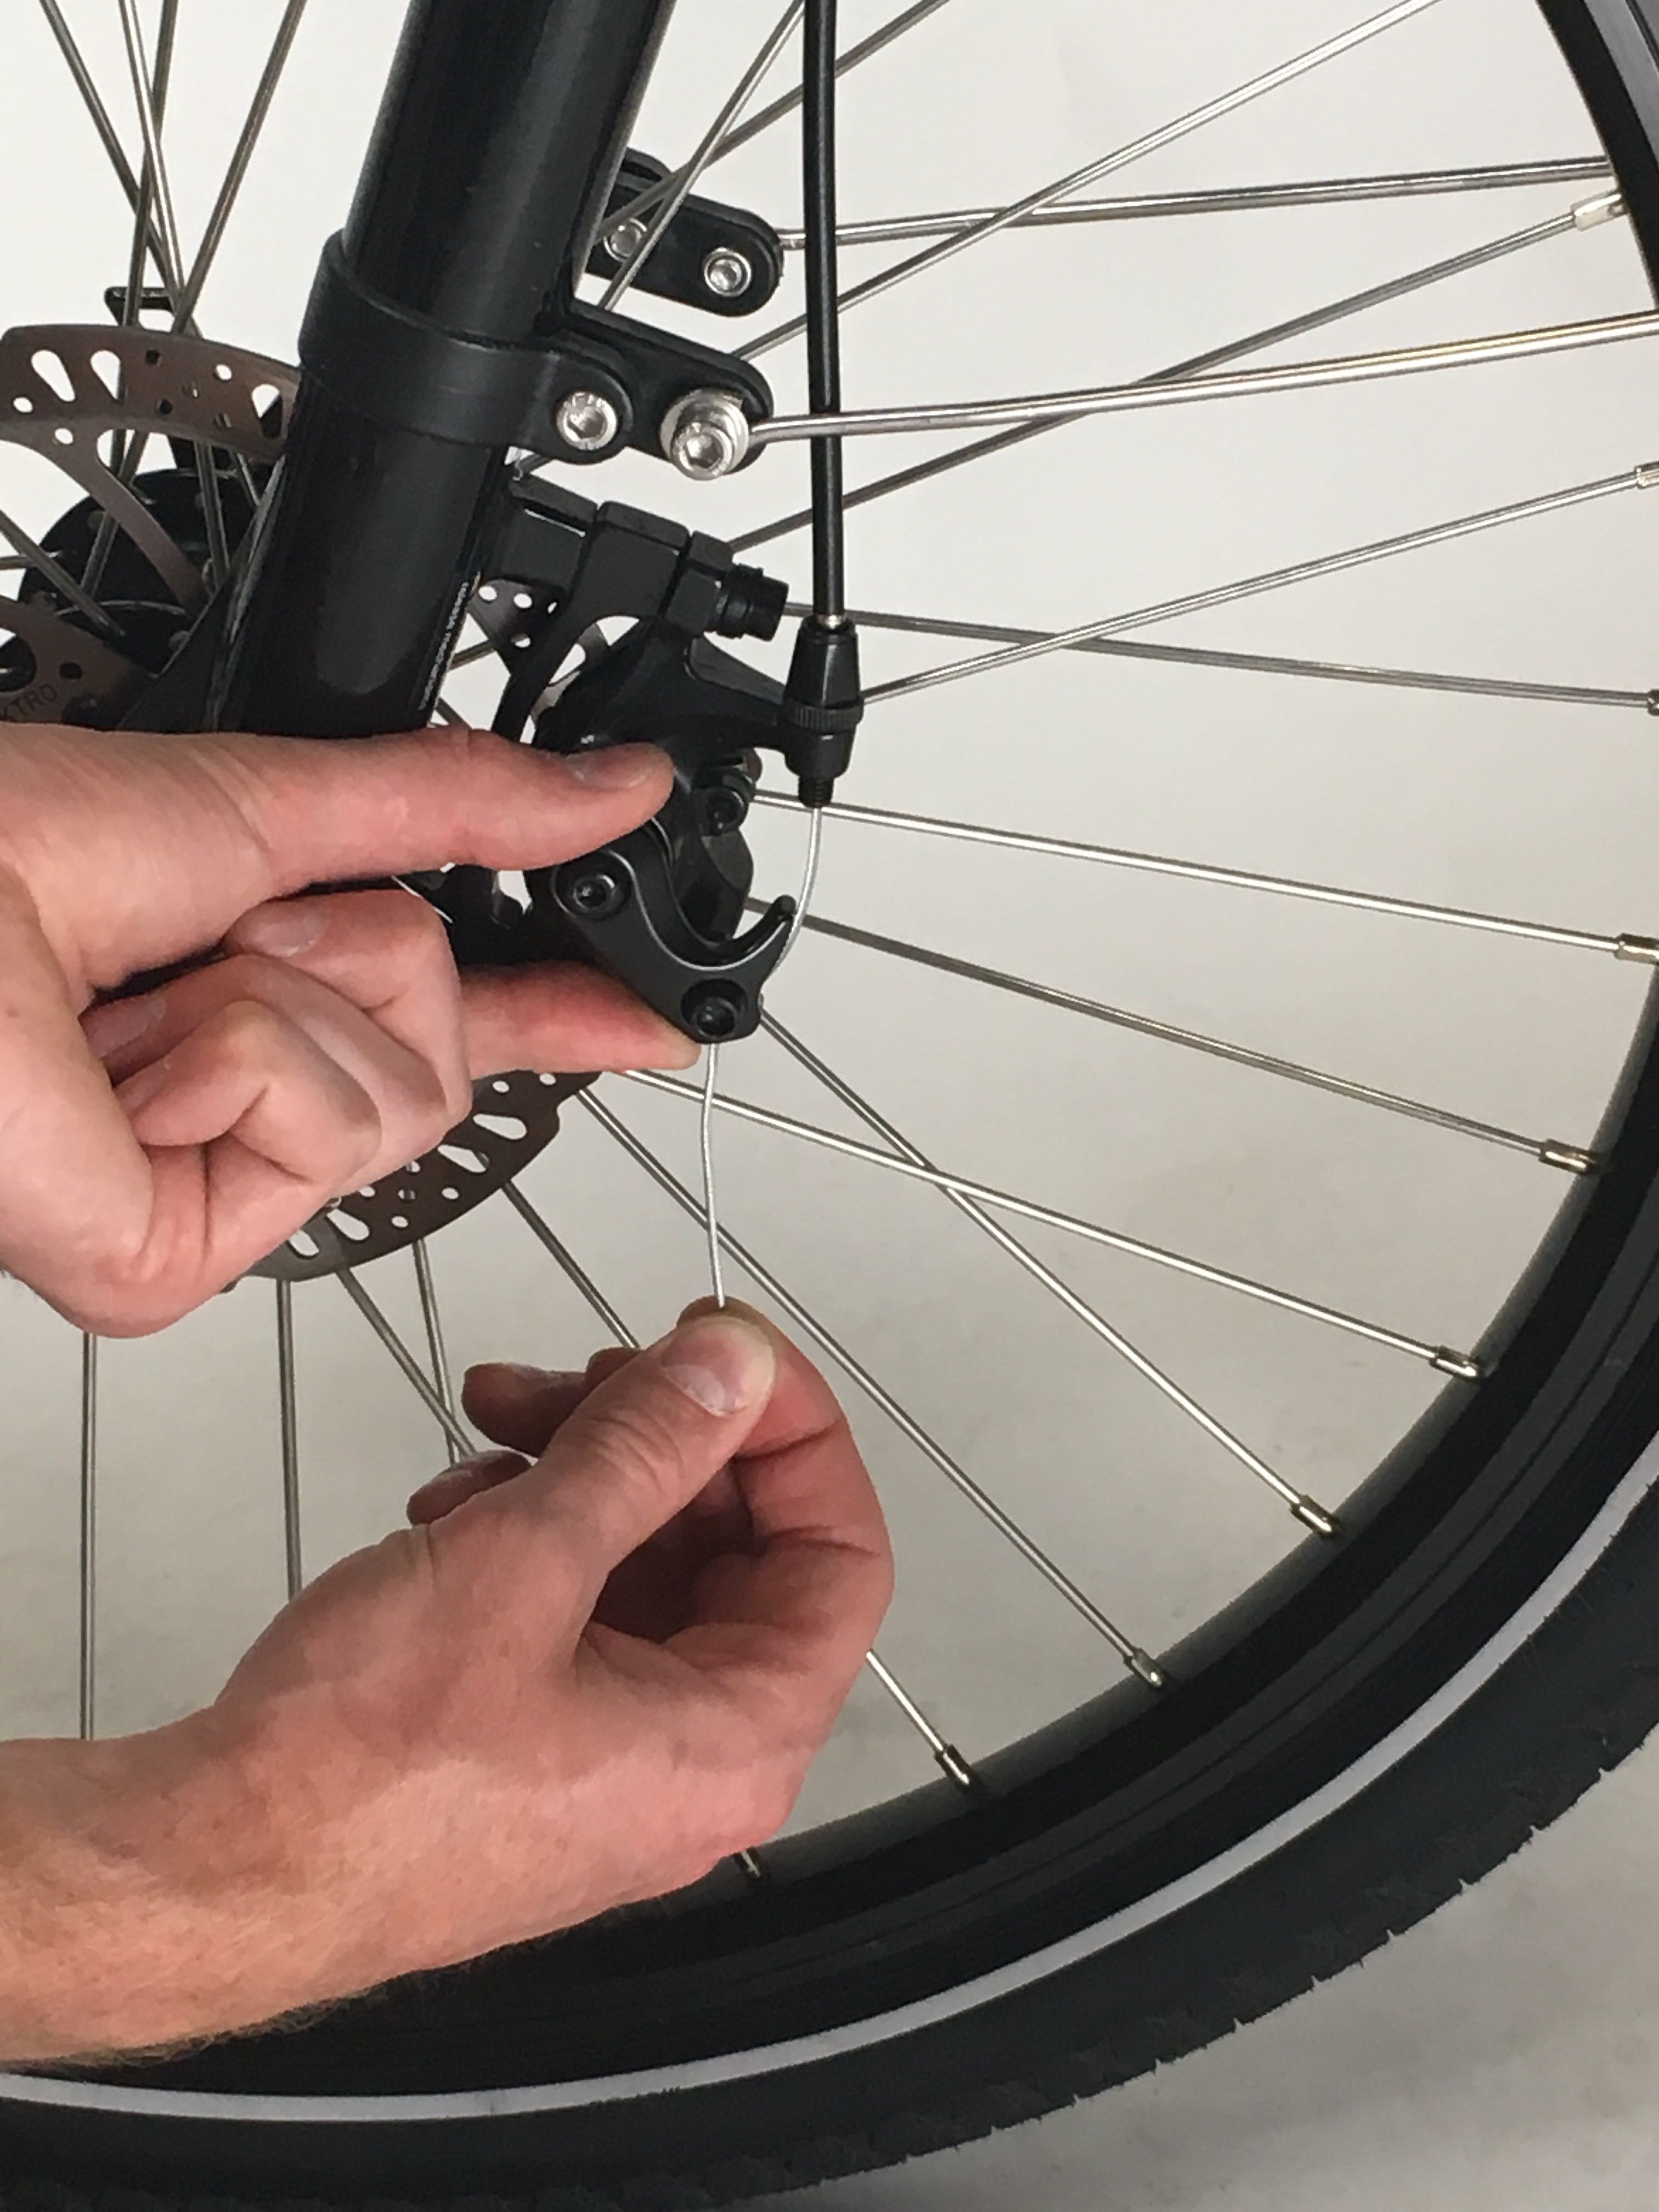
- Loosen the cable pinch bolt at the caliper and let more cable through. Use a 5 mm Allen wrench to loosen (but not remove) the cable pinch bolt just enough to allow the brake cable to slide through the bolt.
- Loosen the inner pad adjustment dial. Use a 5 mm Allen wrench to turn the inner pad adjustment dial counterclockwise 1 to 2 clicks to increase the space between the inner pad and the brake rotor.
Note: The inner pad adjustment dial at the front wheel is easily accessible by passing a 5 mm Allen wrench through the spokes and into the dial. Follow step 5 to access the inner pad adjustment dial at the rear wheel, which may require extra steps depending on model. - Adjust the rear inner brake pad, if needed.
- For bikes with a geared hub motor:
- At the rear wheel, near the wheel hub, pass a 5 mm Allen wrench through the spokes and into the inner pad adjustment dial.
- Turn the tool counterclockwise 1 to 2 clicks to increase the space between the inner pad and the brake rotor.
- For bikes with a direct drive motor (RadCity, RadCity Step-Thru, and RadWagon models through 2019):
- Locate the inner pad adjustment tool or a 5 mm Allen wrench. Starting in 2020, new models will ship with the inner pad adjustment tool in the assembly toolkit. To get an inner pad adjustment tool, if needed, please contact our Product Support team using the method linked HERE. The inner pad adjustment tool makes the inner brake pad adjustment much easier. If you have a 2019 or earlier RadCity, RadCity Step-Thru, or RadWagon model, don't have the tool, and want to adjust your rear brake as soon as possible, you can do so with a 5 mm Allen wrench following the instructions below.
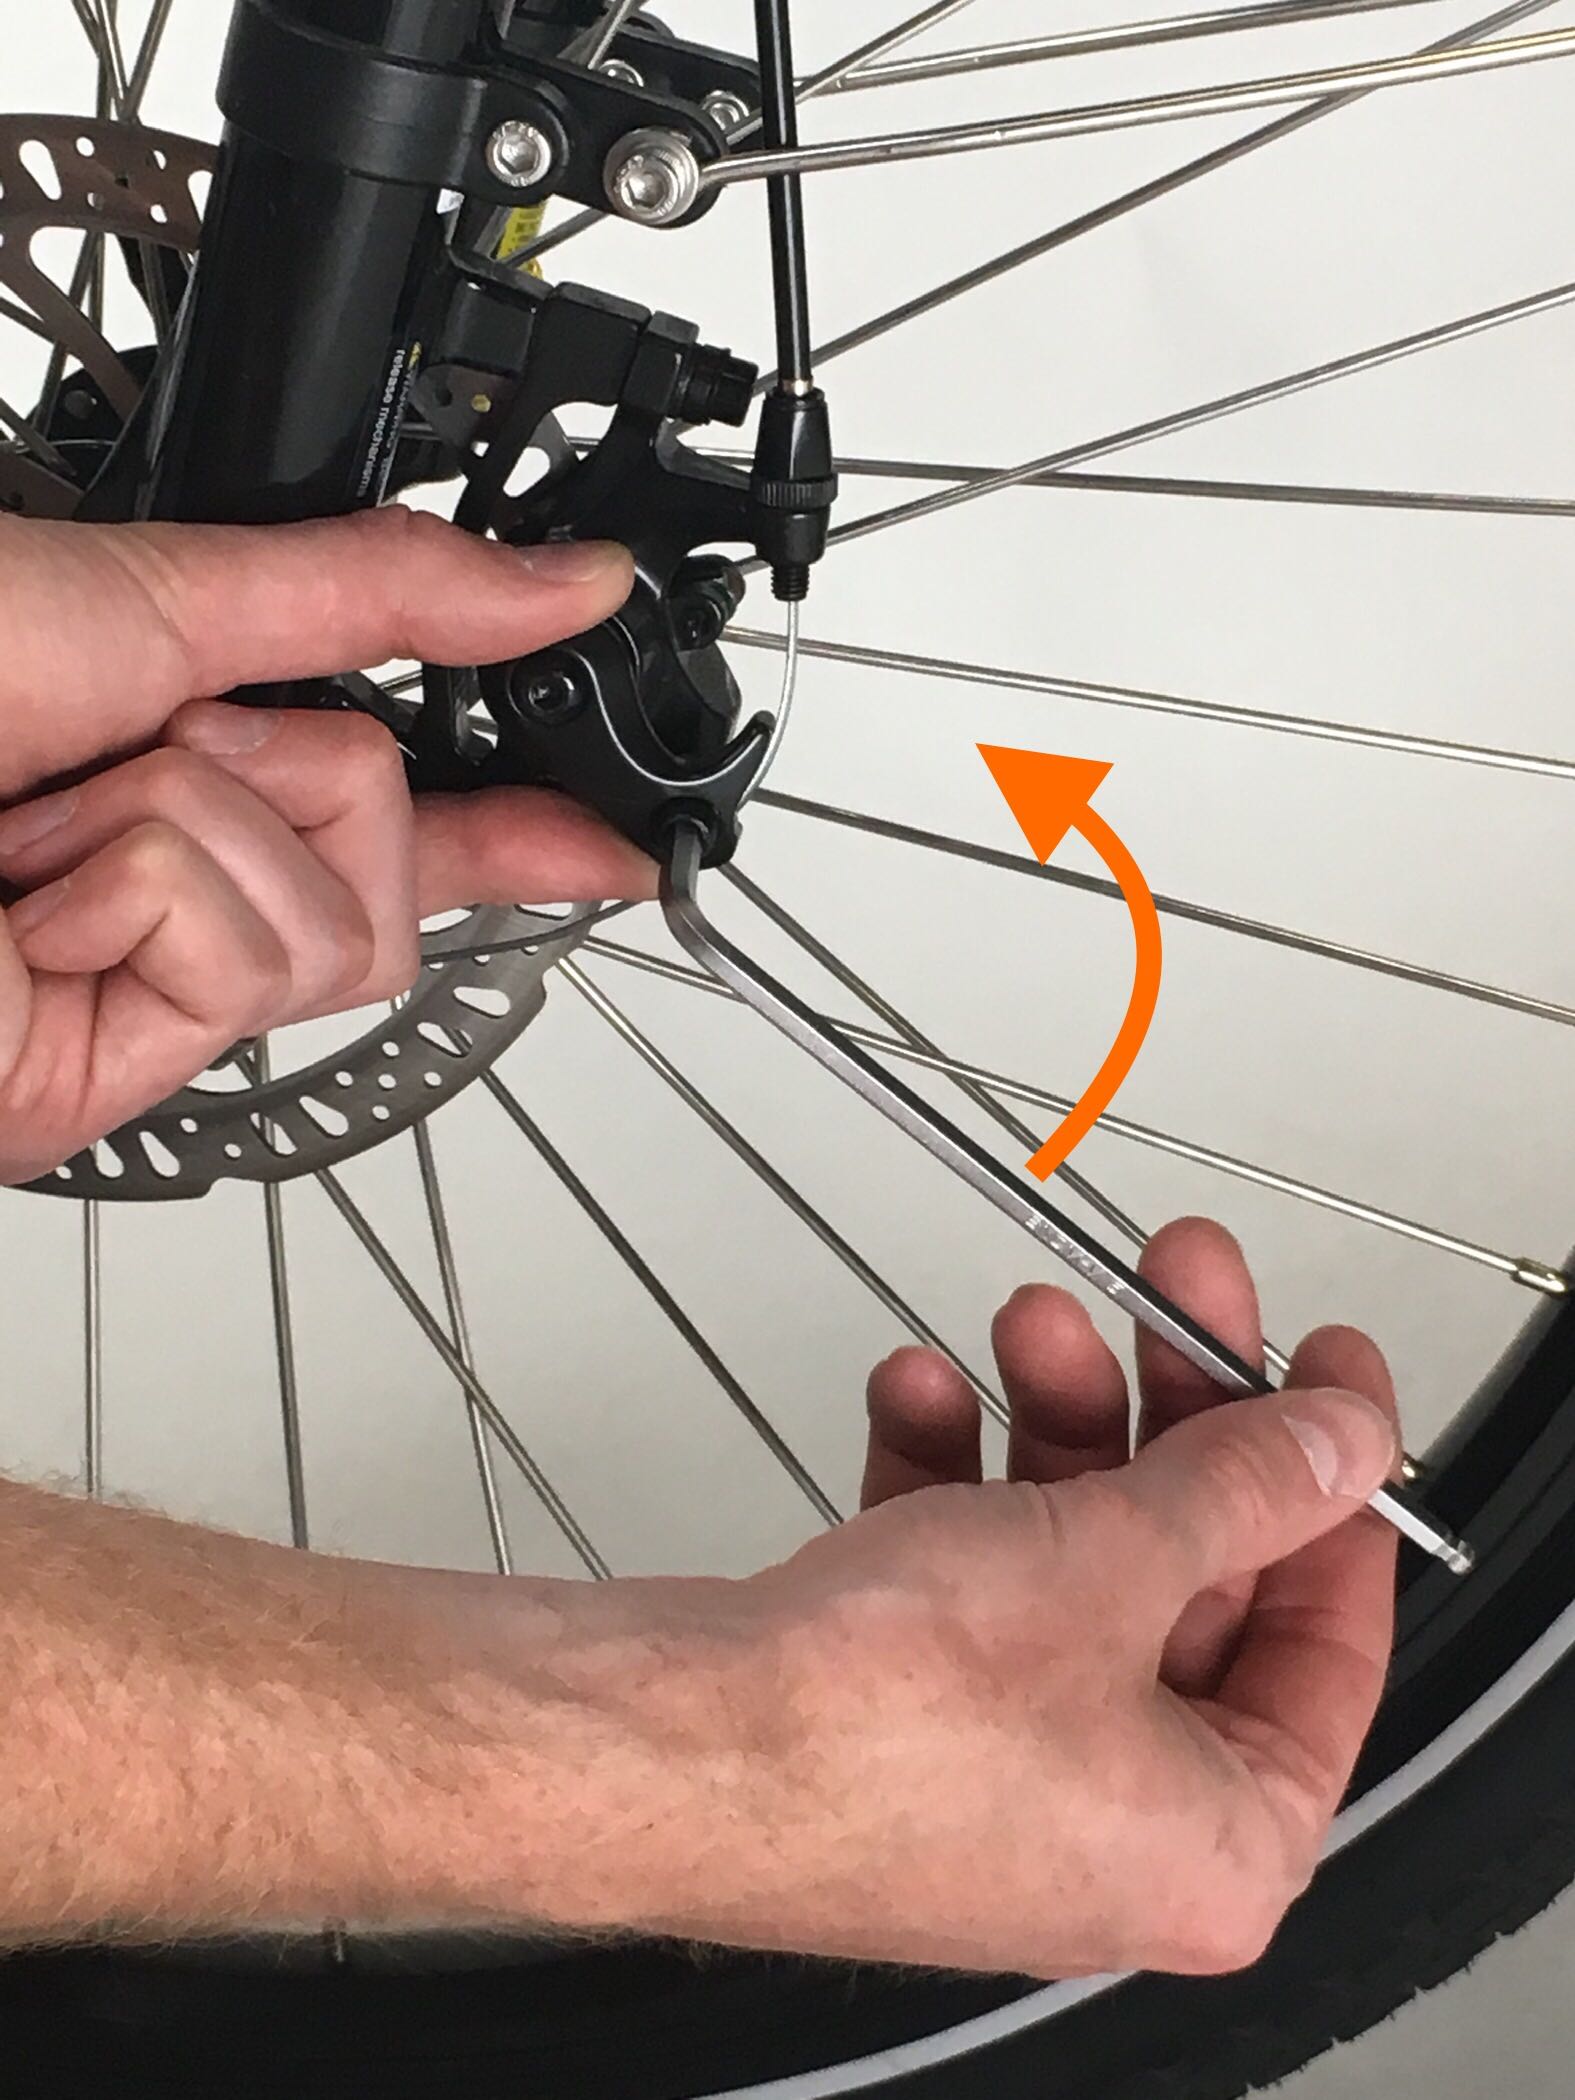
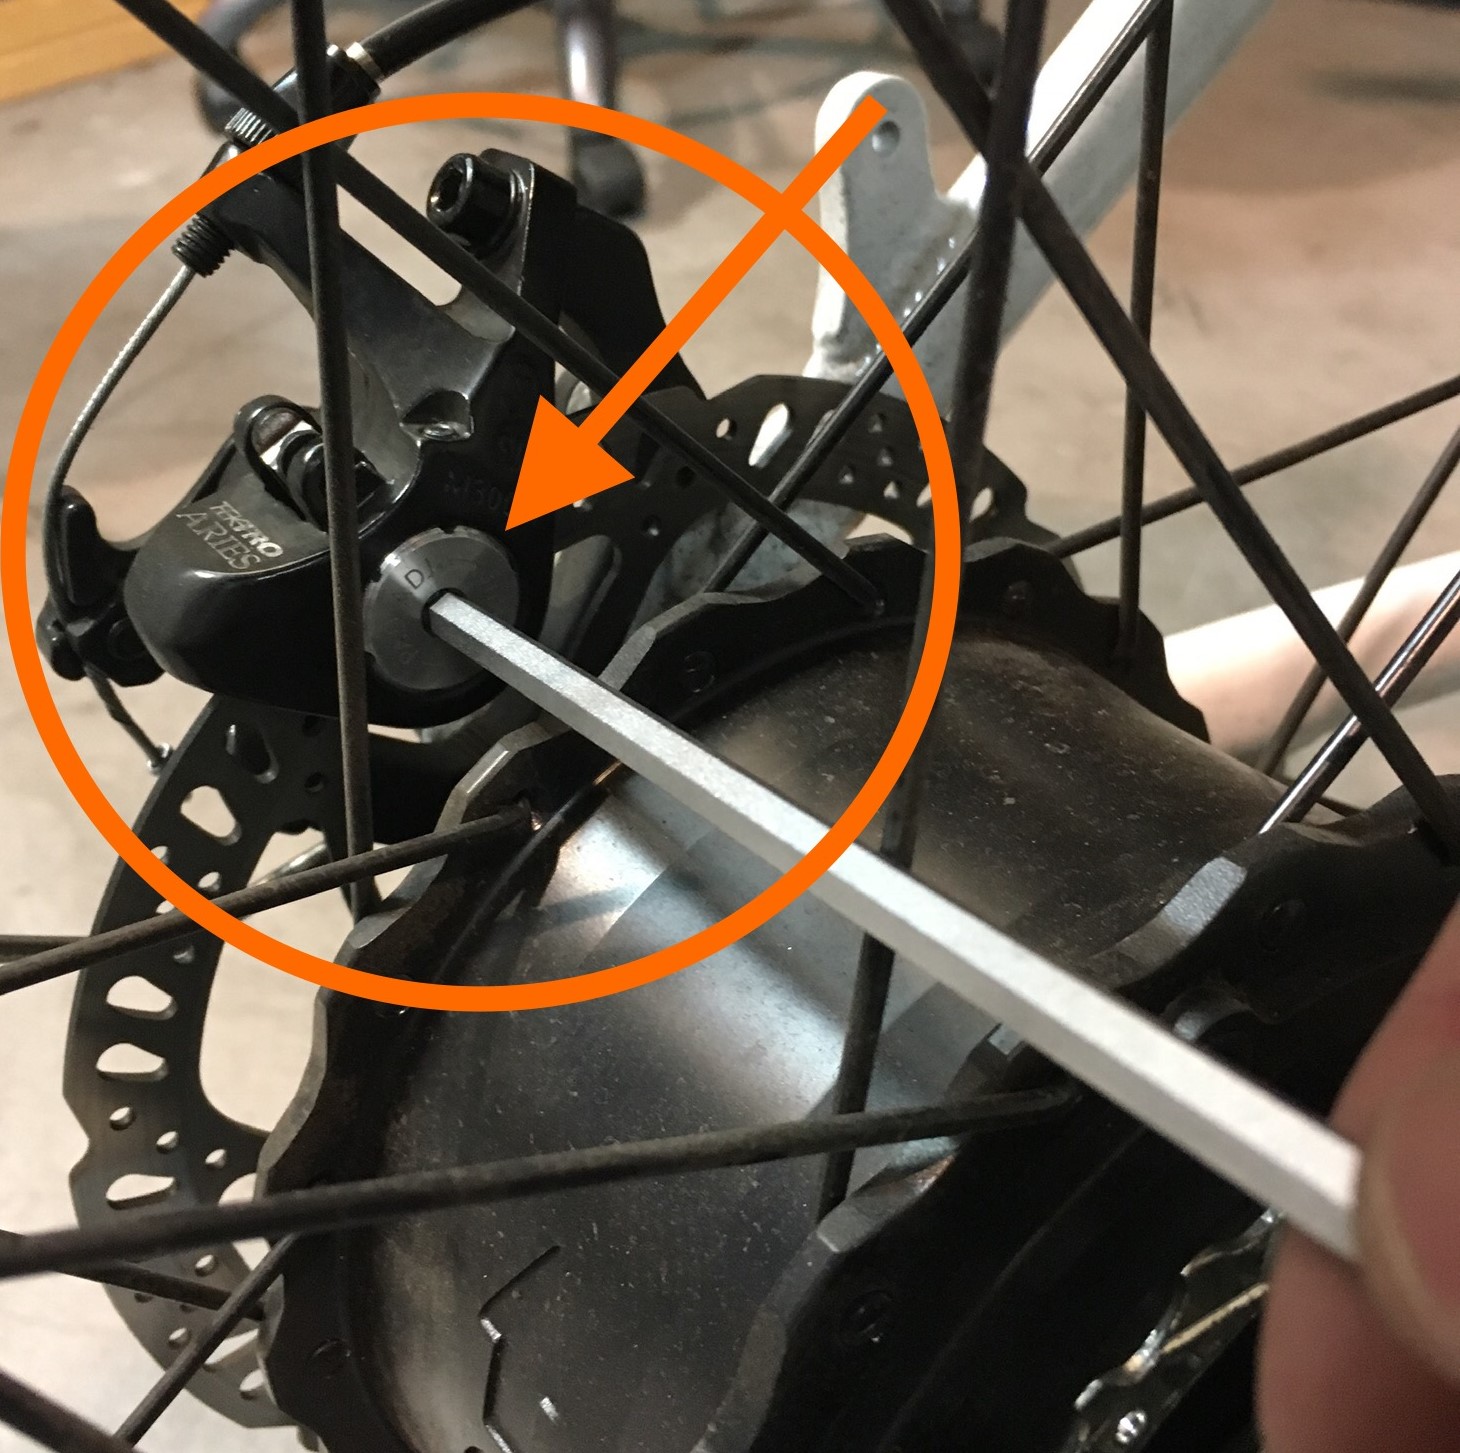
- If using the inner pad adjustment tool: At the rear wheel, near the wheel hub, pass the inner pad adjustment tool in between the motor and brake caliper, and into the inner pad adjustment dial. Turn the tool 1 to 2 clicks, as shown below, to increase the space between the inner pad and the brake rotor.
- If using a 5 mm Allen wrench:
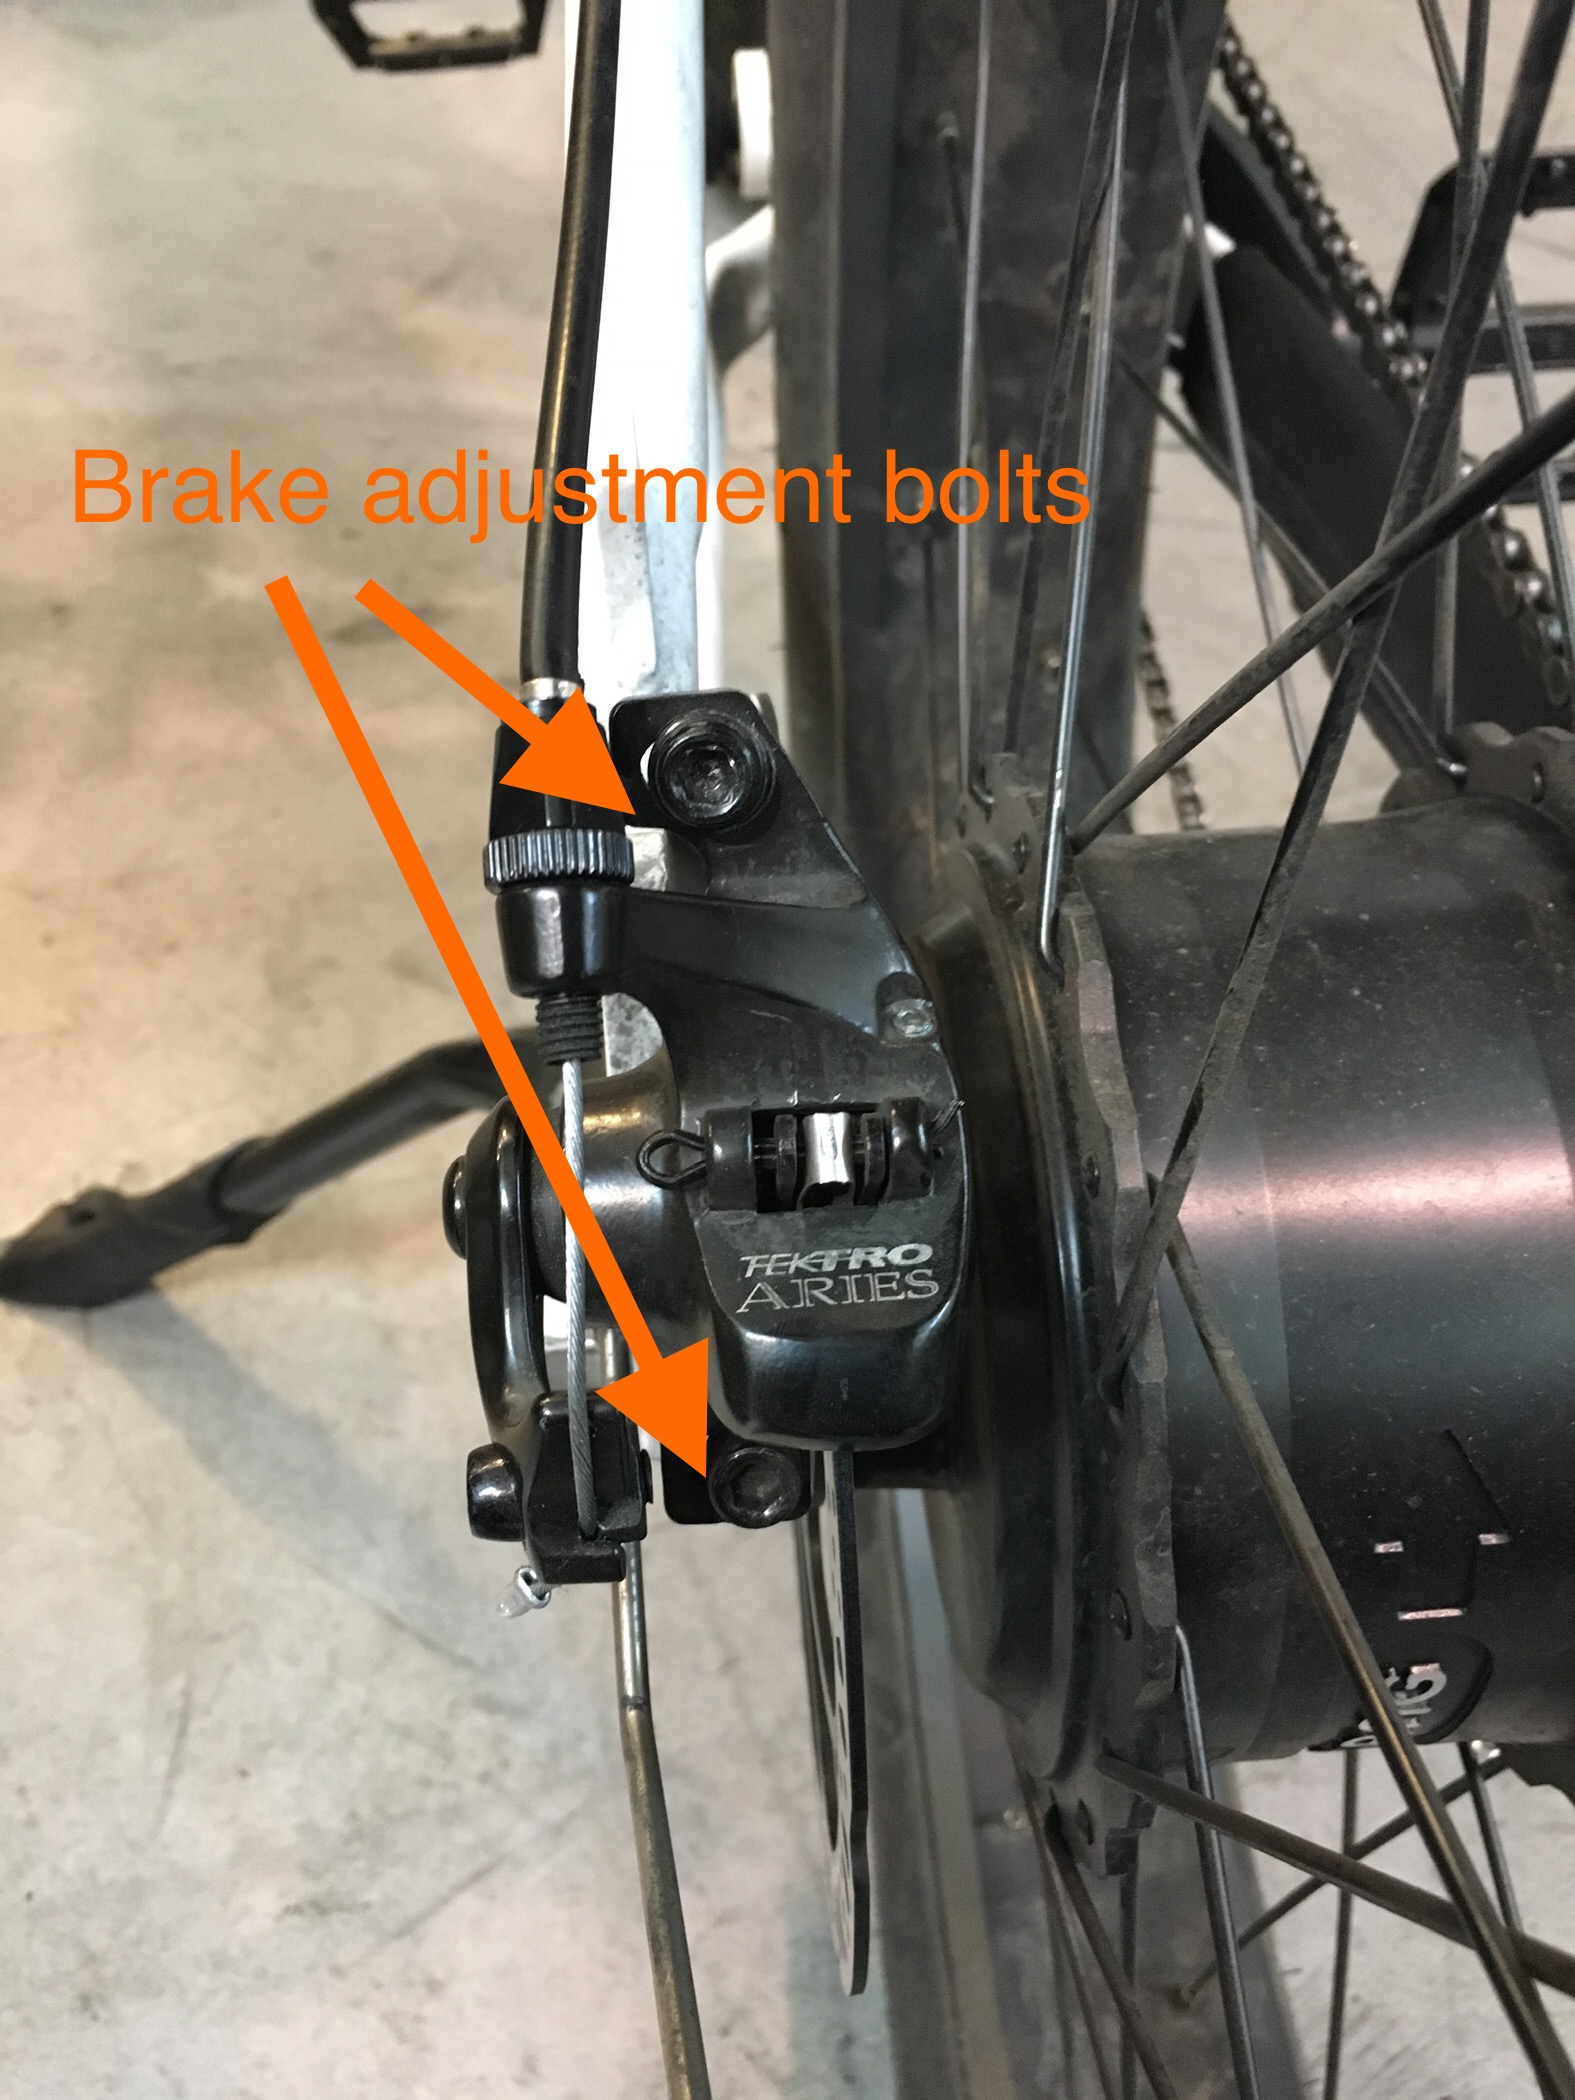
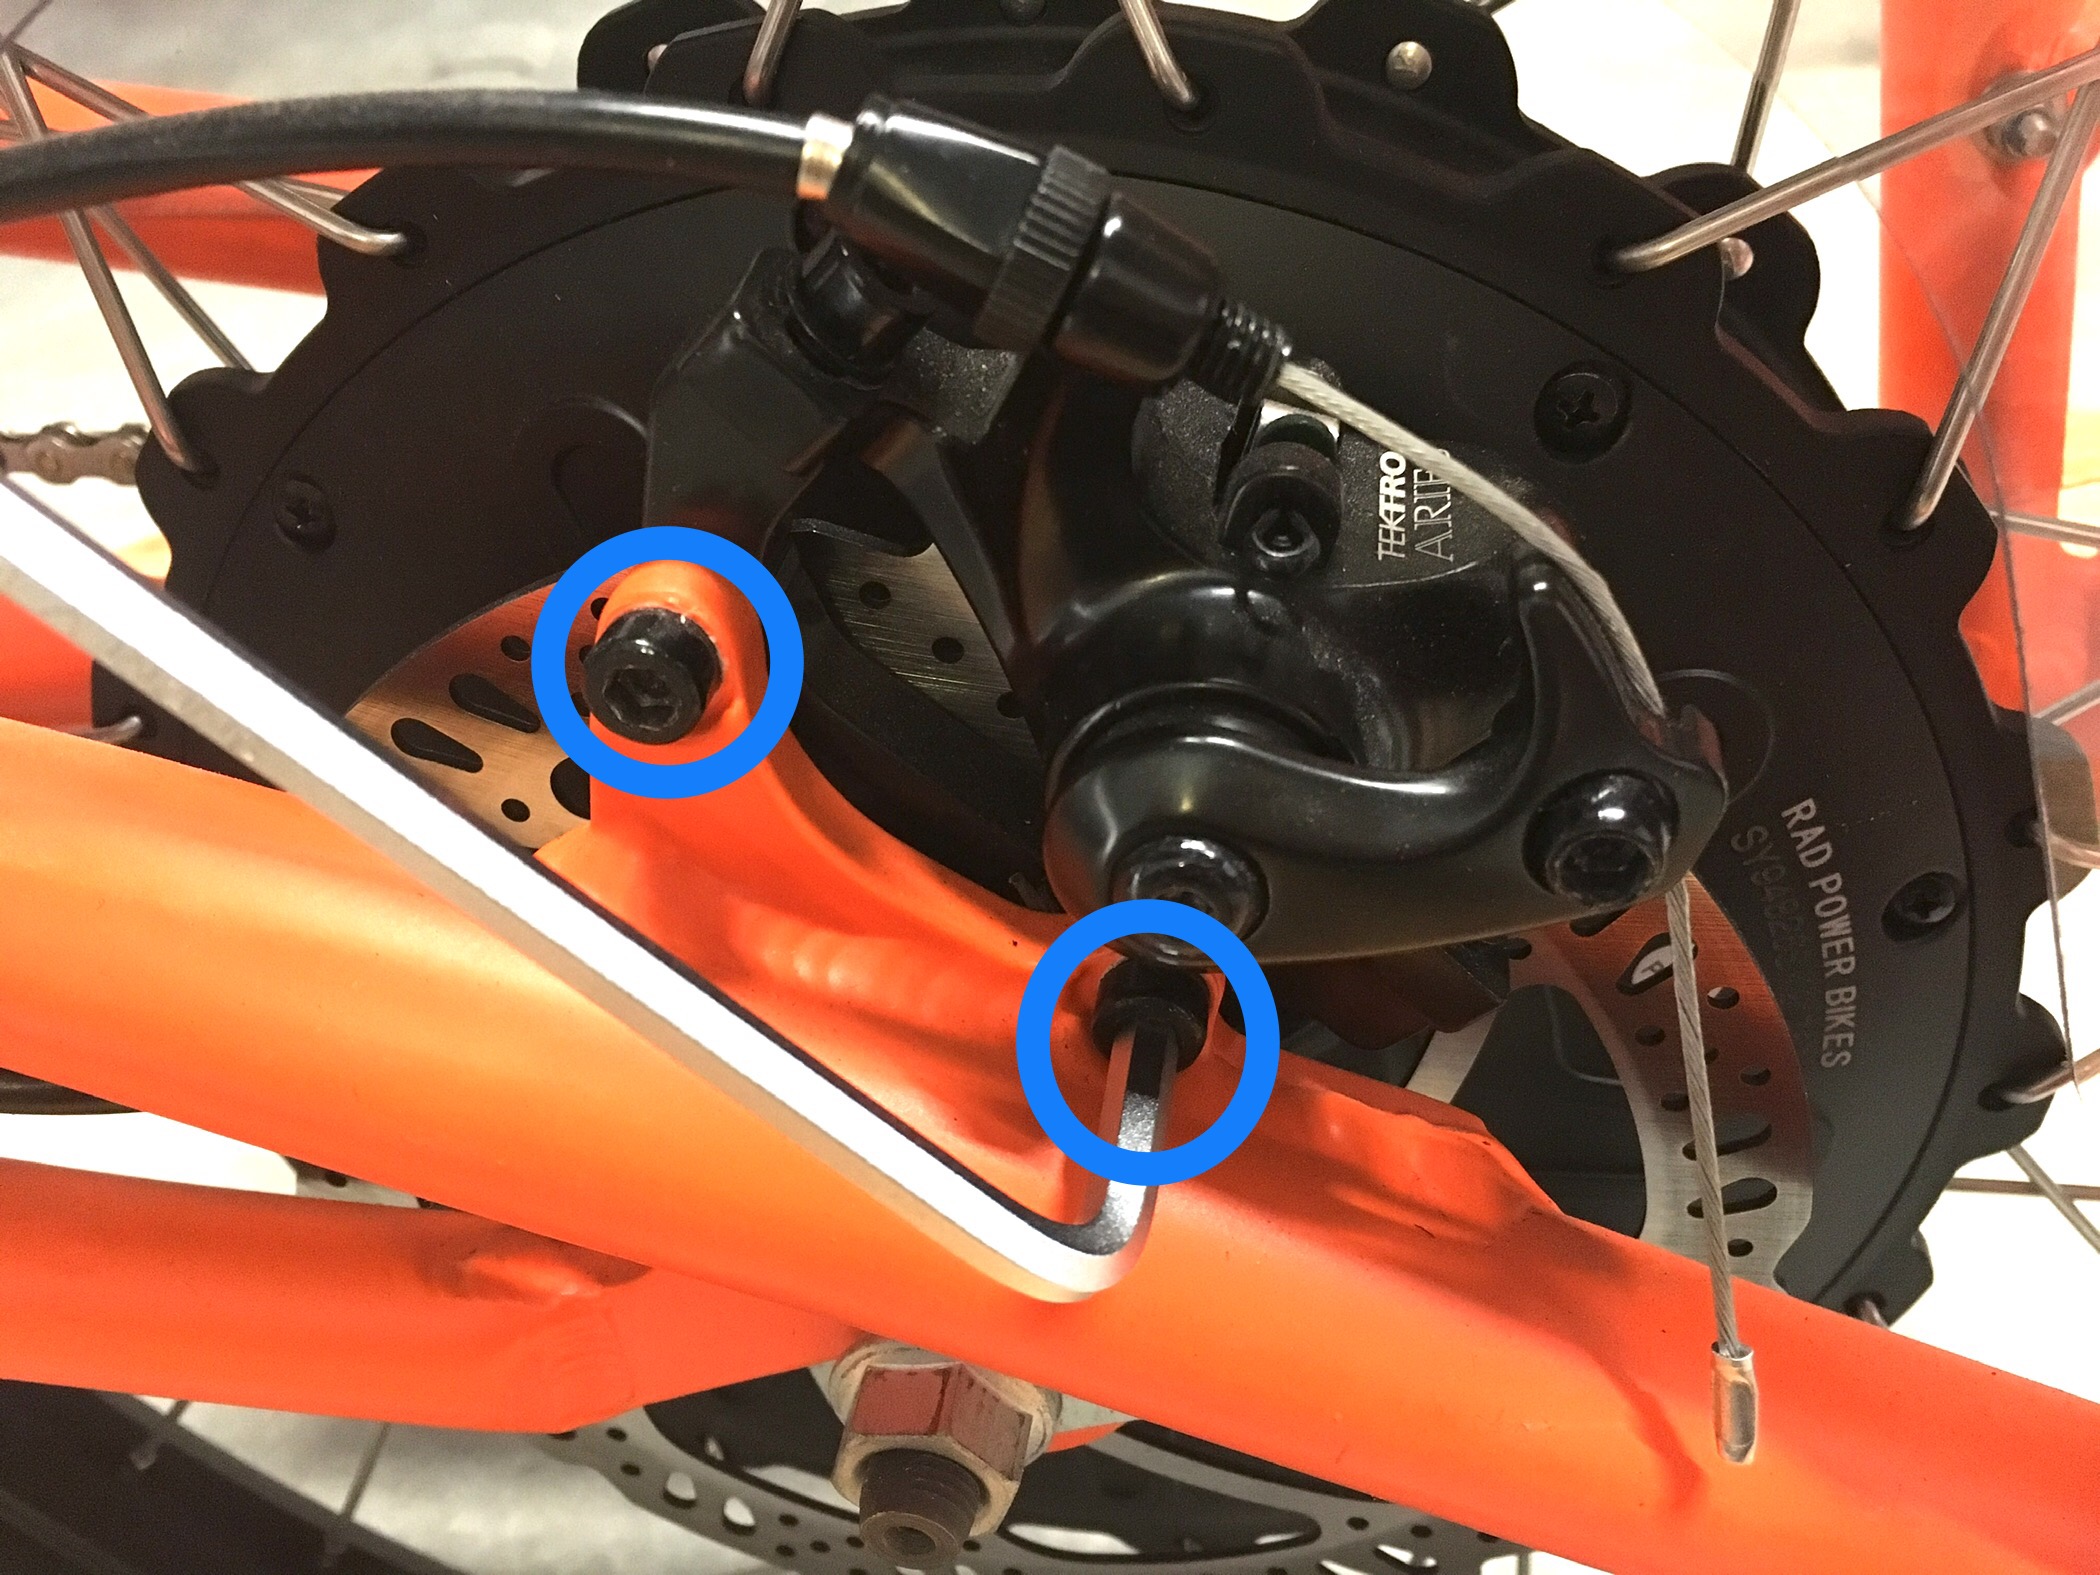
- Locate the brake caliper bolts securing the brake caliper to the frame. Use a 5 mm Allen wrench to loosen the two bolts, and remove the brake caliper.
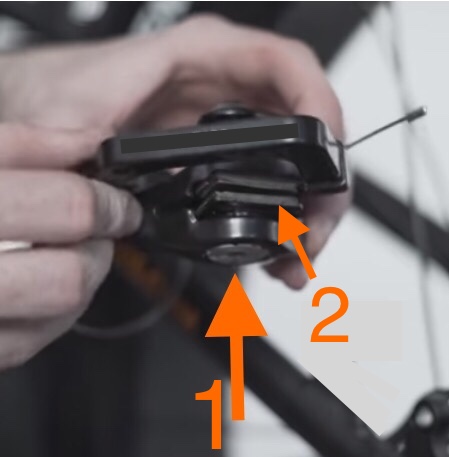
- Locate the inner brake pad adjustment dial and use a 5 mm Allen wrench, turning clockwise 1-2 clicks (1, below), to decrease the space between the inner pad and the brake rotor (2, below).
- Reinstall the brake caliper. Center the rotor between the pads, reinstall the bolts, and tighten the bolts evenly. Torque the bolts to 6-8 Nm.
- Locate the brake caliper bolts securing the brake caliper to the frame. Use a 5 mm Allen wrench to loosen the two bolts, and remove the brake caliper.
- For bikes with a geared hub motor:
- Repeat step 2 to test the wheels and brakes again. If another adjustment is needed, repeat steps 4 and 5 to adjust the brake.
Once properly adjusted, the wheel should spin freely with adequate clearance between the brake pads and rotor.
If the issue continues or the brake rotor looks like it gets twisted when the brake is squeezed, contact us for more help. - Once the brakes have been adjusted, reinstall the battery, and test the bike fully before riding.