Front Wheel Removal Guide
All of our models have a front wheel that is easy to remove - without any tools! This helps make maintenance easier, and regularly checking that the quick release lever is fully secure will keep your bike safe and fun to ride.
Follow the steps below to remove and reinstall a front wheel on your bike.
Remove the Wheel
- Get the bike ready for maintenance. Turn off the bike, remove the battery, and press and hold MODE or power to discharge remaining power.
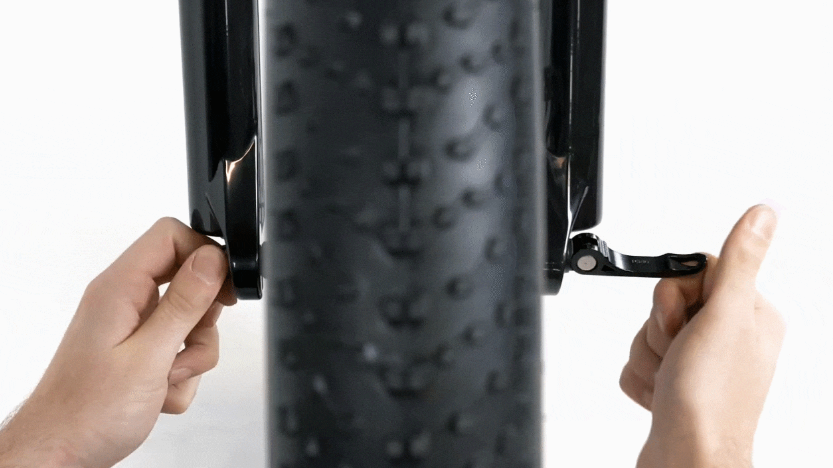
- Locate and loosen the quick release skewer. The quick release skewer is holding the front wheel in place. Open the lever so it is parallel to the ground. While holding onto the lever, turn the thumbnut on the other side of the wheel 2-3 turns to loosen it enough so the wheel can be removed from the fork dropouts.
Note: If needed, the quick release skewer and hardware can be removed completely. Make note of the order of the hardware as it is important for reinstallation.
- Remove the front wheel. Lift the bike off of the front wheel and gently lower the bike on the ground so it is resting on the front fork.
- Perform necessary maintenance. Once the rear wheel is removed, change the tube or tire, swap in a new wheel, etc.
Reinstall the Wheel
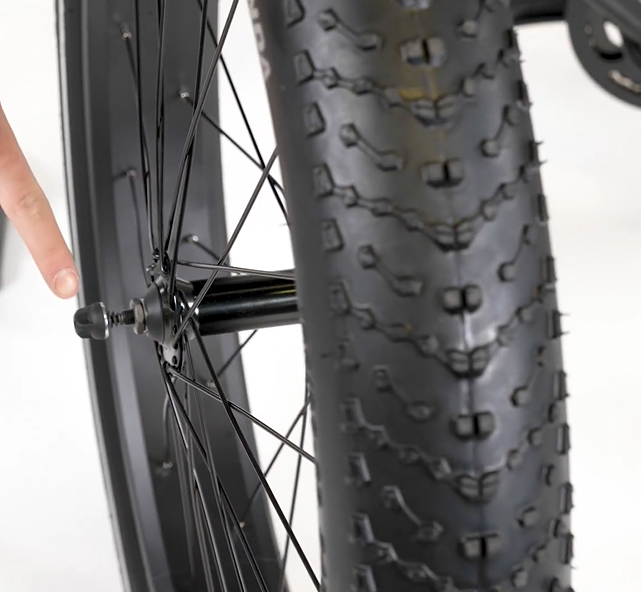
- Install the skewer, if removed. On the brake rotor side of the wheel, pass the skewer (with one cone spring) through the hub and install the other cone spring on the other side. Both cone springs should point in, toward the wheel hub. Thread the thumb nut just a couple of turns, leaving enough room for the fork dropouts. Leave the lever open.
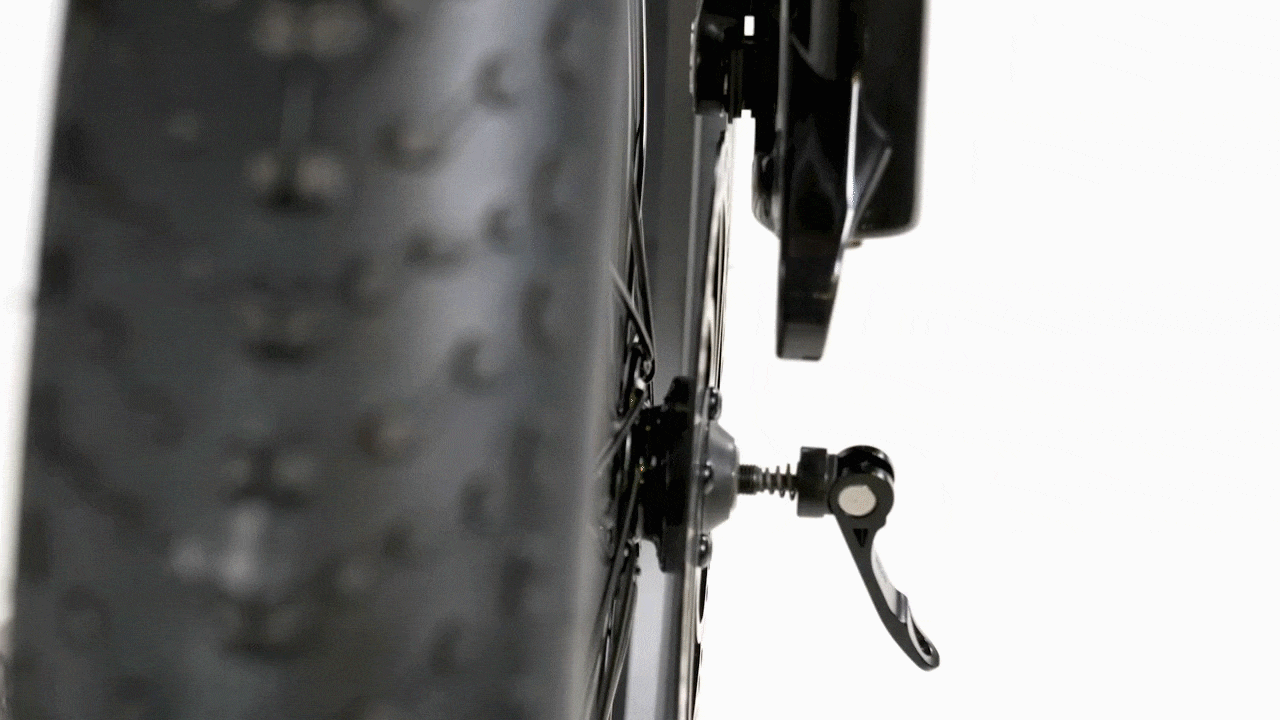
- Lower the fork onto the wheel. Make sure the lever is open, then carefully lift the front of the bike and lower the fork onto the wheel. The brake rotor should go into the brake caliper, in between the brake pads, and the axle should enter the fork dropouts fully.
- If installing the front wheel is difficult, use a 5 mm Allen wrench to widen the gap between the brake pads by turning the inner pad adjuster “out”, or counterclockwise, two clicks, then install the wheel.

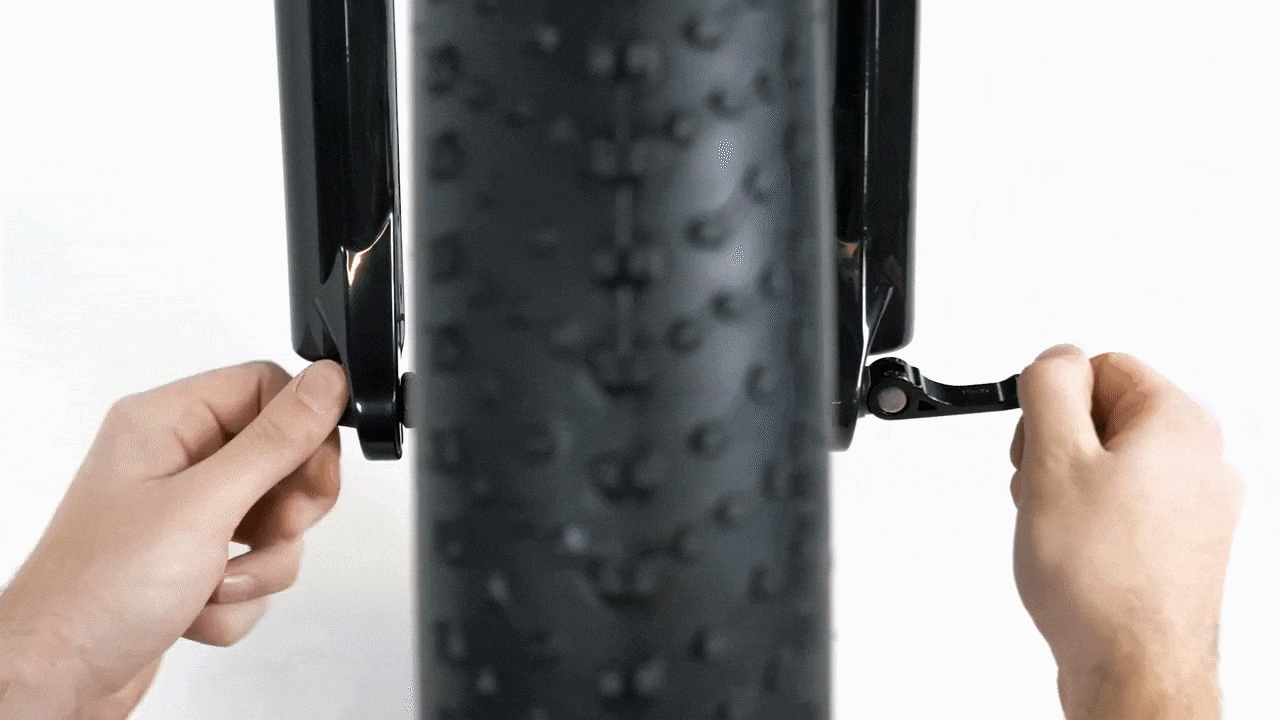
- Check that the wheel is fully seated in the dropouts and that it is centered.
- Secure the quick release lever. Hold the quick release lever in line with the axle and tighten the thumbnut on the opposite side until the lever can stay parallel to the floor without being held. Then use the palm of your hand to close the lever without touching the brake rotor. There should be enough resistance that the lever leaves an imprint on your palm.
- Reinstall the battery and test the bike fully before riding.
If you are not confident in your ability to successfully and safely perform all steps, we recommend having the work performed by a local, certified, and reputable bike mechanic.