LCD Display Replacement Guide
The LCD display is designed to be replaced in the unlikely event it is determined to be damaged or non-functional by Rad Power Bikes Product Support.
If you are not confident in your ability to successfully and safely perform all steps, we recommend having the work performed or checked by a local, certified, and reputable bike mechanic.
You will need:
- A 3 mm Allen wrench
- Flat side cutters
- A replacement zip tie
- The replacement LCD display
Remove the Old Display
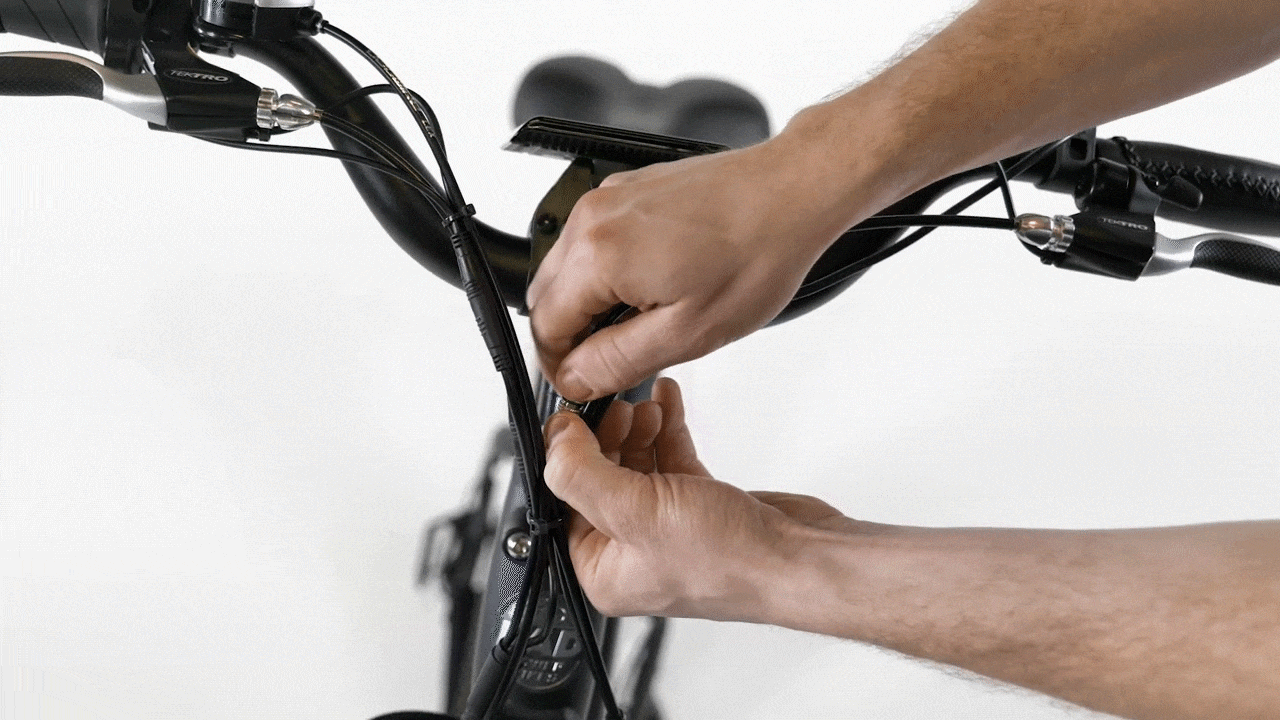
- Get the bike ready for maintenance. Turn off the bike, remove the battery, and press MODE to discharge remaining power.
- Disconnect the old LCD display. Snip the zip tie securing the display cable, then trace the cable to the silver metal connector. Untwist the silver metal portion, then pull directly apart, without twisting, to unplug.
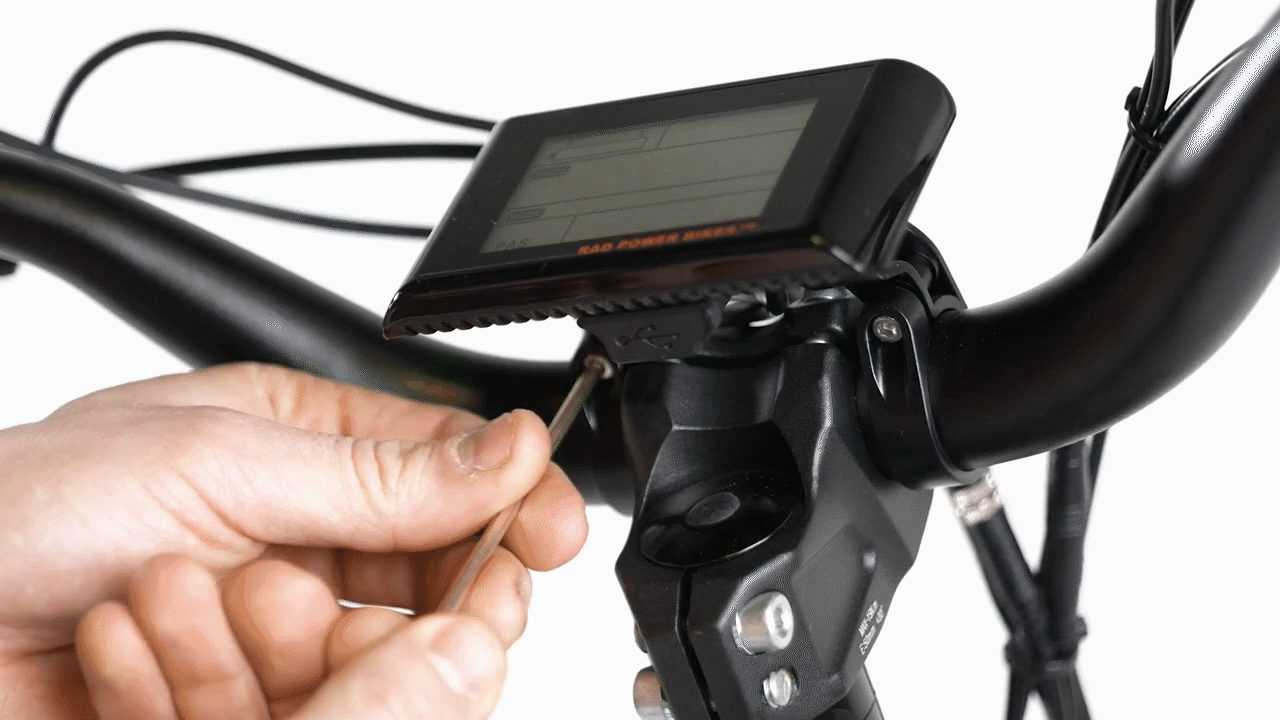
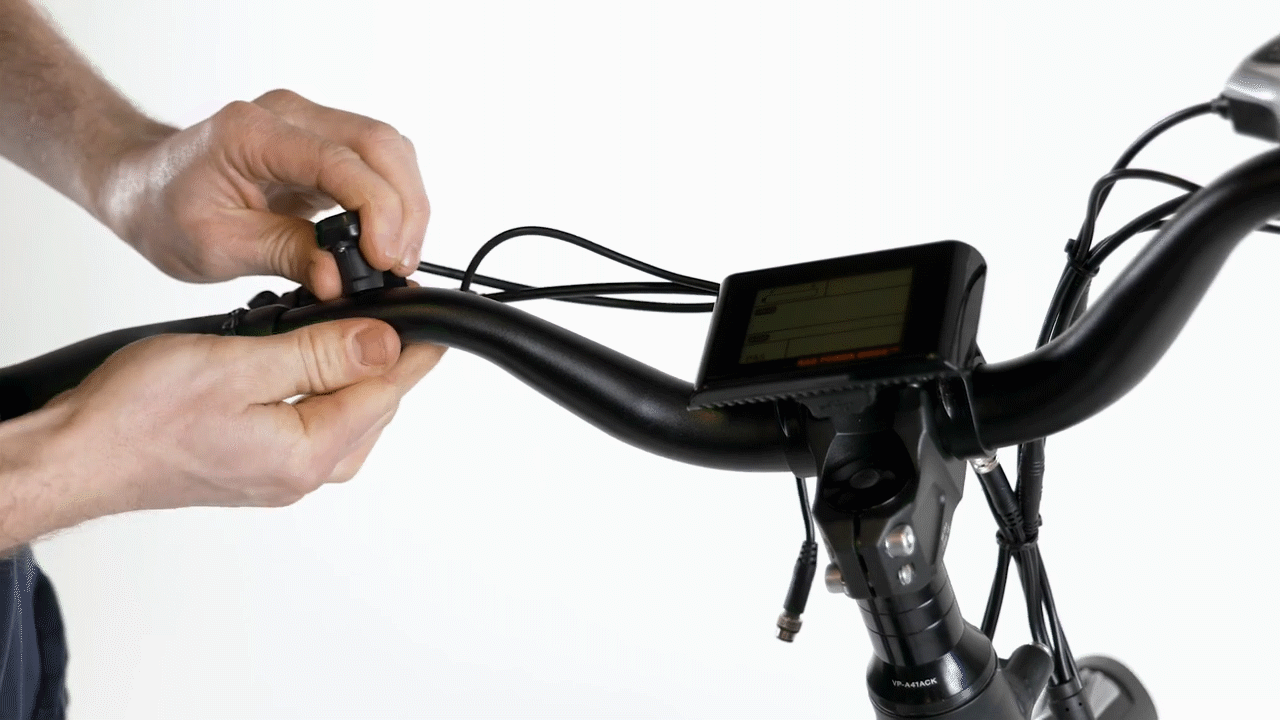
- Remove the two LCD display clamp bolts and the display remote bolt. Use a 3 mm Allen wrench remove the bolts, and set them aside.
- Remove the old remote and LCD display. Open the remote and display clamps and carefully pull them off of the handlebar.
Install the LCD Display
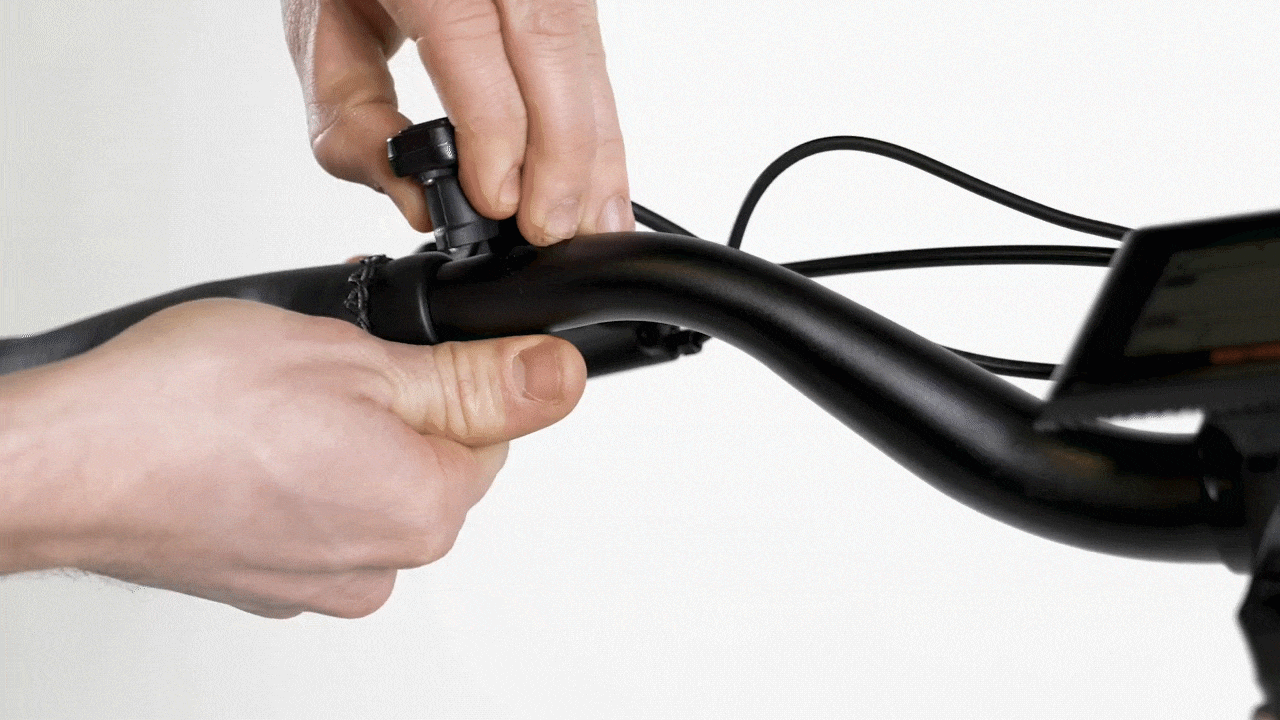
- Install the new LCD display. Pass the display clamp over the handlebar center and tighten both bolts securely. Adjust the display so it is visible to the rider.
- Install the display remote. Ensure the wire running from the display to the remote is not twisted and runs smoothly. Pass the display remote clamp over the handlebar at the left side of the bike. Tighten the bolt securely.
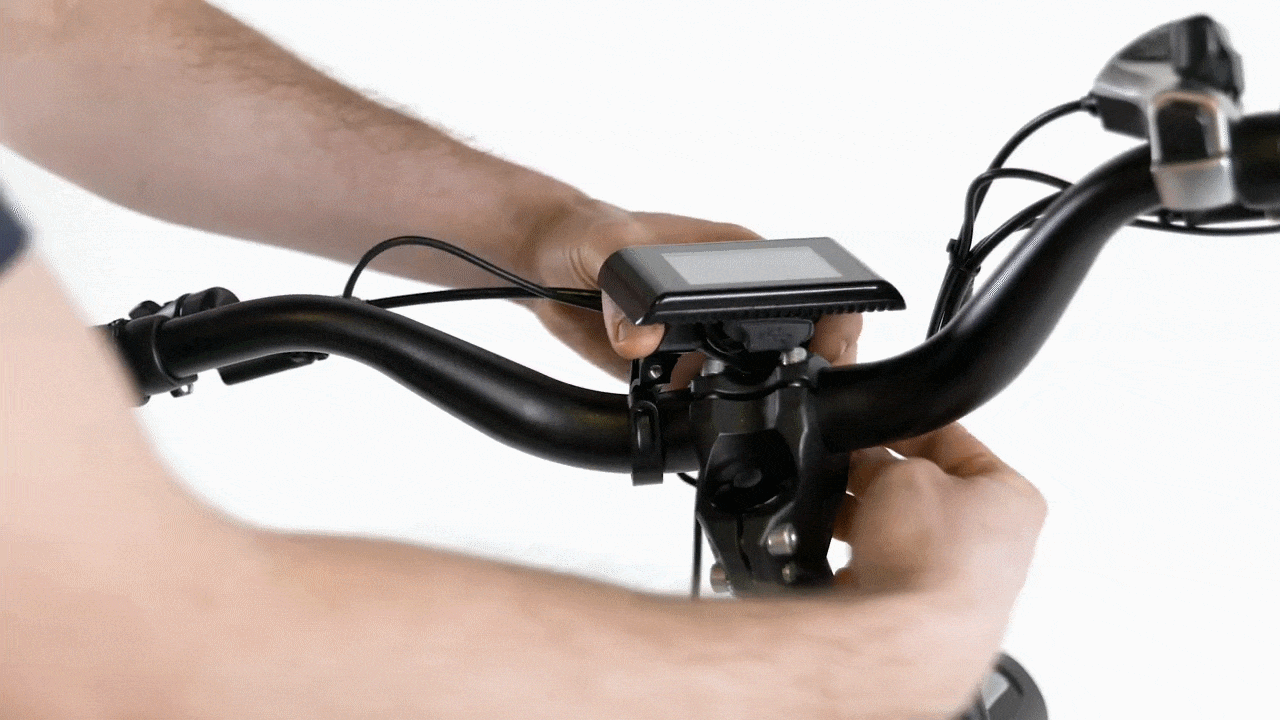
- Connect the LCD display to the wiring harness. Line up the internal notches and pins (and external arrows), and push the connector ends directly together, without twisting, to connect. Then twist just the silver metal portion to fully seat the connection.

- Replace the zip tie. Snip the zip tie so it is flush and smooth.
- Reinstall the battery and test the bike fully before riding.