Basic Battery Use
Click a heading below to learn about how to use the battery keys, how to remove the battery, and how to check the battery charge level.
Using the Battery Keys: Power On and Off
The battery can be turned ON or OFF using one of the two identical keys included with your bike.
On, locked
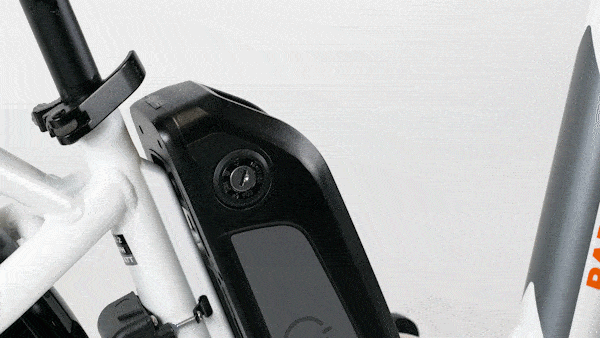
Off, locked
Off, unlocked
Lost Keys
Your bike comes with two identical keys to turn your battery on and off. These keys are unique to your bike. For help with lost keys, please contact us and we'll help get you back up and running!
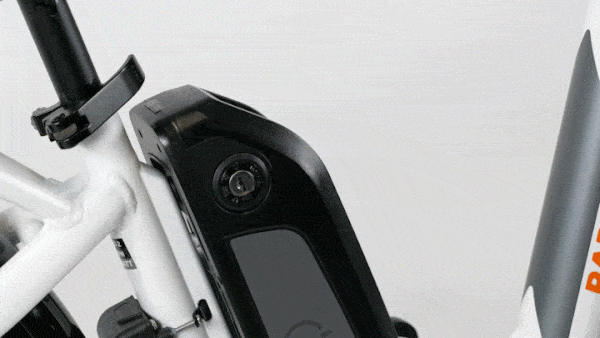
Removing the Battery
- Turn off the bike. Press and hold the MODE button on the LCD Display remote (or the power button on the LED remote) until the display turns off.
- Use the key to turn off and unlock the battery. Insert the key into the key port, then push and rotate the key to the "OFF, unlocked" position.

- Remove the battery. When in the "OFF, Unlocked" position, you can carefully slide the battery upwards and lift it off the frame. Note: the battery weighs around 8 lbs and should be handled with care.
For more information on how to best care for your battery, please refer to the Rad Power Bikes Owner's Manual that came with your bike or download a copy of your bike's manual from HERE.
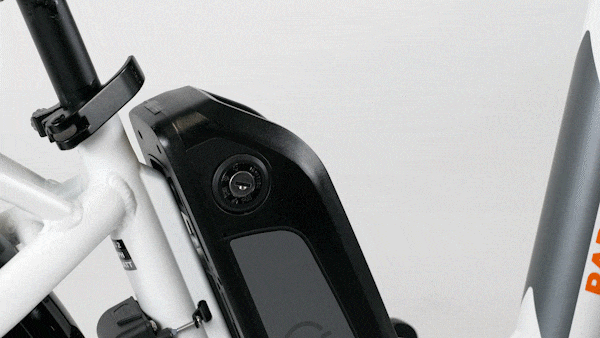
When the Battery is Removed
- Do not touch the “+” and “-” terminal contacts on the bottom of the battery when the battery is removed from the bike.
- Be careful not to drop or damage the battery when loose from the bike.
- Avoid damaging the exposed connector terminals and keep them clear of debris.
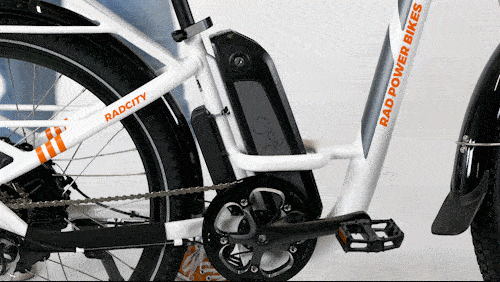
When Installing the Battery
- Ensure the battery is turned off before sliding the battery into the frame mount receptacle.
- Do not force the battery onto the receptacle; slowly align and push the battery down into the receptacle.
- Ensure the battery has been properly secured to the bike before each use by carefully pulling upwards on the battery with both hands to test the security of the attachment of the battery to the mount.
Use caution to avoid damage to battery connector terminals, which are exposed when the battery is unlocked and removed from the frame of the bike. In the case of damage to the terminals or battery mounts, please discontinue use and contact Rad Power Bikes Product Support immediately.
Checking the Battery Charge Level
There are two ways to check a battery's current charge level.
Battery gauge:
- Stand at the side of the bike. Make sure you're not sitting on the bike when you check the battery level and that the charger is not plugged into the battery.
- Turn on the battery. Use the key to turn the key barrel to the on-and-locked position. Remove the key or keep it in place.
- Press and hold the button next to the LEDs. The LEDs on the battery gauge will illuminate. The higher number of green LEDs that are illuminated, the higher your current battery level.
Note: The key barrel must be in the on-and-locked position for the LEDs to light up.
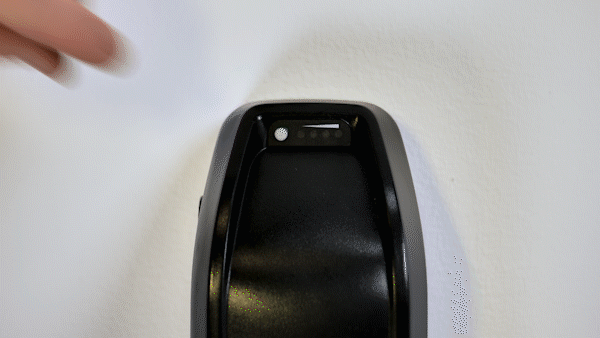
- Turn off the battery to conserve power. Use the key to turn the key barrel to the off-and-locked position.
LCD display gauge:
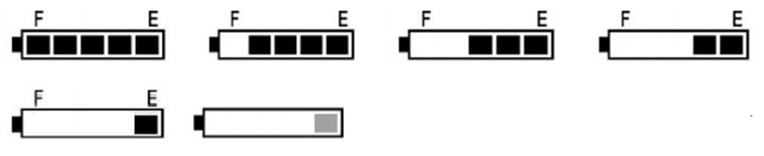
- Locate the LCD display battery gauge.The LCD display shows a battery gauge in the top left corner of the screen when the bike is turned on
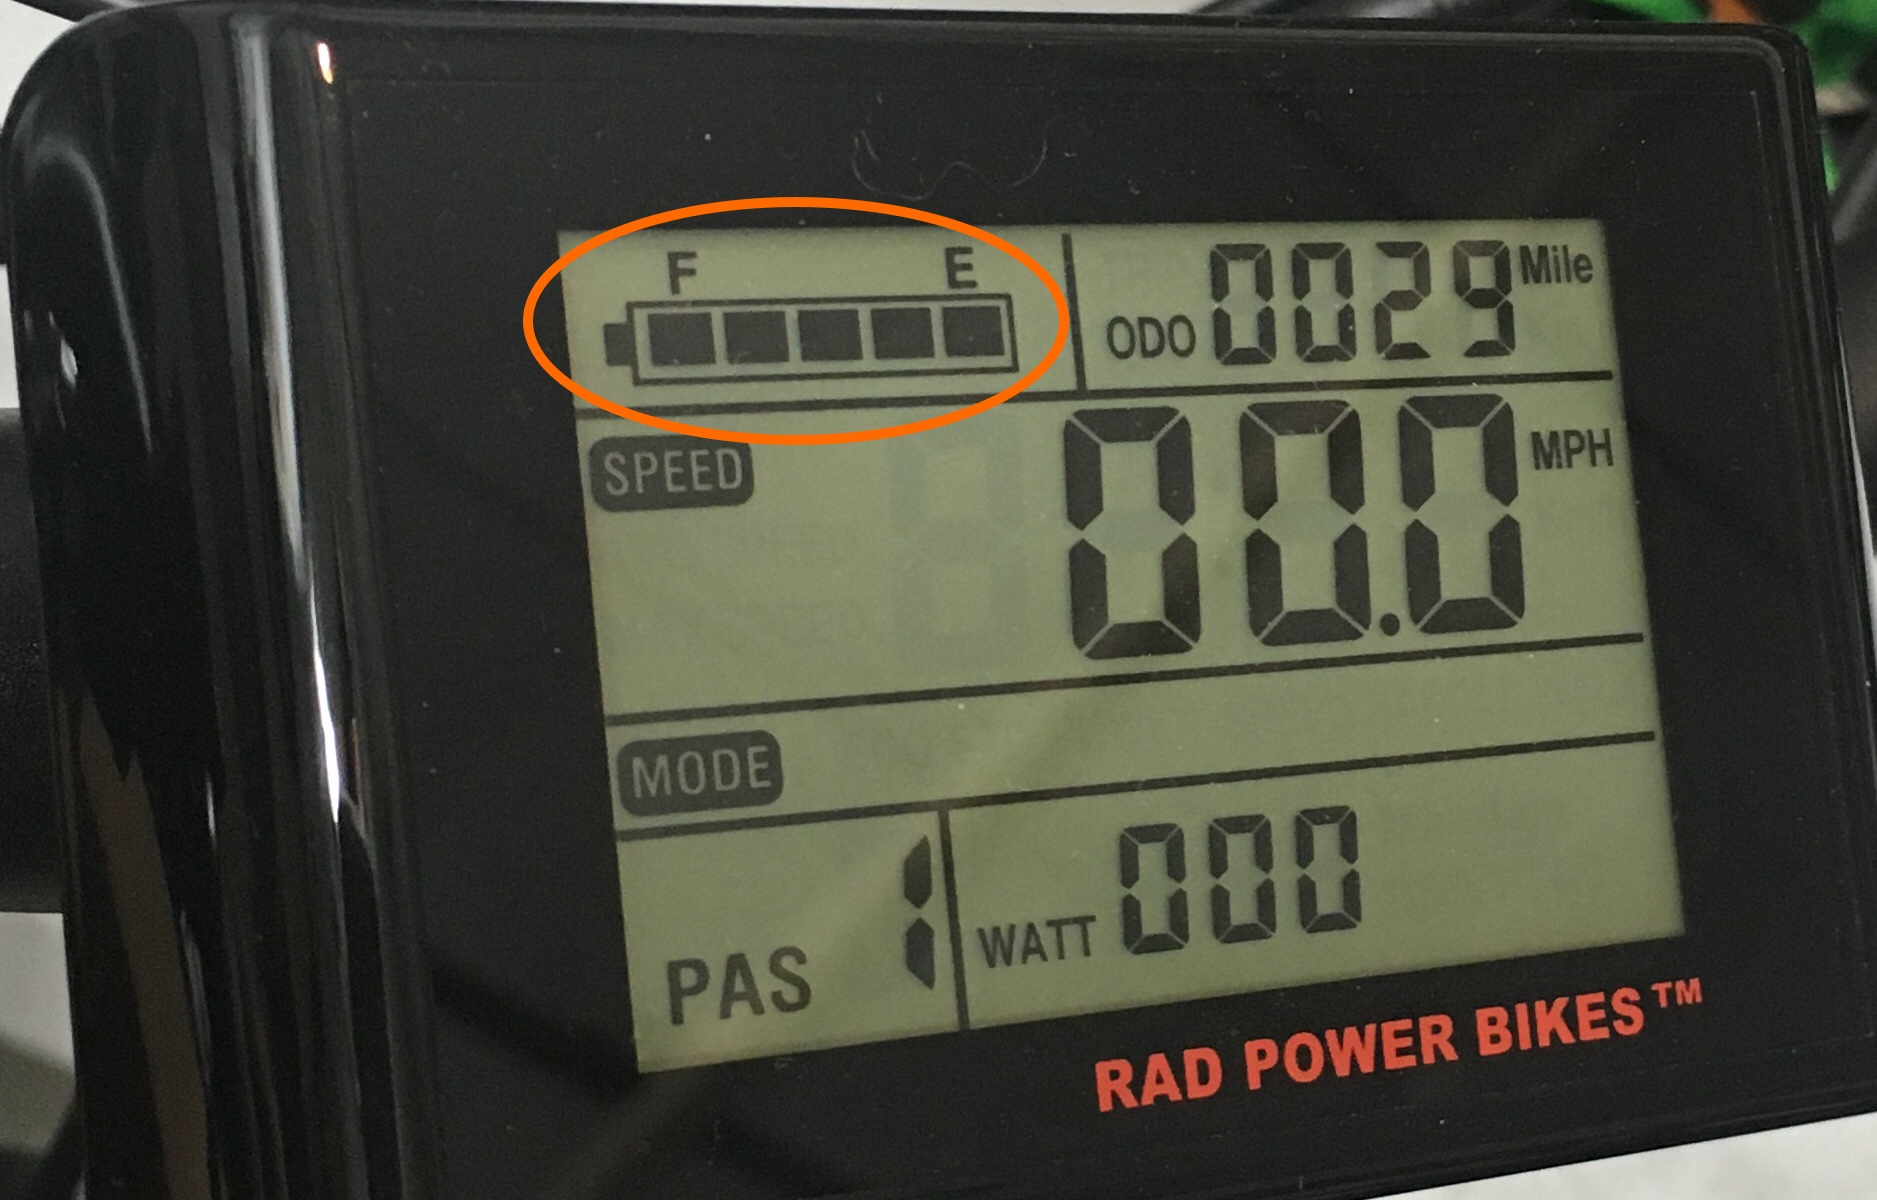
- Check the gauge when the bike is not moving.The LCD display gauge calculates battery life based on the battery power output (instantaneous voltage reading) and can fluctuate while riding if power demand and/or output changes. If you are riding, the battery reading should stabilize at the current battery capacity after about 5 seconds when power assist is off (pedal assist 0 and no twist power assist applied), the brakes are not activated, and while coasting on the bike.
- Charge the battery when needed.Click HERE to learn how to charge the battery. Charge the battery after each ride and as soon as possible when only one tick is left on the battery gauge. At lower states of charge, the bike may limit power output to prevent damage to the battery. When the battery is fully depleted, the last bar will begin to flash, warning the user to charge the battery as soon as possible.
Failure to follow proper charging and storage procedures may result in a non-functional battery, and replacement will not be covered under warranty. Always ensure battery is charged before use. Before each ride, inspect the battery to ensure there is no damage to battery and that it is securely locked to the frame. Charge and store bike and battery in a dry location, between 50 °F - 77 °F (10 °C - 25 °C). Failure to properly charge, store, or use your battery may void the warranty and may cause a hazardous situation.
Click HERE for general battery details, range, and battery life information. Click HERE for our battery charging guide.