Brake Pad Replacement Guide
The mechanical disc brakes on your bike are a critical safety feature. Ensuring the brake pads have adequate pad material to stop the ebike is very important. Click HERE to purchase brake pads for your ebike.
Watch the video and follow the steps below to learn how to perform a brake pad replacement on your bike.
Tools Needed:
- Needle nose pliers
- 5 mm Allen wrench
- The replacement brake pads
- Nitrile gloves (optional)
Remove the Brake Pads
- Get the bike ready for maintenance. Turn off the bike, remove the battery, and press MODE or the power button to discharge remaining power.
- Locate the brake pads. The brake pads are inside the brake caliper on each wheel.
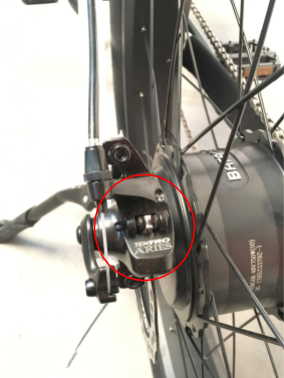
- Straighten the brake pad retention pin. Use needle nose pliers to carefully unbend the pin until it is straight.
- Remove the brake caliper from the frame. Use a 5 mm Allen wrench to remove the two brake caliper bolts. Be careful to not touch the brake rotor.
- Remove the brake pad retention pin. Remove the pin and set it aside for reinstallation.
- Remove the old brake pads. Push the pads from the top of the caliper body and out through the bottom of the caliper.
Continue to the next section to install the new brake pads.
Install the New Brake Pads
- Prepare the new brake pads for installation. While wearing gloves, arrange the pads into the configuration that they will be inserted into the caliper. The brake pad material should be facing each other with the metal spacer between them. The hole at the top of each pad (which is where the retention pin will go) should be aligned. With fingers on the outside of the pads, press them together so the two sides of pad material are touching.
Do not to touch the pad material on the new pads with your fingers-- the oil from your hands may cause the brakes to squeak and/or lose performance.
- Install the brake pads into the caliper. While pinching the pads together, slide the pads into the brake caliper, hinge-side first.
- Reinstall the caliper.
- Slide the caliper into position so the mounting holes on the frame are aligned with the mounting points on the caliper.
- Thread in the bolts and use a 5 mm Allen wrench to turn each bolt 1/4 turn, then switch to the other bolt. Alternate between bolts to evenly tighten both of them to 10-12 Nm. Do not touch the brake pad material or brake rotor with bare hands during installation.
- If the caliper does not slide onto the disc easily, please refer to the article linked HERE to increase the space between the brake pads.
- Replace the brake retention pin. Use needle nose pliers to carefully bend the end of the retention pin to around a 90° angle so it cannot slide out.
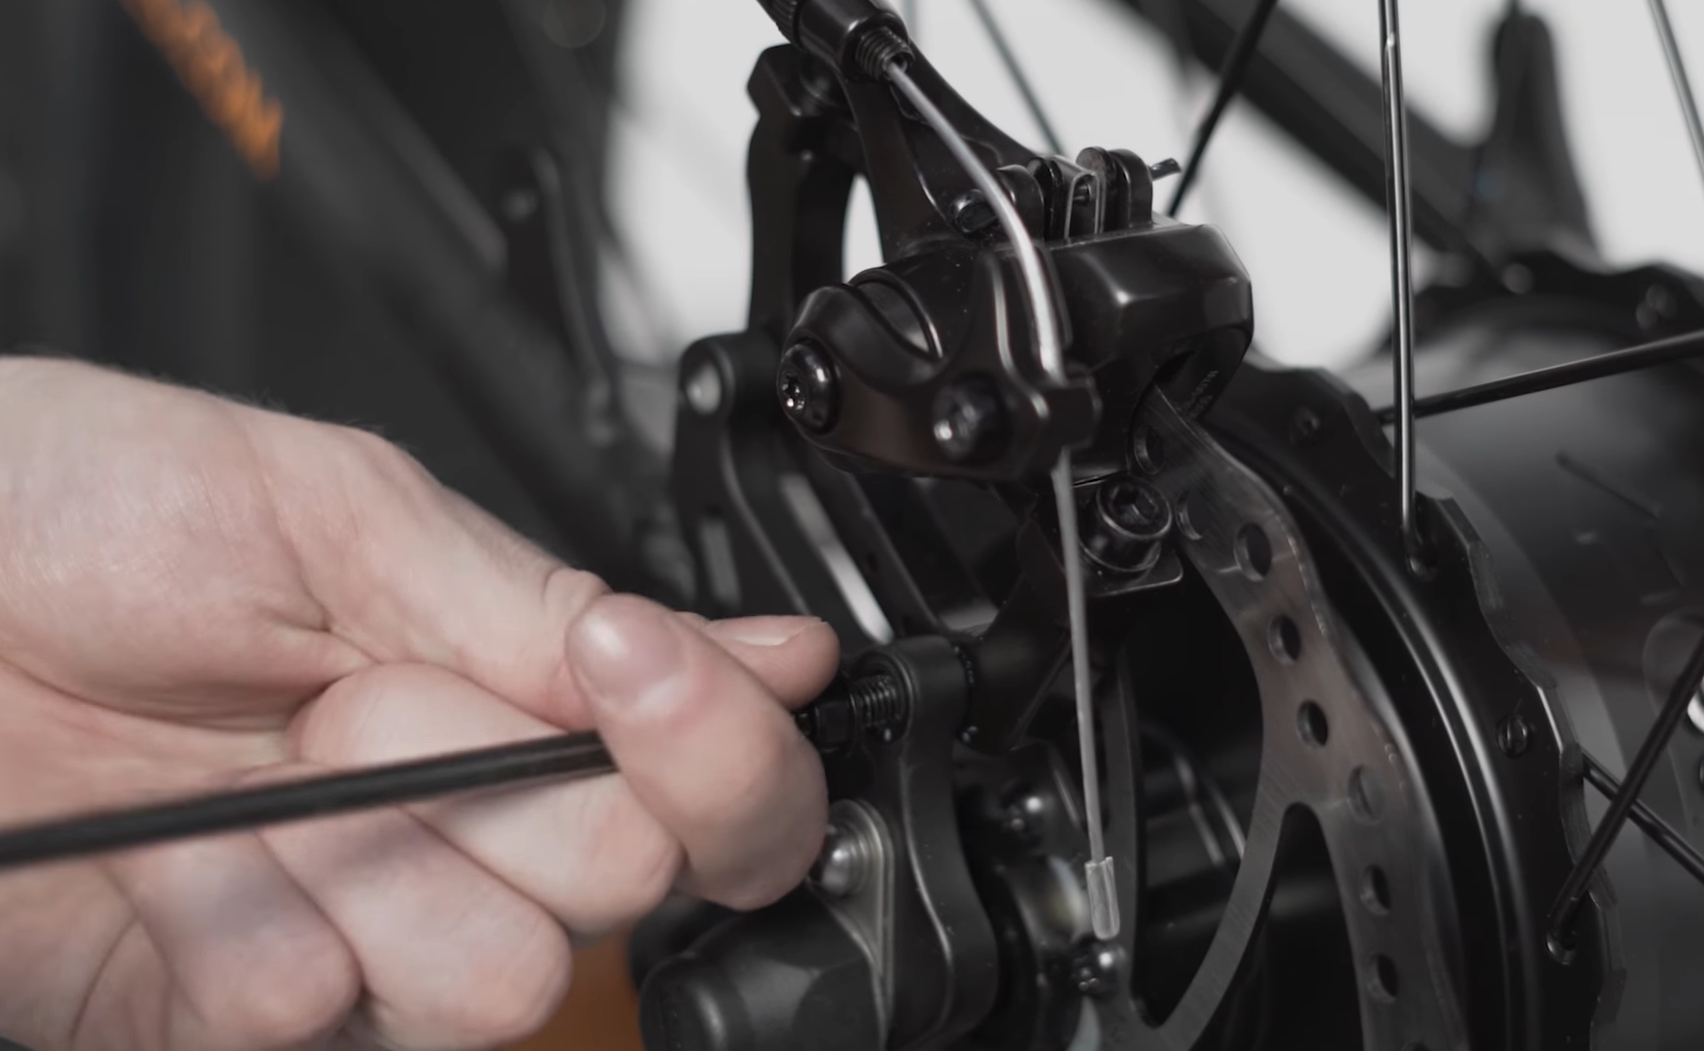
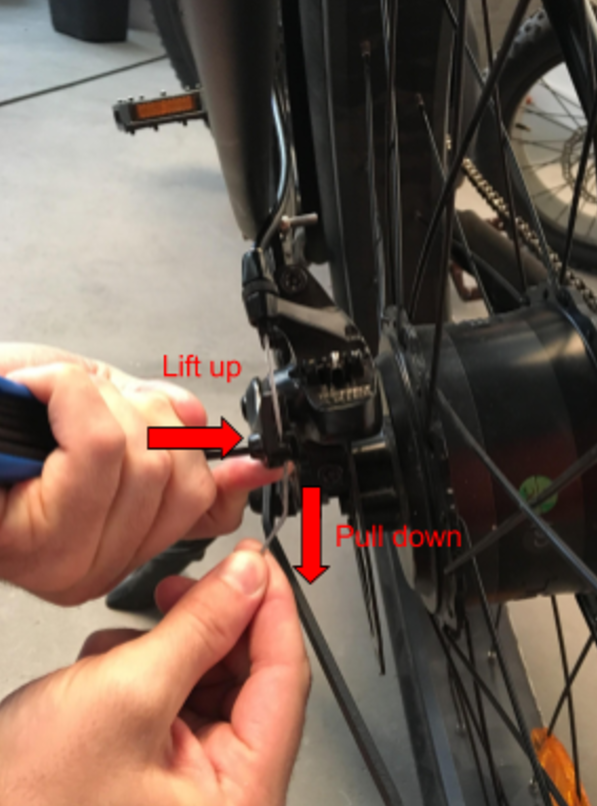
- Adjust the brakes. To adjust the brakes, loosen the cable pinch bolt, and while lifting up on the caliper, pull the brake cable down as shown below. Hold the cable in place and tighten the cable pinch bolt to 10-12 Nm.
If the brake rotor does not spin freely between the brake pads after adjusting with the cable pinch bolt, the brakes require additional adjustment. Click HERE to learn how to adjust the brakes. - Follow the steps HERE to complete the bedding-in new brake process.
- Reinstall the battery and test the bike fully before riding.
If you are not confident in your ability to successfully and safely perform all steps, we recommend having the work performed by a local, certified, and reputable bike mechanic.