RadRunner Connector Check Guide
Checking the connectors and ensuring they are secure and undamaged can help diagnose electrical issues and make sure your ebike is safe and fun to ride.
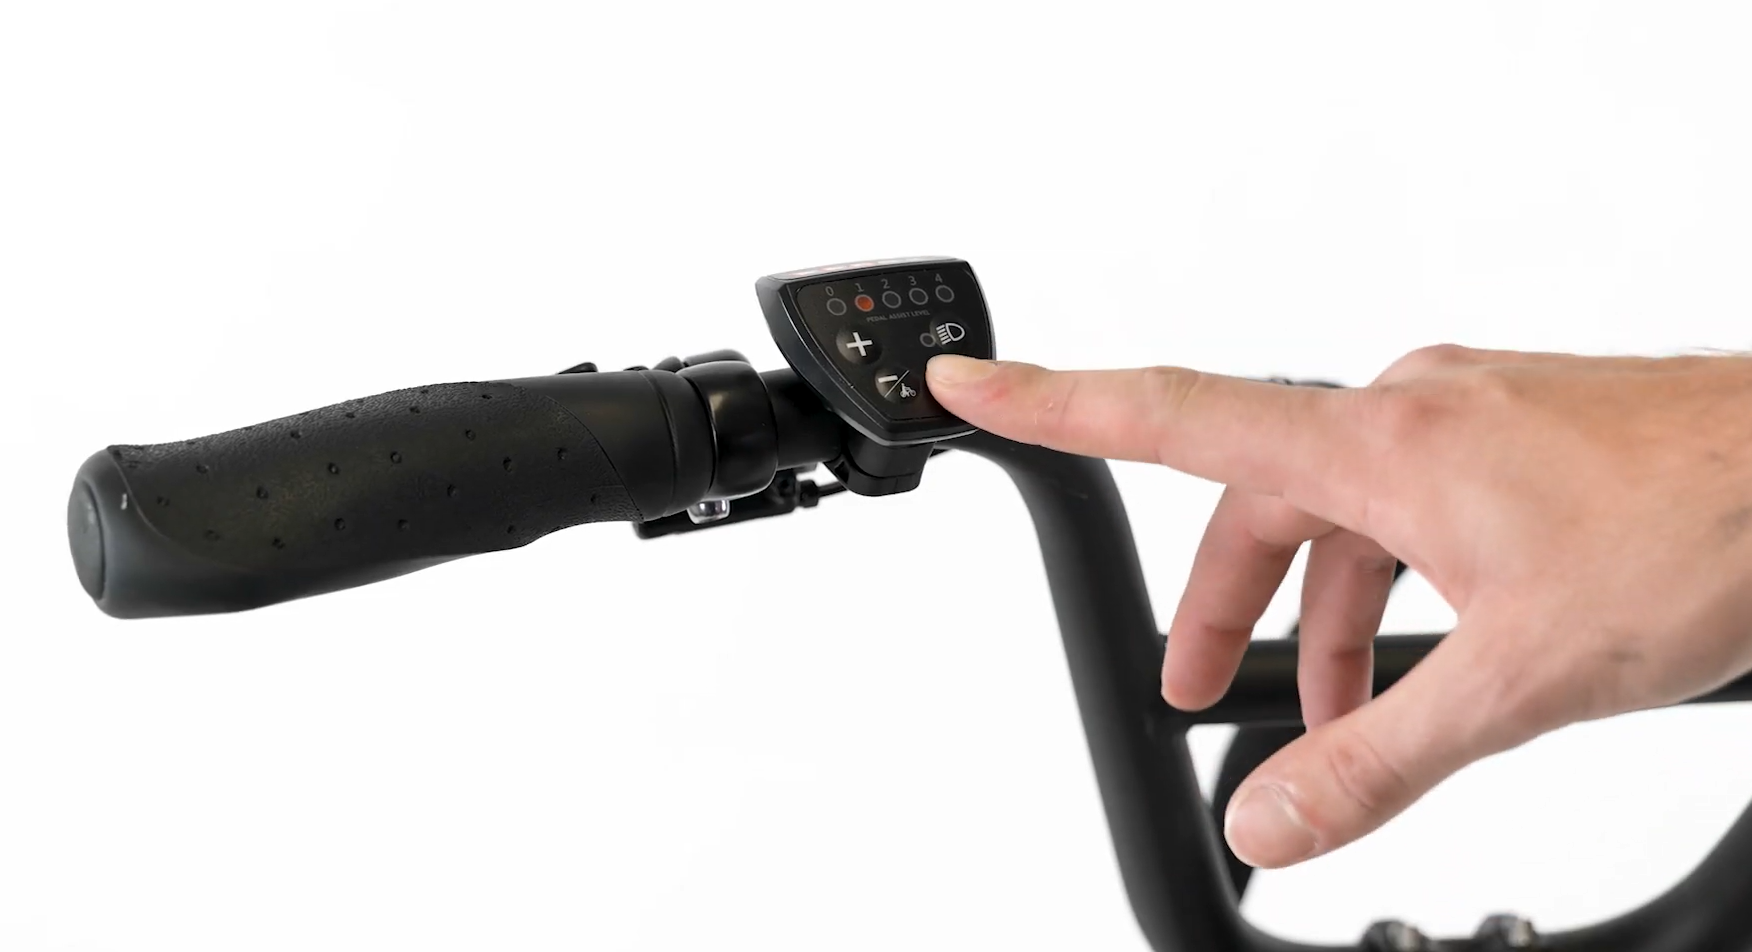
Over time, a connector on your ebike may vibrate loose and need to be plugged in again. If that happens, all Pedal Assist Level lights on the LED display will flash (shown below), or the bike will fail to power on. Performing a connector check can help solve the problem.
If you are not confident in your ability to safely and successfully perform all steps, we recommend having the work performed by a local, certified, and reputable bike mechanic.
Overview
The process will require you to power off the bike, turn off the battery, discharge residual power, unplug a connector and inspect it (take photos of any signs of moisture, debris, or damage), carefully plug the connector back in, turn on the battery, and check if the issue is resolved when you power on the bike. Repeat the process for each connector until the issue is resolved.
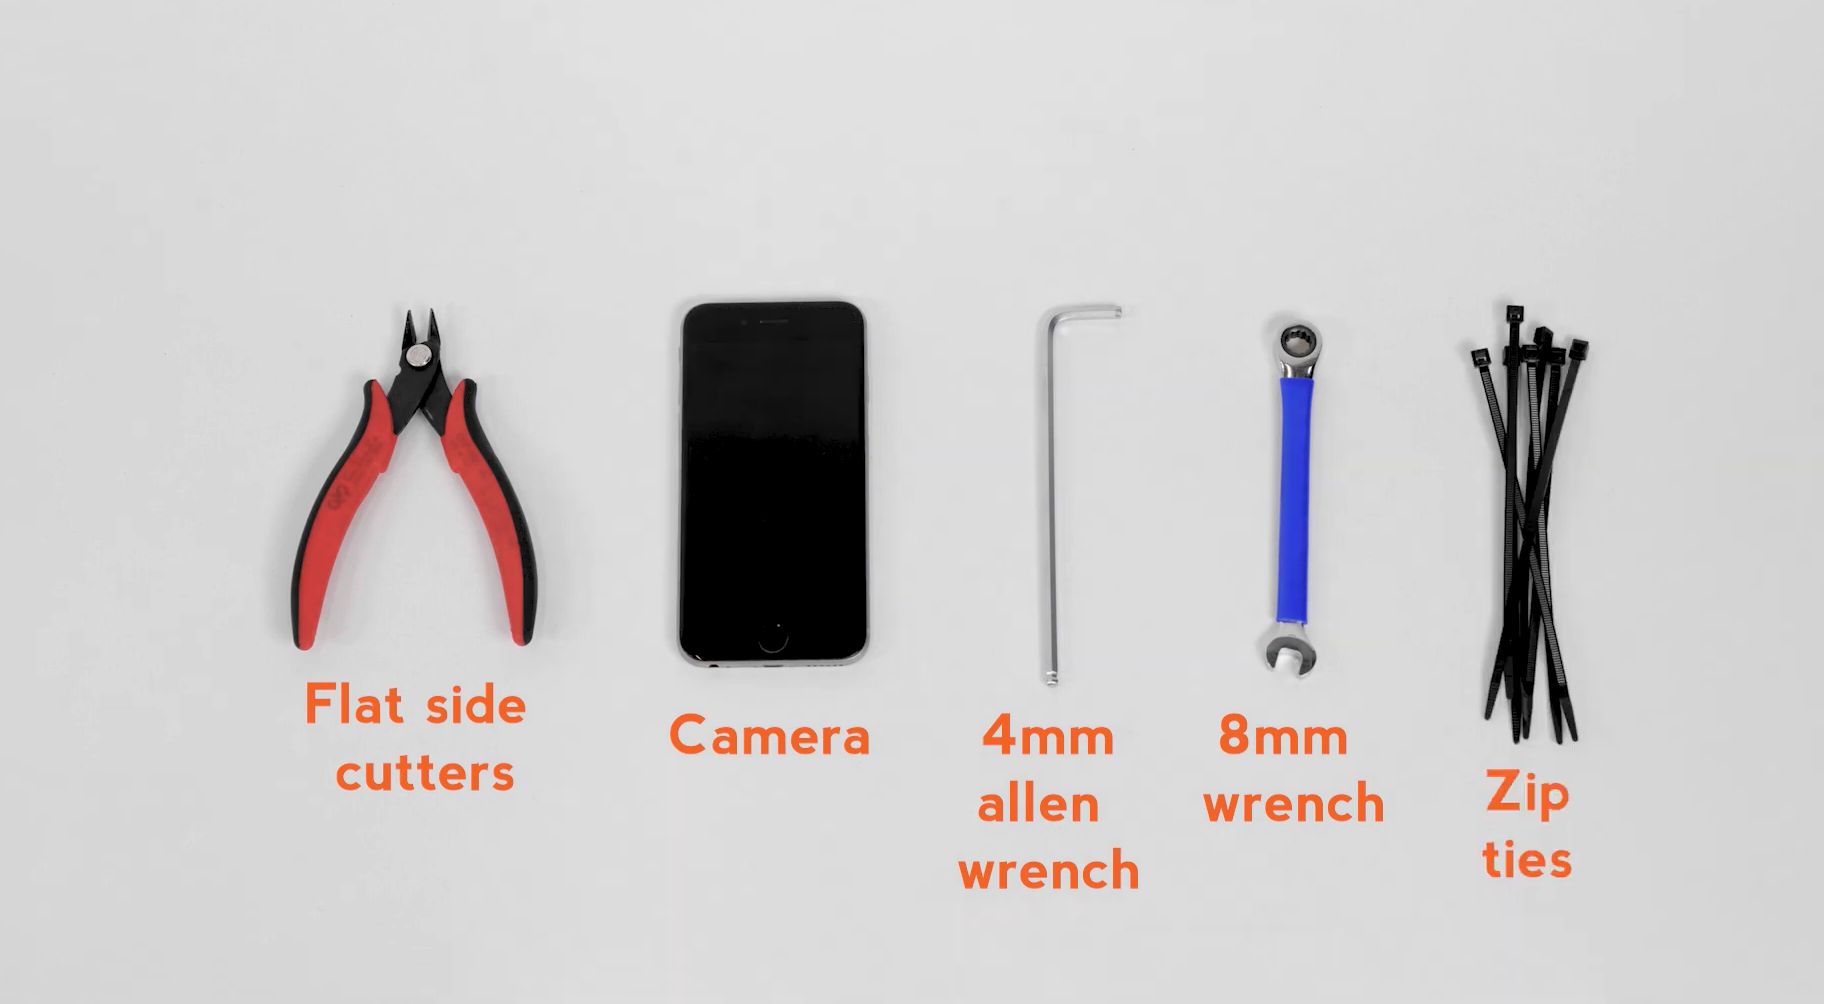
Gather the tools you will need:
- Flat side cutters to snip zip ties securing the connector cables,
- A camera to take photos of any moisture, debris, or damage for Rad Power Bikes Product Support,
- A 4 mm Allen wrench,
- An 8 mm wrench, and
- Around 7 replacement zip ties to secure the cables once the process is complete.
Click on each heading below and follow the instructions within to check each connector.
As you work through the connectors, use flat side cutters to snip zip ties as needed to create enough slack to unplug both sides of the connector.
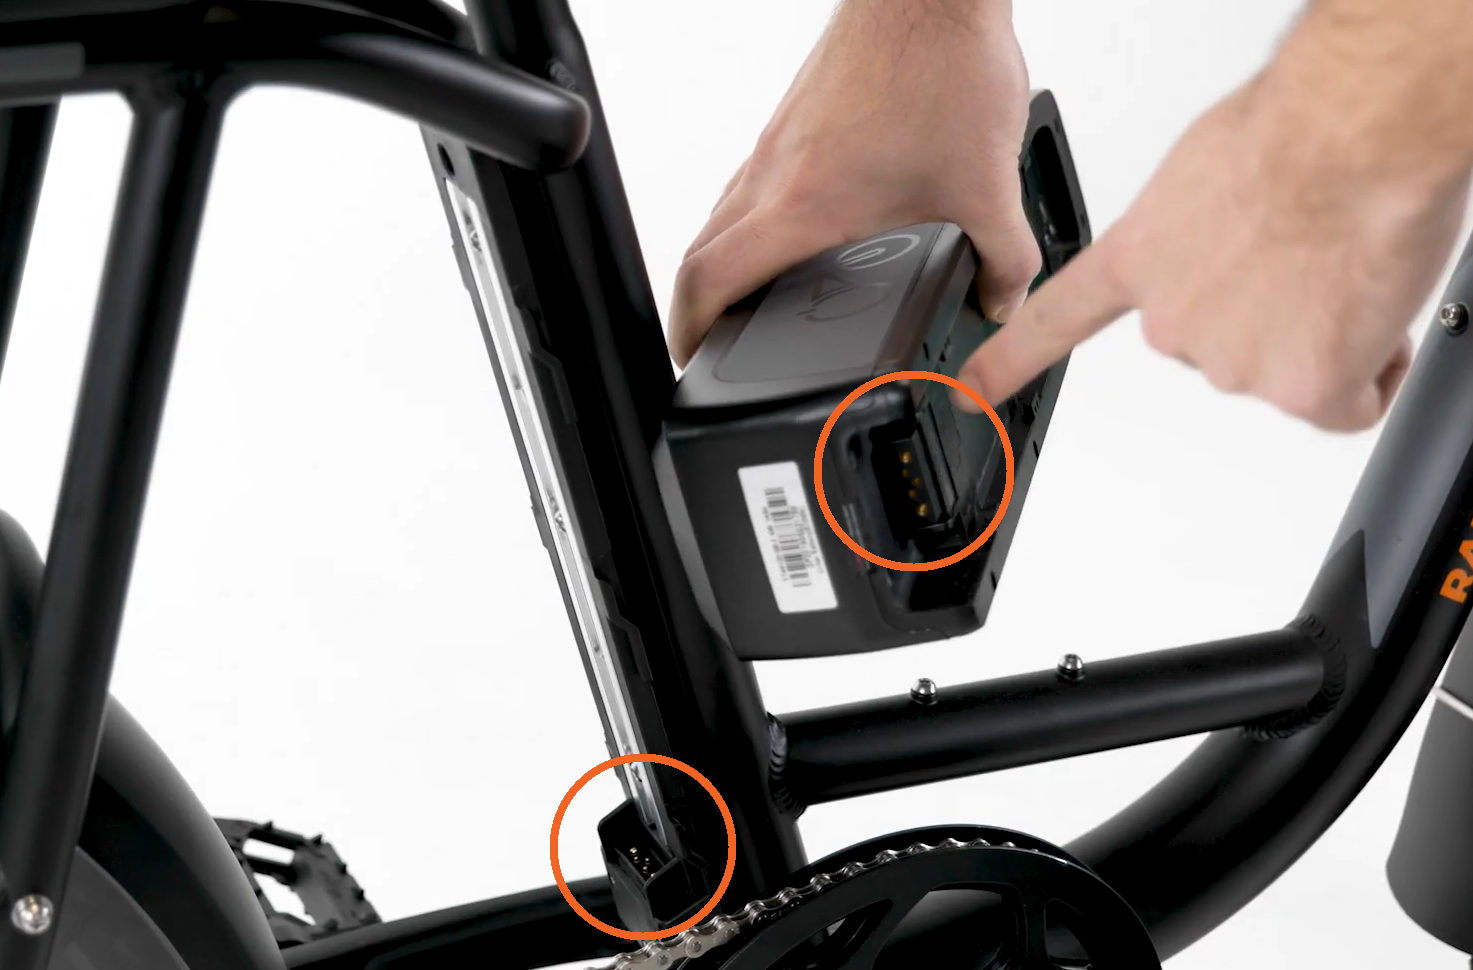
Battery Check
- Power off the bike, remove the battery, and discharge residual power by pressing and holding the power button on the LED display until the display remains off (it may flash on briefly).
Notice: Do not drop the battery or touch/damage the connector terminals when the battery is removed. - Inspect the battery terminal contacts on the mounting tray. Take photos of any damage and contact Rad Power Bikes Product Support as soon as possible.
 If everything looks normal, reinstall the battery, ensuring a proper connection. Use the key to turn on and lock the battery to the frame, and power on the bike to see if the issue is resolved.
If the issue persists, power off the bike, turn off the battery, discharge residual power, and proceed to the next connector.
Display Connector
- Remove the cable cover at the front of the bike and set it aside.
- Trace the cable from the display on the handlebar to the silver metal display connector.
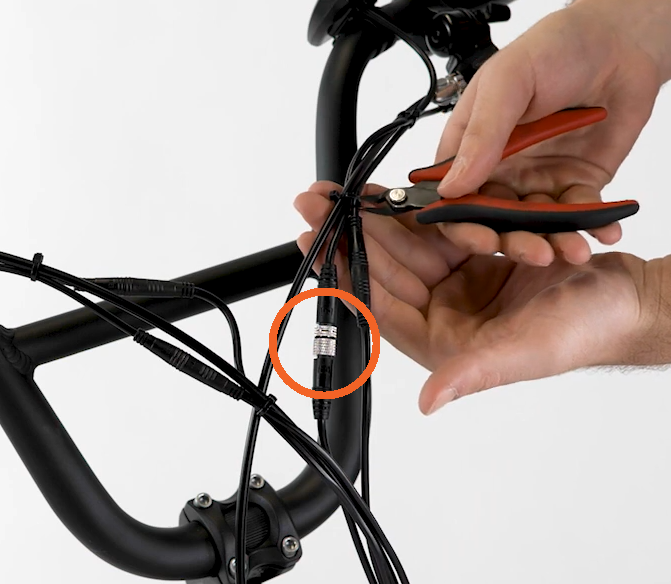
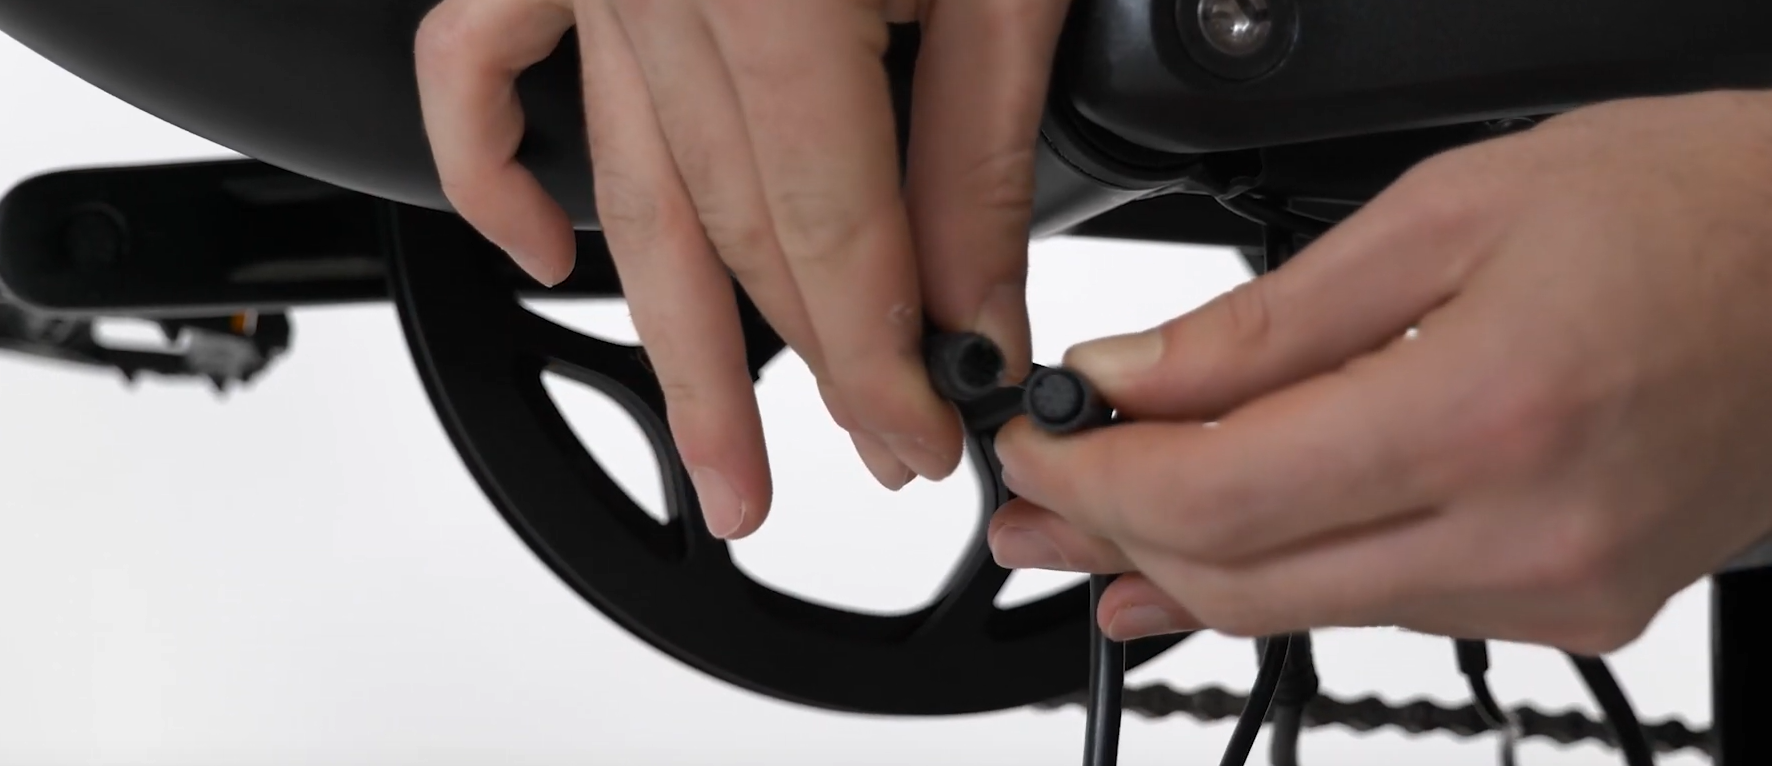
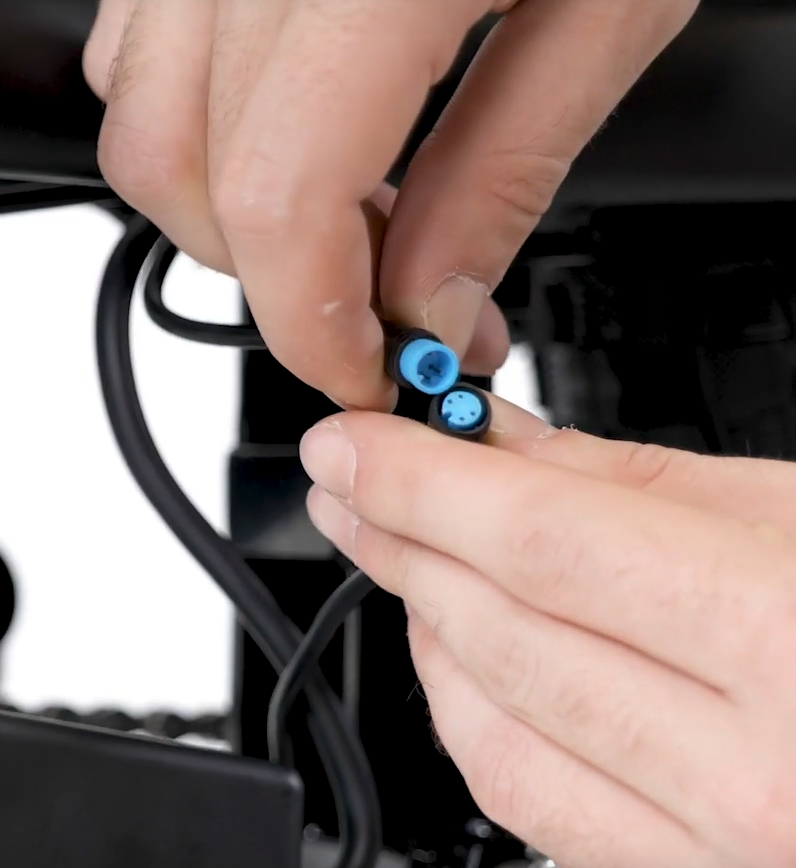
- Unscrew the silver metal connector until the threaded portion releases, then pull each side directly apart without twisting. Inspect both sides of the connector. If you notice signs of moisture, debris, or damage, take photos to send to Rad Power Bikes Product Support as soon as possible.
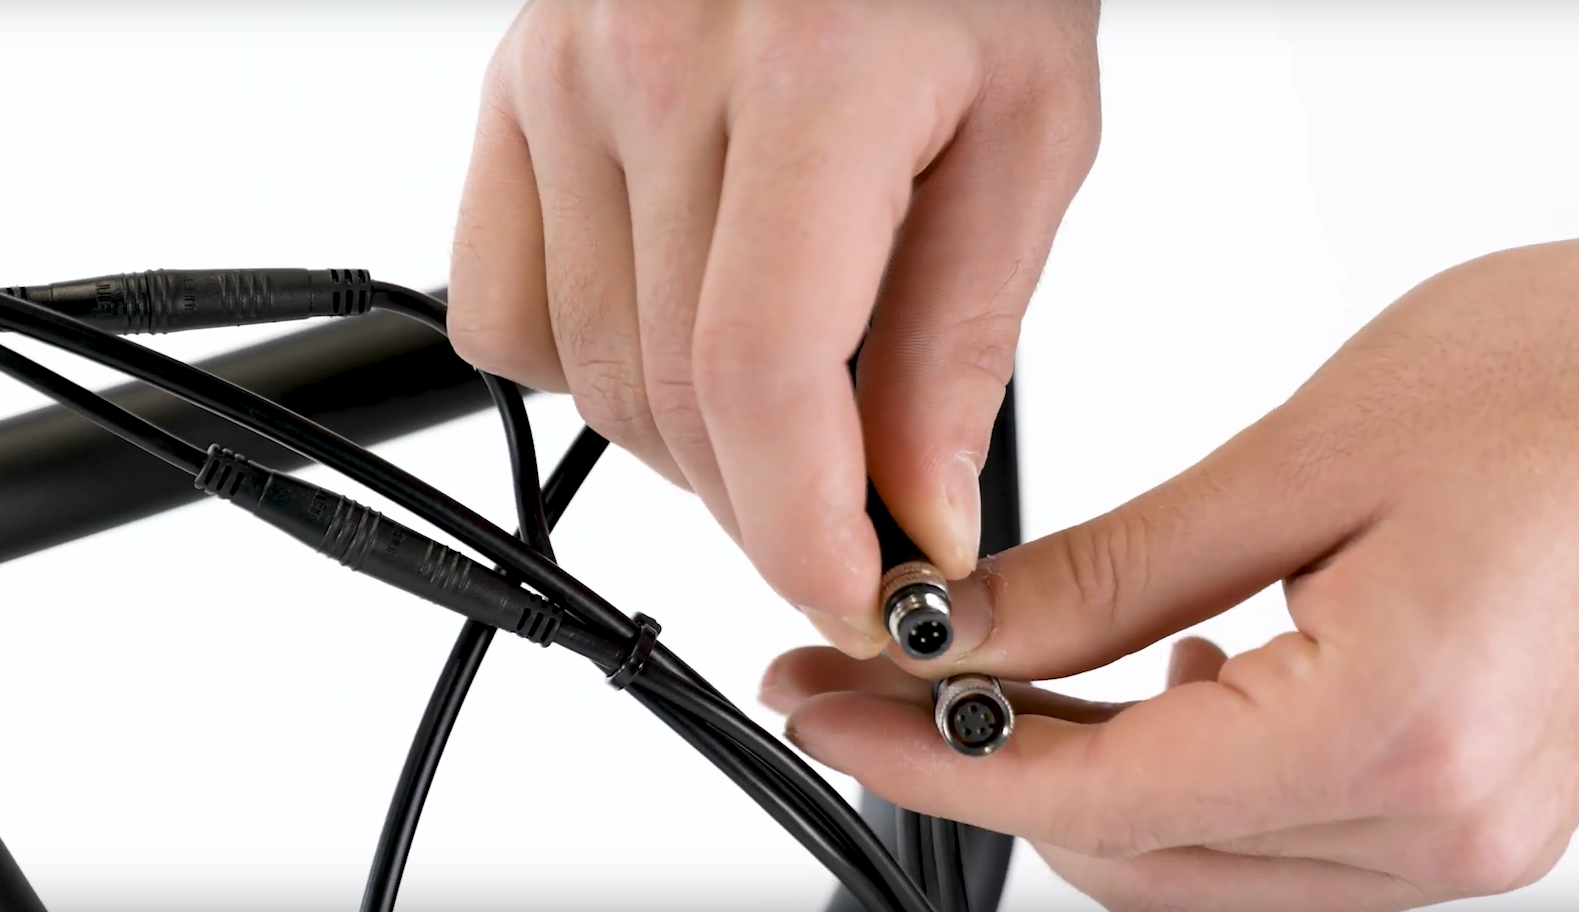
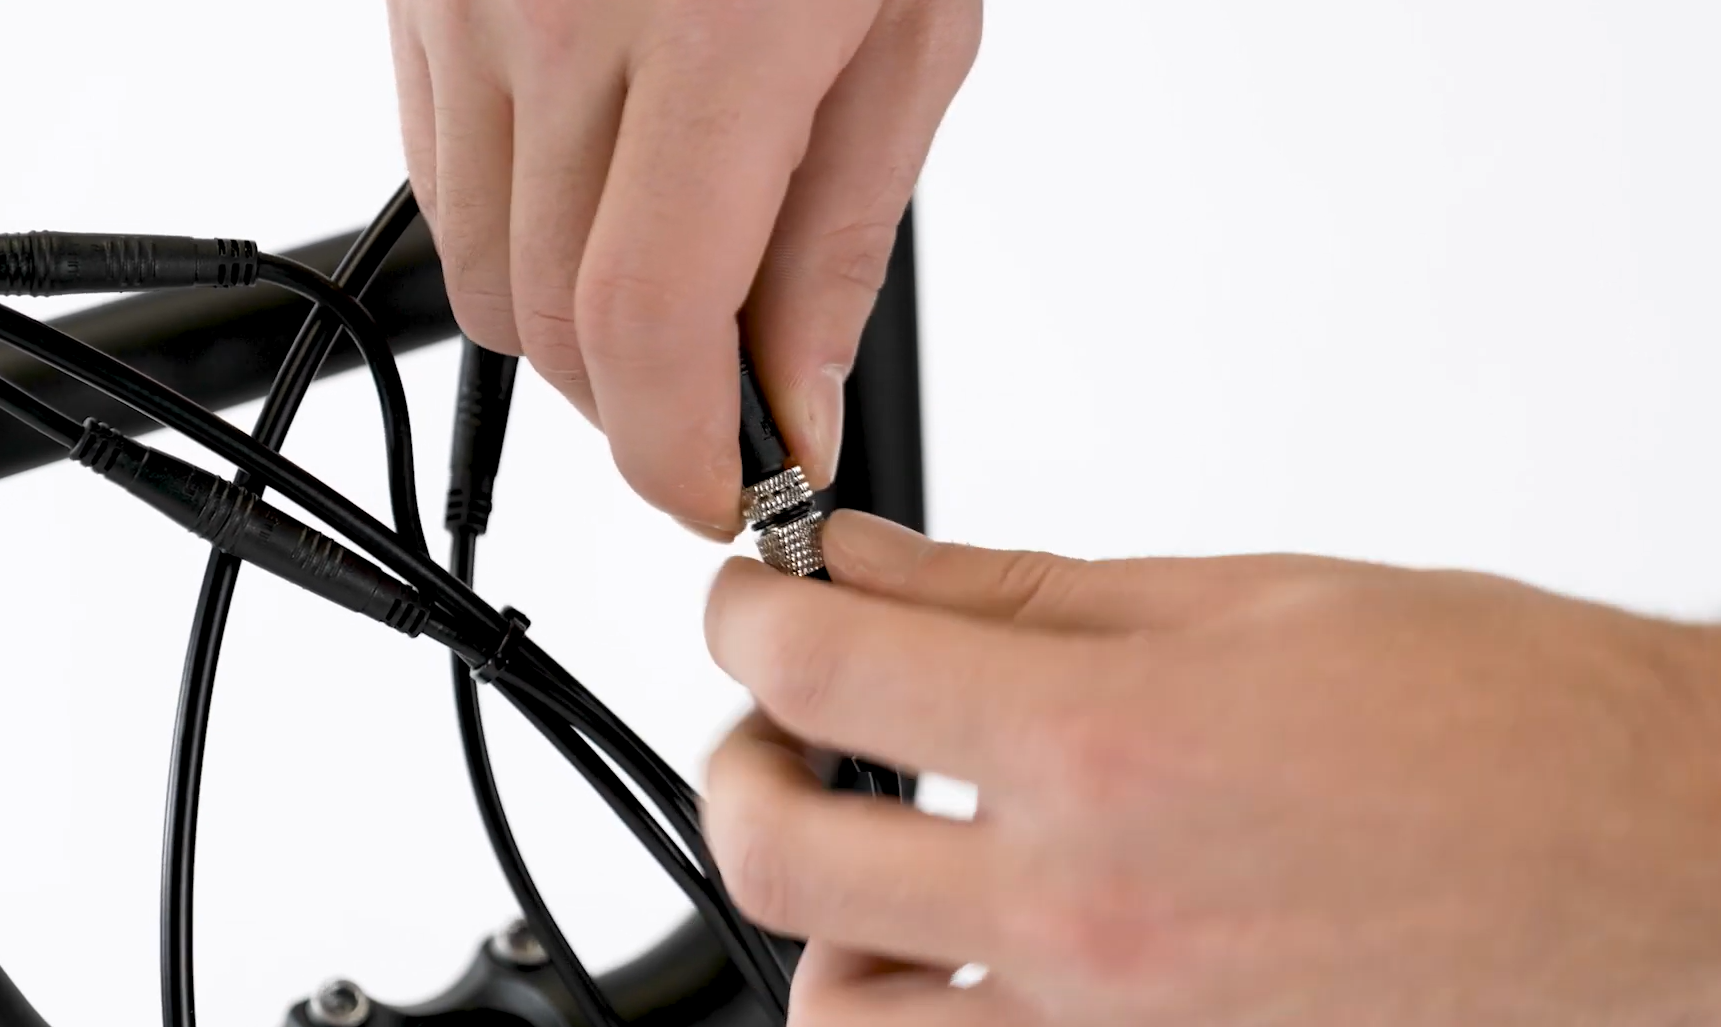
- Reconnect the display connector. Align the internal notch and pins and press directly together without twisting. Then screw the two threaded pieces together to fully seat the connection.
- Turn on the battery and power on the bike to see if the issue is resolved.
If the issue persists, power off the bike, turn off the battery, discharge residual power, and proceed to the next connector.
Brake Connectors
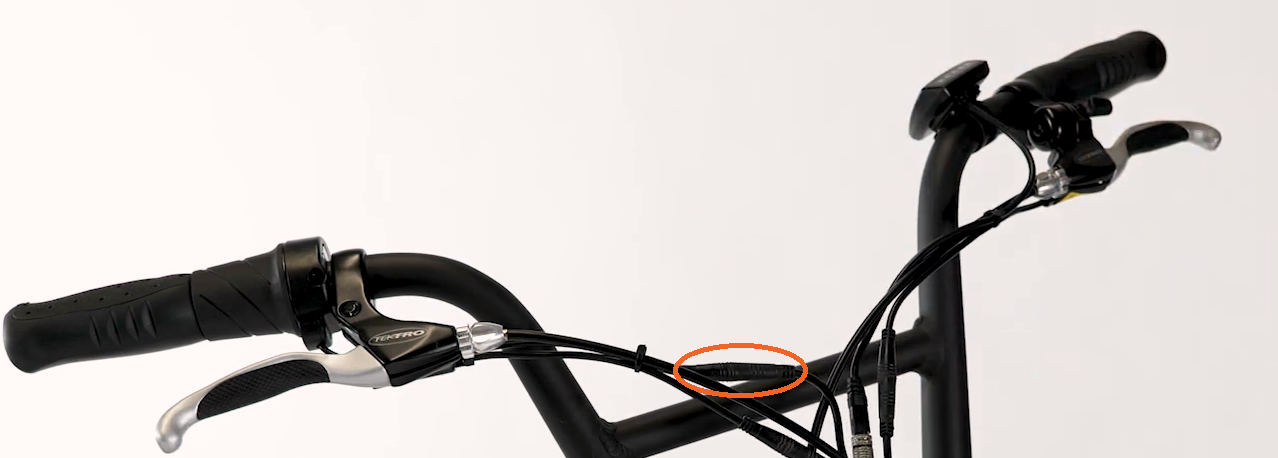
- Trace the cable from one brake lever on the handlebar at the front of the bike to the connector.
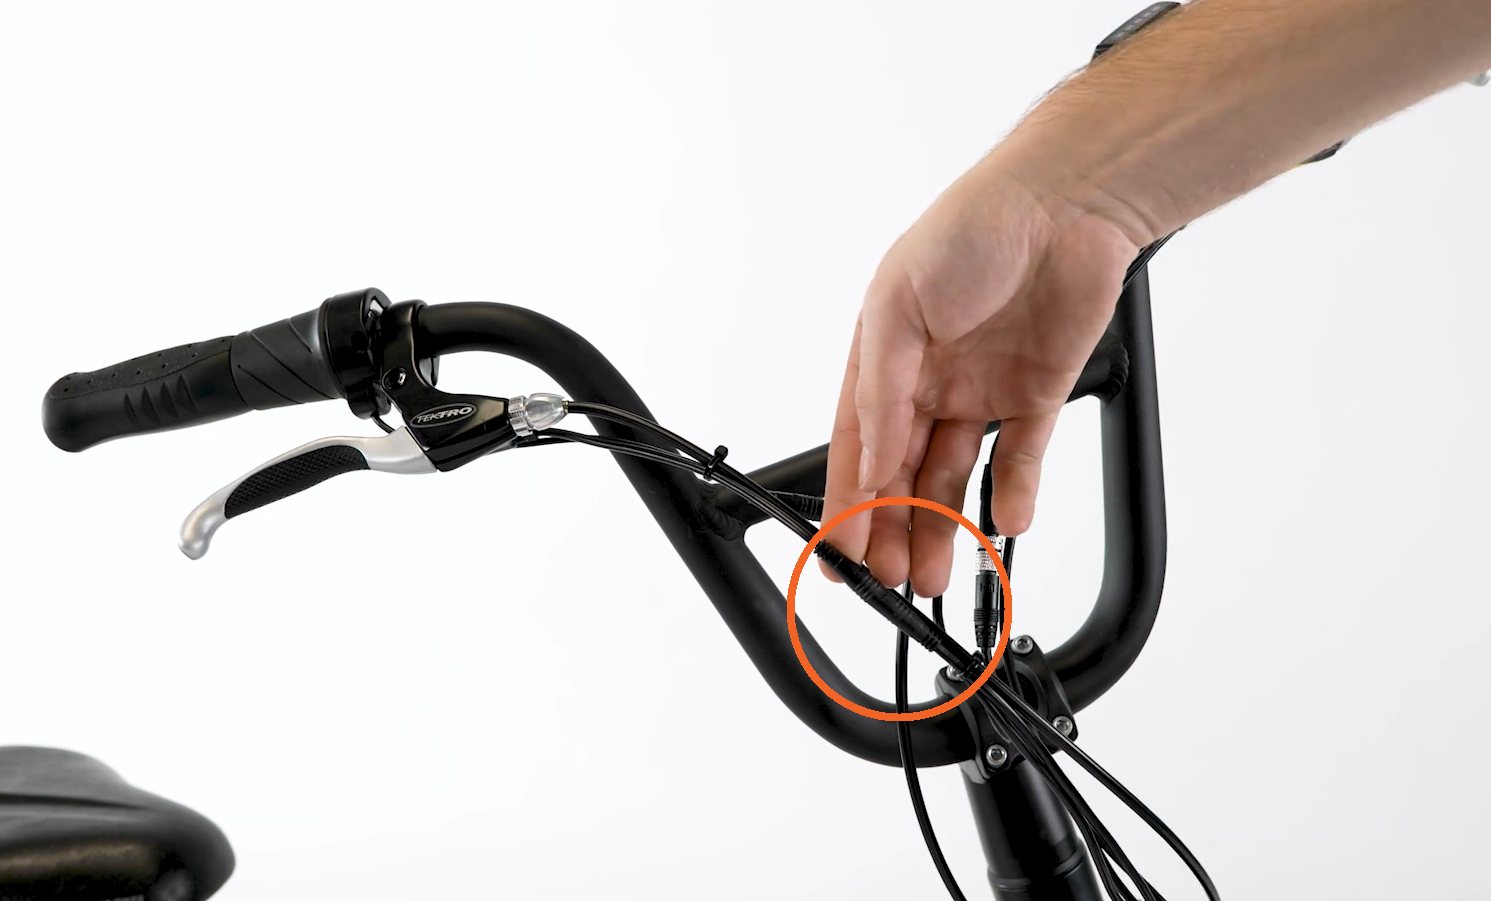
- Pull each side of the connector directly apart without twisting and inspect both sides of the connector. If you notice signs of moisture, debris, or damage, take photos to send to Rad Power Bikes Product Support as soon as possible.
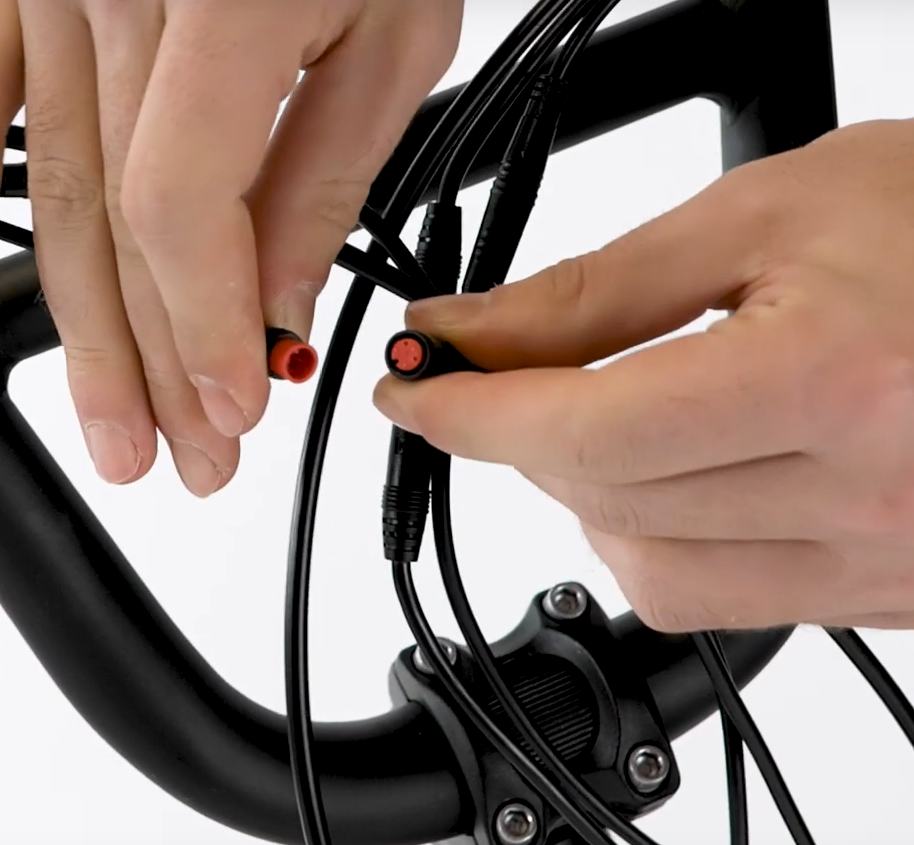
- Reconnect the brake connector. Align the internal notch and pins (and external arrows) and press directly together without twisting to fully seat the connection.
- Turn on the battery and power on the bike to see if the issue is resolved.
If the issue persists, power off the bike, turn off the battery, discharge residual power, and repeat steps 1 through 4 with the other brake connector before proceeding to the next connector on this list.
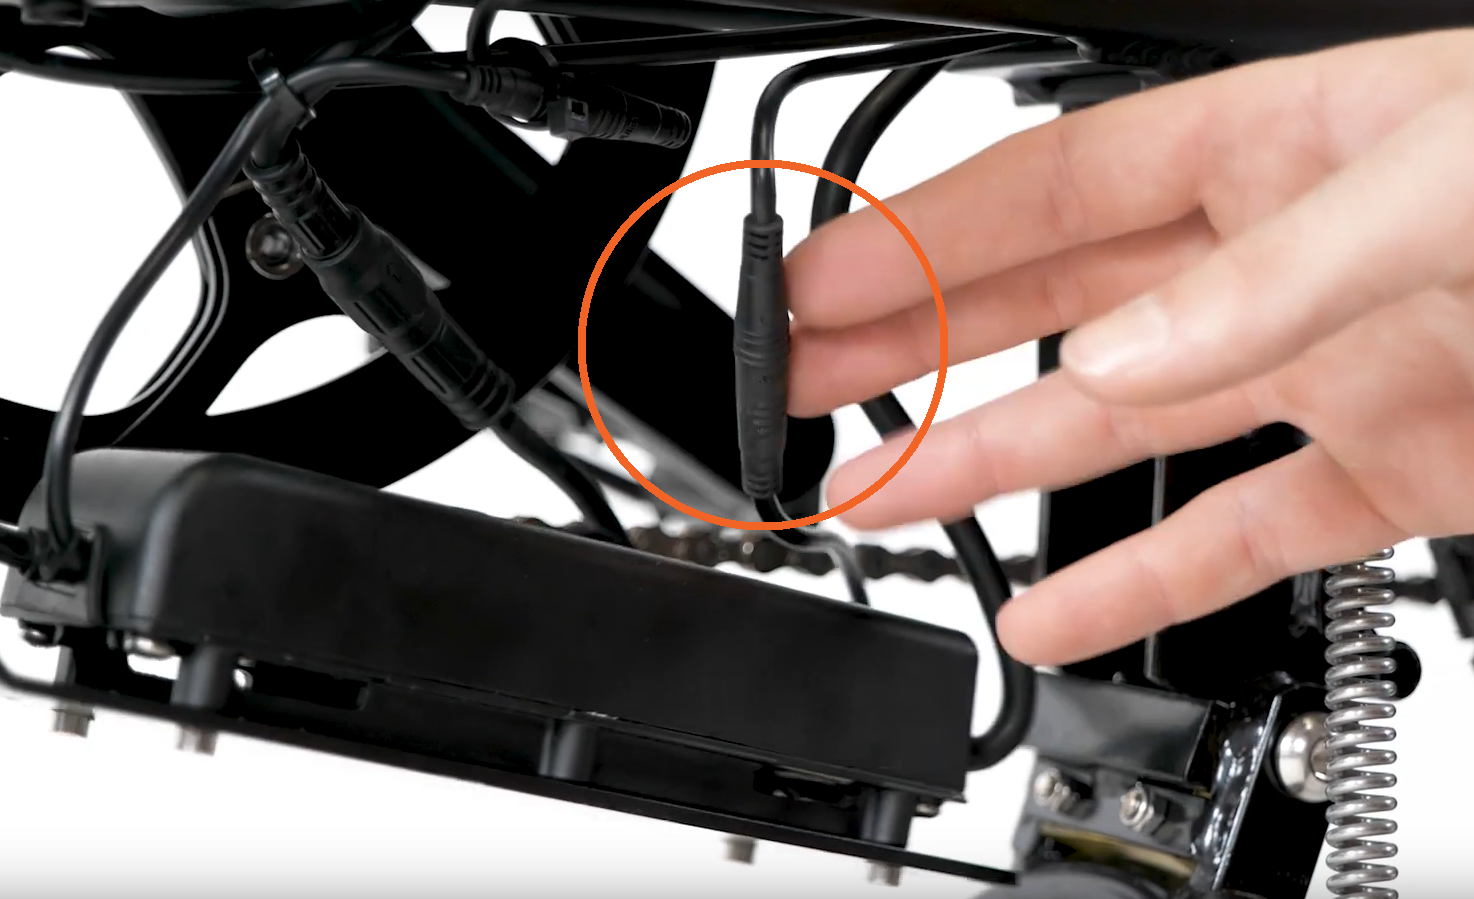
Twist Power Assist Connector
- Trace the cable from the twist grip on the handlebar to the connector at the front of the bike.
- Pull each side of the connector directly apart without twisting and inspect both sides of the connector. If you notice signs of moisture, debris, or damage, take photos to send to Rad Power Bikes Product Support as soon as possible.
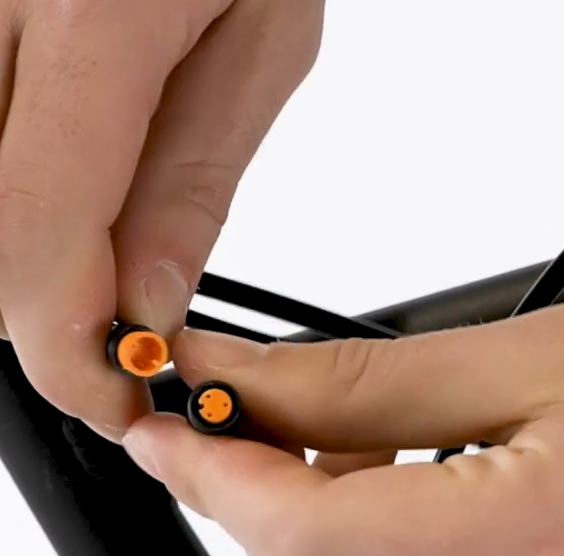
- Reconnect the twist power assist connector. Align the internal notch and pins (and external arrows) and press directly together without twisting to fully seat the connection.
- Turn on the battery and power on the bike to see if the issue is resolved.
If the issue persists,power off the bike, turn off the battery, discharge residual power, and proceed to the next connector.
Headlight Connector
- Trace the cable from the headlight at the front of the bike to the connector.

- Pull each side of the connector directly apart without twisting and inspect both sides of the connector. If you notice signs of moisture, debris, or damage, take photos to send to Rad Power Bikes Product Support as soon as possible.
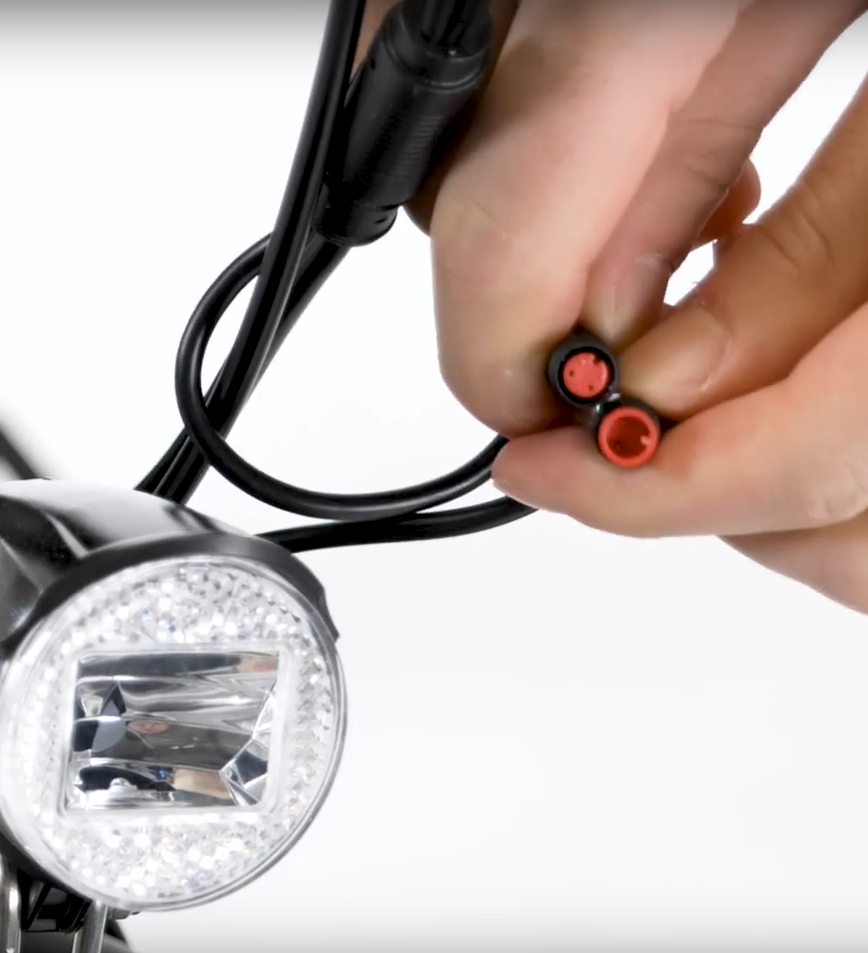
- Reconnect the headlight connector. Align the internal notch and pins (and external arrows) and press directly together without twisting to fully seat the connection.
- Turn on the battery and power on the bike to see if the issue is resolved.
If the issue persists,power off the bike, turn off the battery, discharge residual power, and proceed to the next connector.
Motor Connector
- Trace the cable coming out of the motor, at the chainstay on the bike’s left side, to the connector.
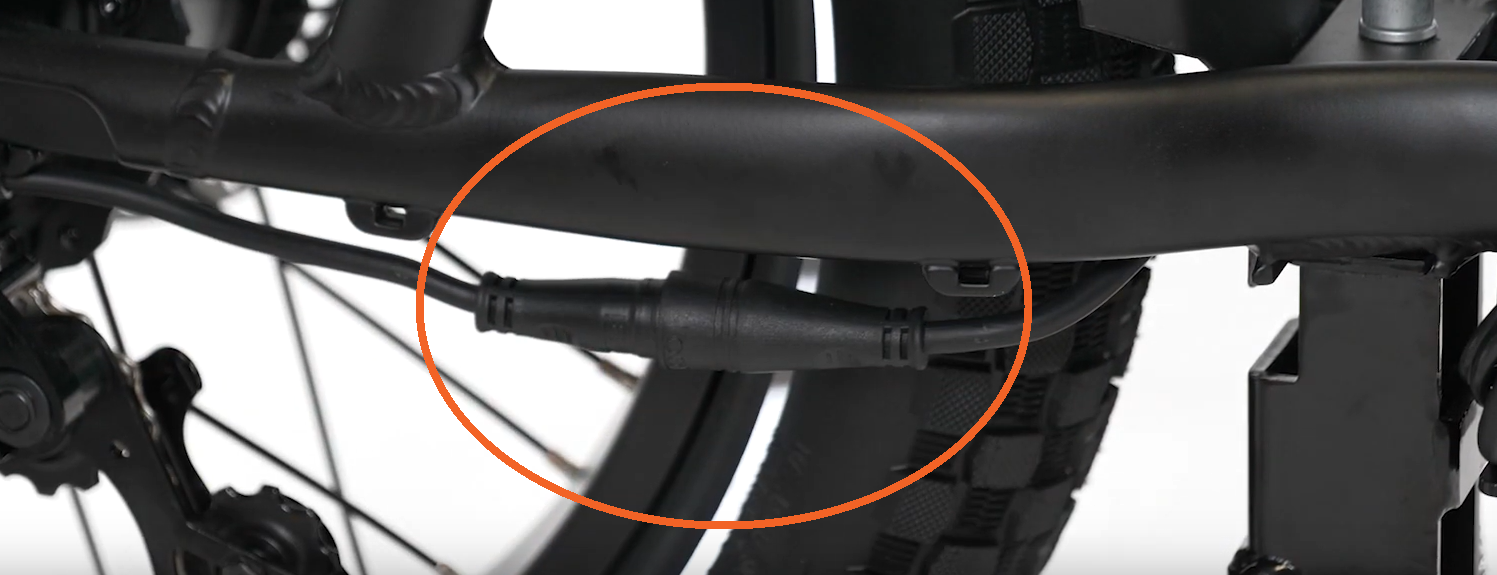
- Pull each side of the connector directly apart without twisting and inspect both sides of the connector. If you notice signs of moisture, debris, or damage, take photos to send to Rad Power Bikes Product Support as soon as possible.
- Reconnect the motor connector. Align the internal notch and pins (and external arrows) and press directly together without twisting to fully seat the connection.
- Turn on the battery and power on the bike to see if the issue is resolved.
If the issue persists, power off the bike, turn off the battery, discharge residual power, and proceed to the next connector.
Taillight Connector
- Trace the cable coming out of the taillight at the rear of the bike to the connector.
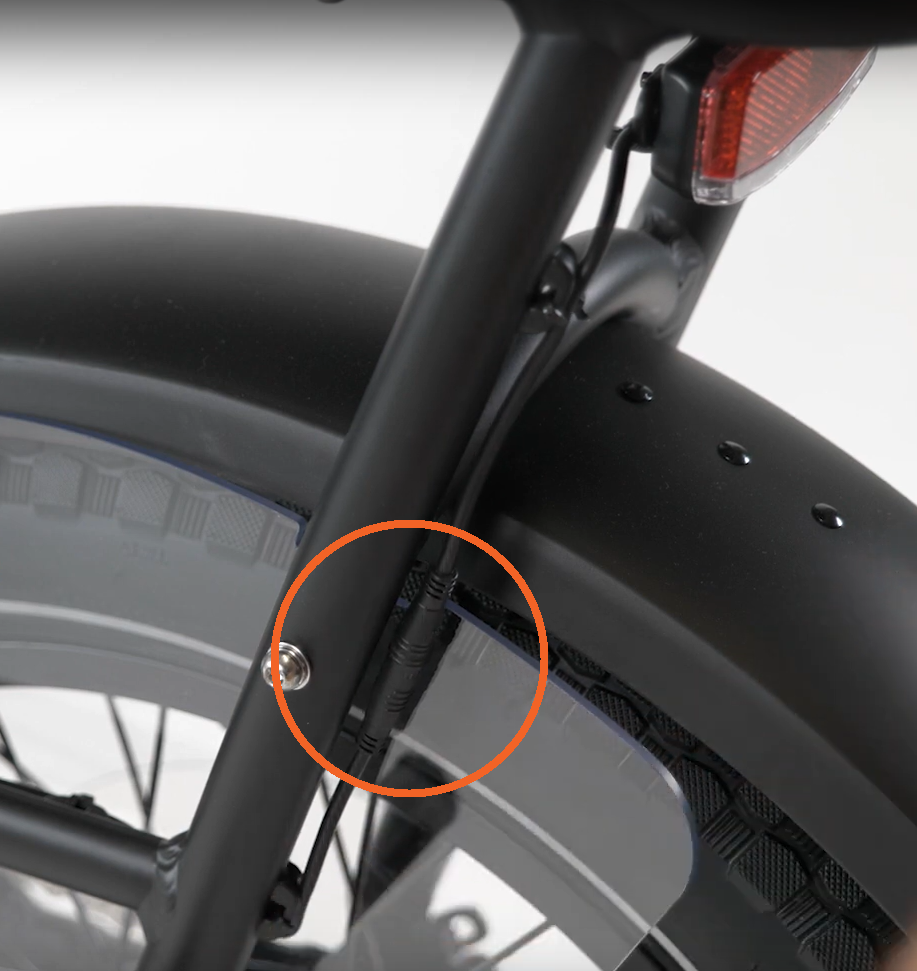
- Pull each side of the connector directly apart without twisting and inspect both sides of the connector. If you notice signs of moisture, debris, or damage, take photos to send to Rad Power Bikes Product Support as soon as possible.
- Reconnect the taillight connector. Align the internal notch and pins (and external arrows) and press directly together without twisting to fully seat the connection.
- Turn on the battery and power on the bike to see if the issue is resolved. If the issue persists, power off the bike, turn off the battery, discharge residual power, and read the instructions below on how to proceed to the next connector.
The remaining connectors are located below the battery, between the battery mounting tray (on the seat tube) and the skid plate (under the cranks at the bottom of the frame). To access these connectors, unlock and remove the battery, discharge residual power, and follow the instructions within each section below.
Remove the Skid Plate
- Remove the skid plate mounting bolts and hardware:
- Remove the rear skid plate mounting bolt, locknut, washer, and spacer. Use a 4 mm Allen wrench from the top and an 8 mm wrench on the locknut under the skid plate (near the kickstand).
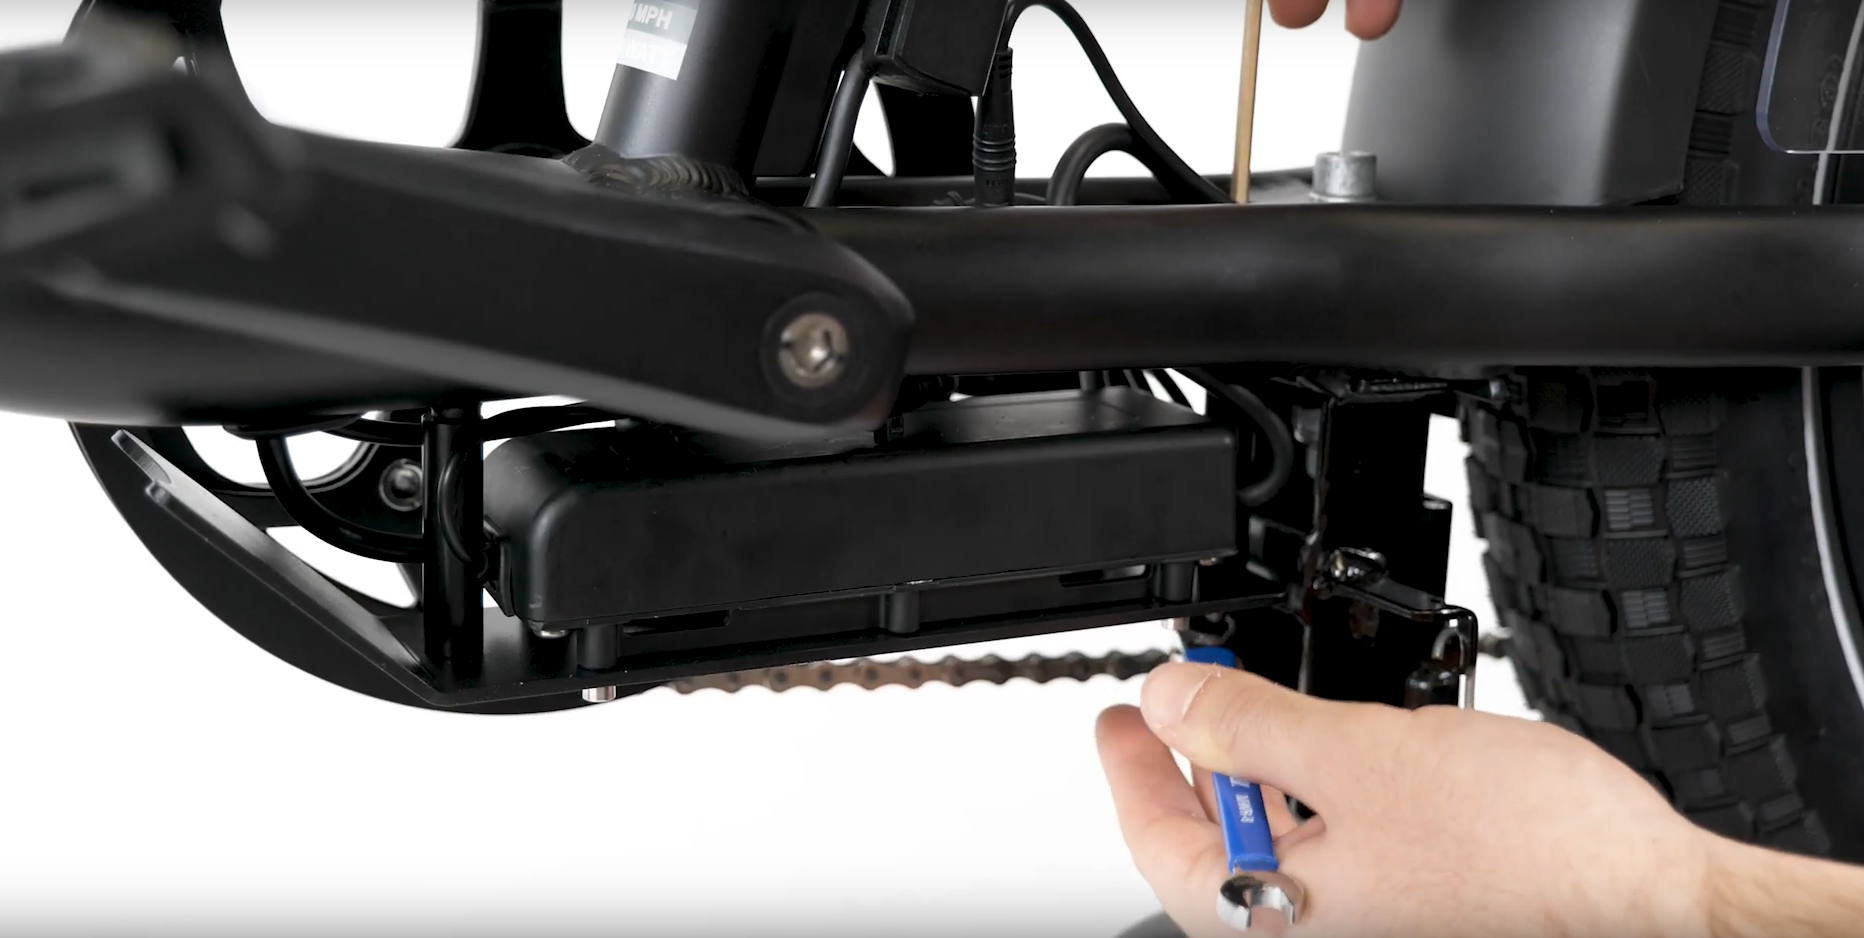
- Remove the front skid plate mounting bolt, spacer, flat washer, and split washer. Insert a 4 mm Allen wrench into the bolt head fully from below the skid plate (near the bent end). Apply constant pressure and turn the wrench slowly to prevent stripping the bolt head.
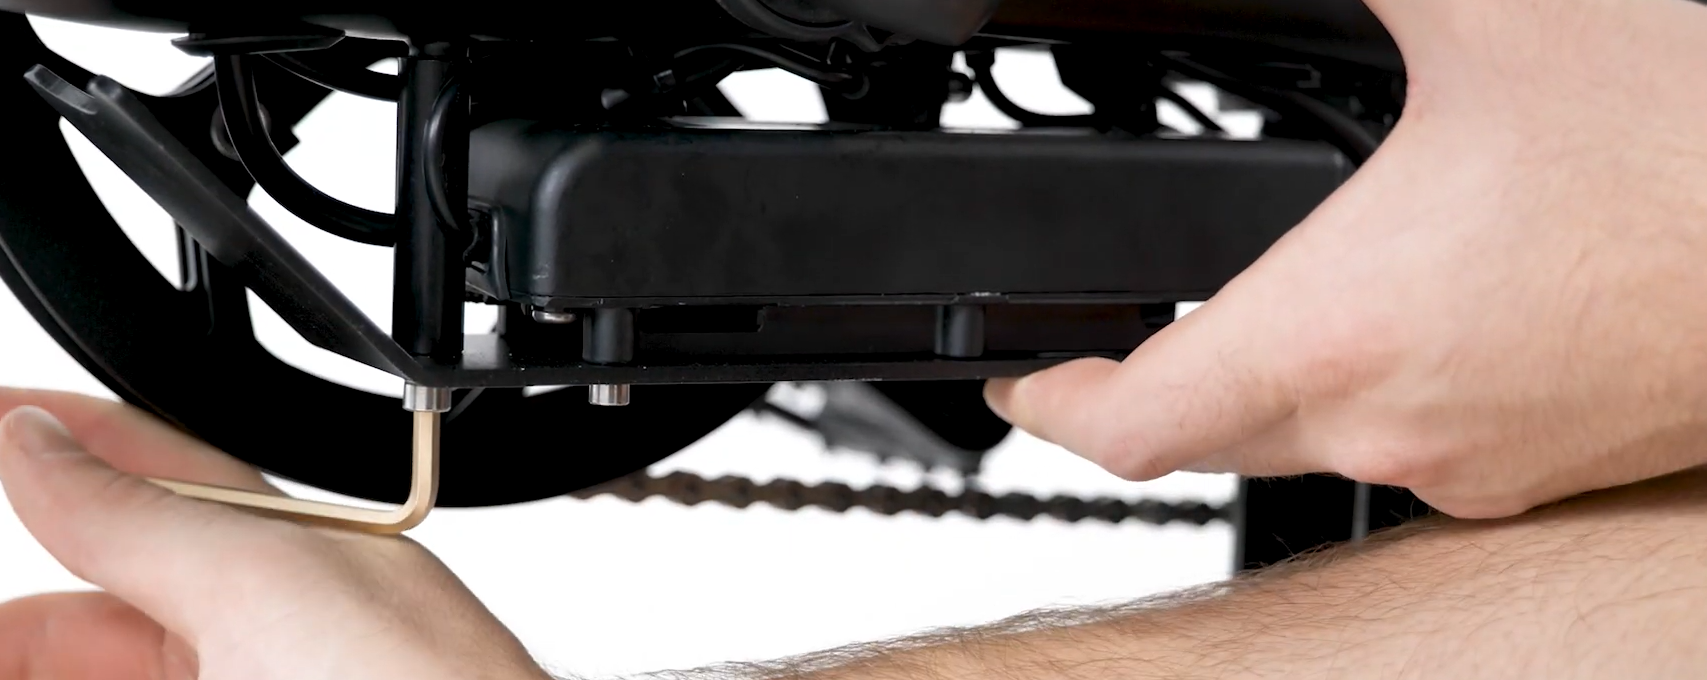
- Remove the rear skid plate mounting bolt, locknut, washer, and spacer. Use a 4 mm Allen wrench from the top and an 8 mm wrench on the locknut under the skid plate (near the kickstand).
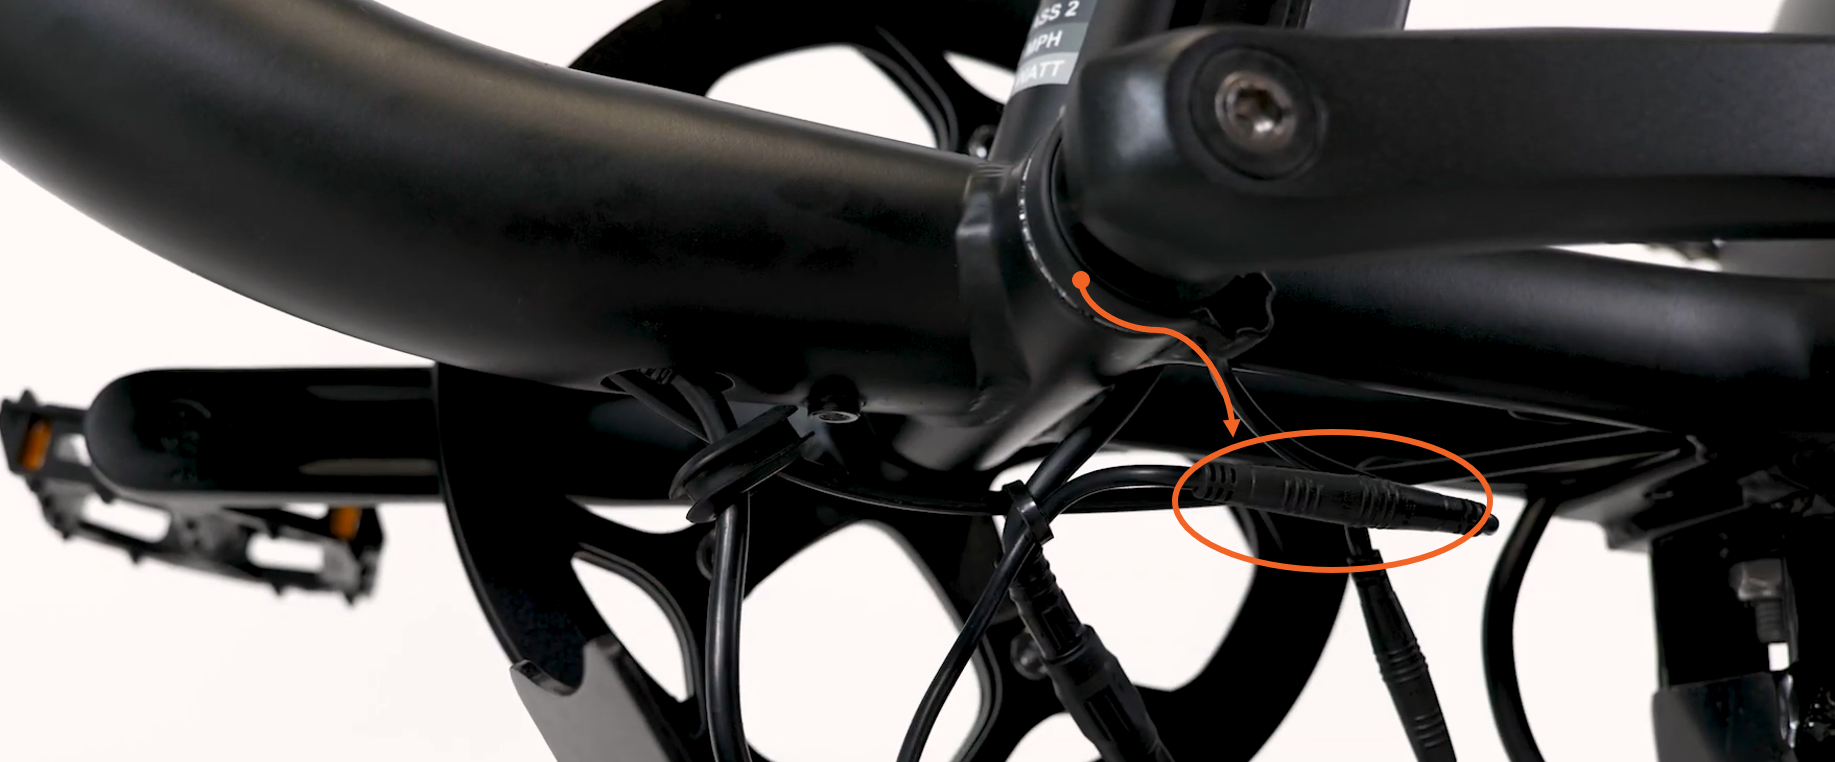
Battery Connector
- Trace the cable coming out of the battery to the connector.
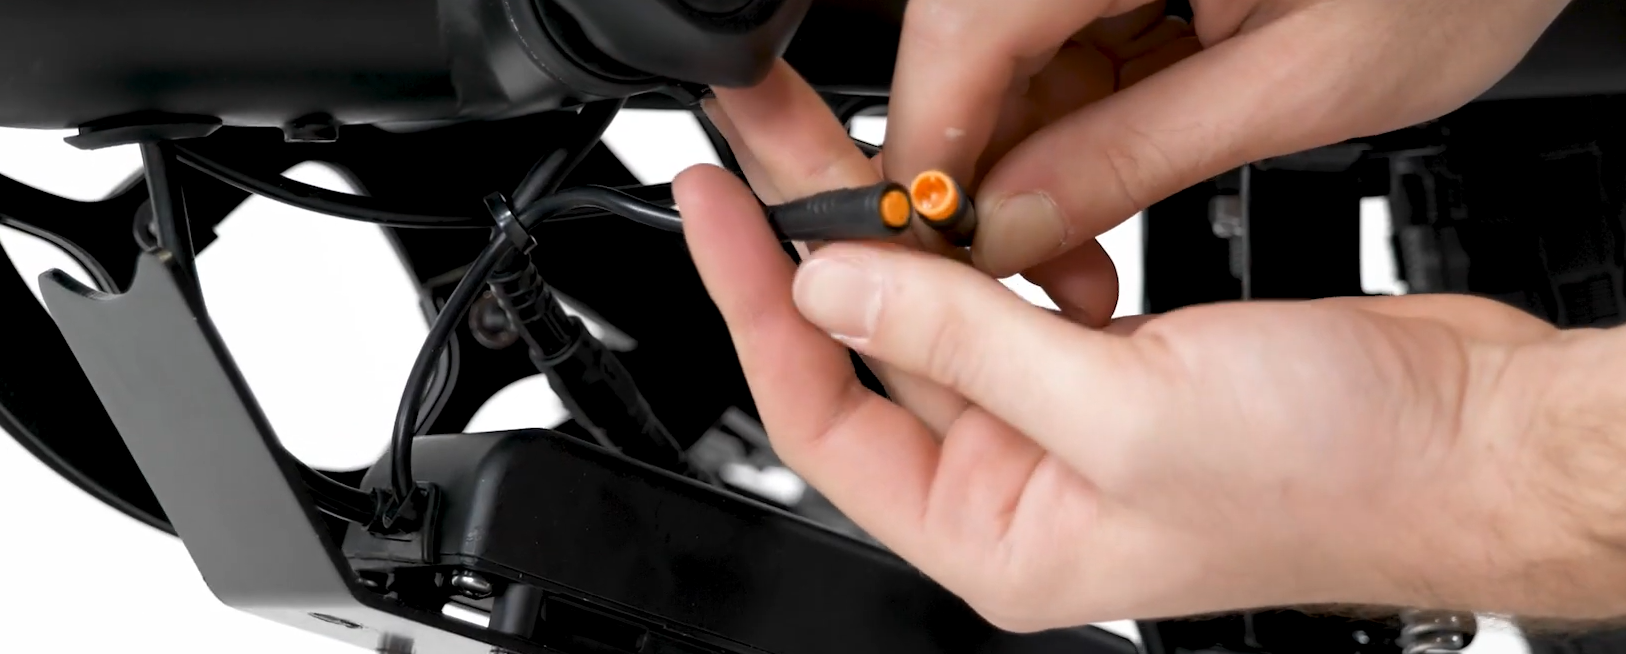
- Pull each side of the connector directly apart without twisting and inspect both sides of the connector. If you notice signs of moisture, debris, or damage, take photos to send to Rad Power Bikes Product Support as soon as possible.
- Reconnect the battery connector.Align the internal notch and pins (and flat portion) and press directly together without twisting to fully seat the connection.
- Turn on the battery and power on the bike to see if the issue is resolved.
If the issue persists,power off the bike, turn off the battery, discharge residual power, and proceed to the next connector.
Pedal Assist (PAS) Sensor Connector
- Trace the cable coming out of the PAS sensor to the connector.
- Pull each side of the connector directly apart without twistingand inspect both sides of the connector. If you notice signs of moisture, debris, or damage, take photos to send to Rad Power Bikes Product Support as soon as possible.
- Reconnect the PAS sensor connector. Align the internal notch and pins (and external arrows) and press directly together without twisting to fully seat the connection.
- Turn on the battery and power on the bike to see if the issue is resolved.
If the issue persists, power off the bike, turn off the battery, discharge residual power, and proceed to the next connector.
Second Taillight Connector
- Locate the second taillight connector,which is the same size as the PAS sensor connector.
- Pull each side of the connector directly apart without twisting and inspect both sides of the connector. If you notice signs of moisture, debris, or damage, take photos to send to Rad Power Bikes Product Support as soon as possible.
- Reconnect the second taillight connector. Align the internal notch and pins (and external arrows) and press directly together without twisting to fully seat the connection.
- Turn on the battery and power on the bike to see if the issue is resolved.
If the issue persists, power off the bike, turn off the battery, discharge residual power, and proceed to the next connector.
Wiring Harness Connector
- Turn the handlebar to the side. Locate the large wiring harness cable, and gently feed the cable into the opening at the front of the downtube to provide slack.

- Unseat the rubber grommet, which is located at the lower cable opening in front of the bottom bracket.
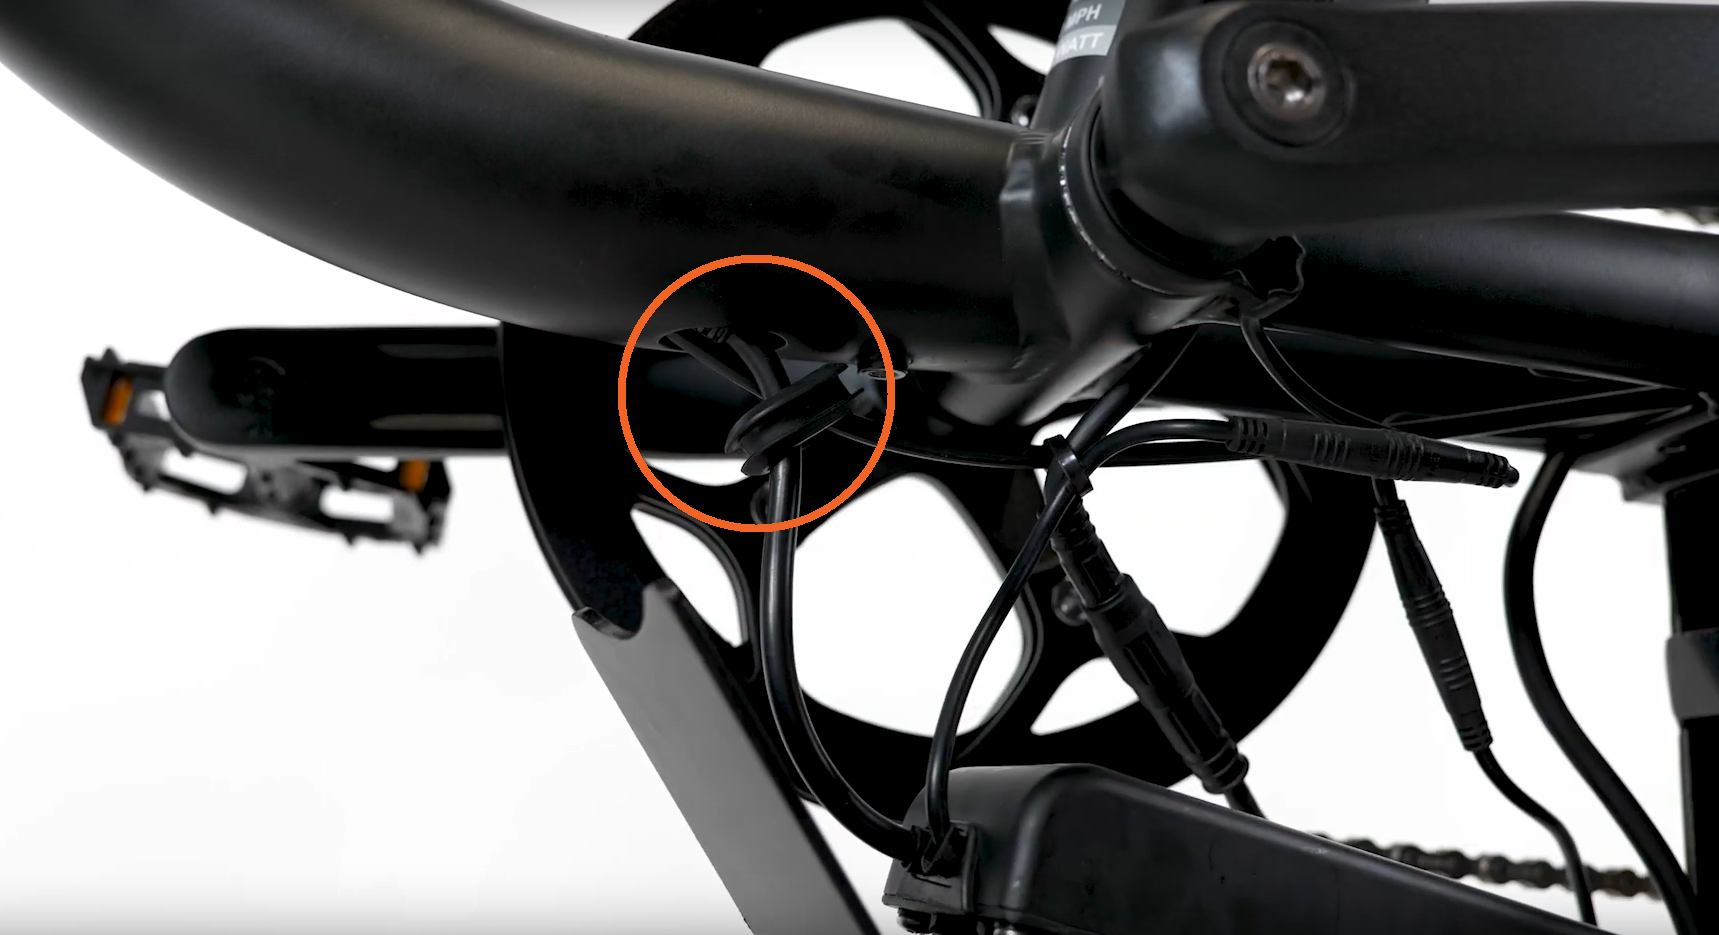
- Use caution to avoid unplugging the connector while it is still in the frame, and gently pull the wiring harness cable to move the connector out of the opening.
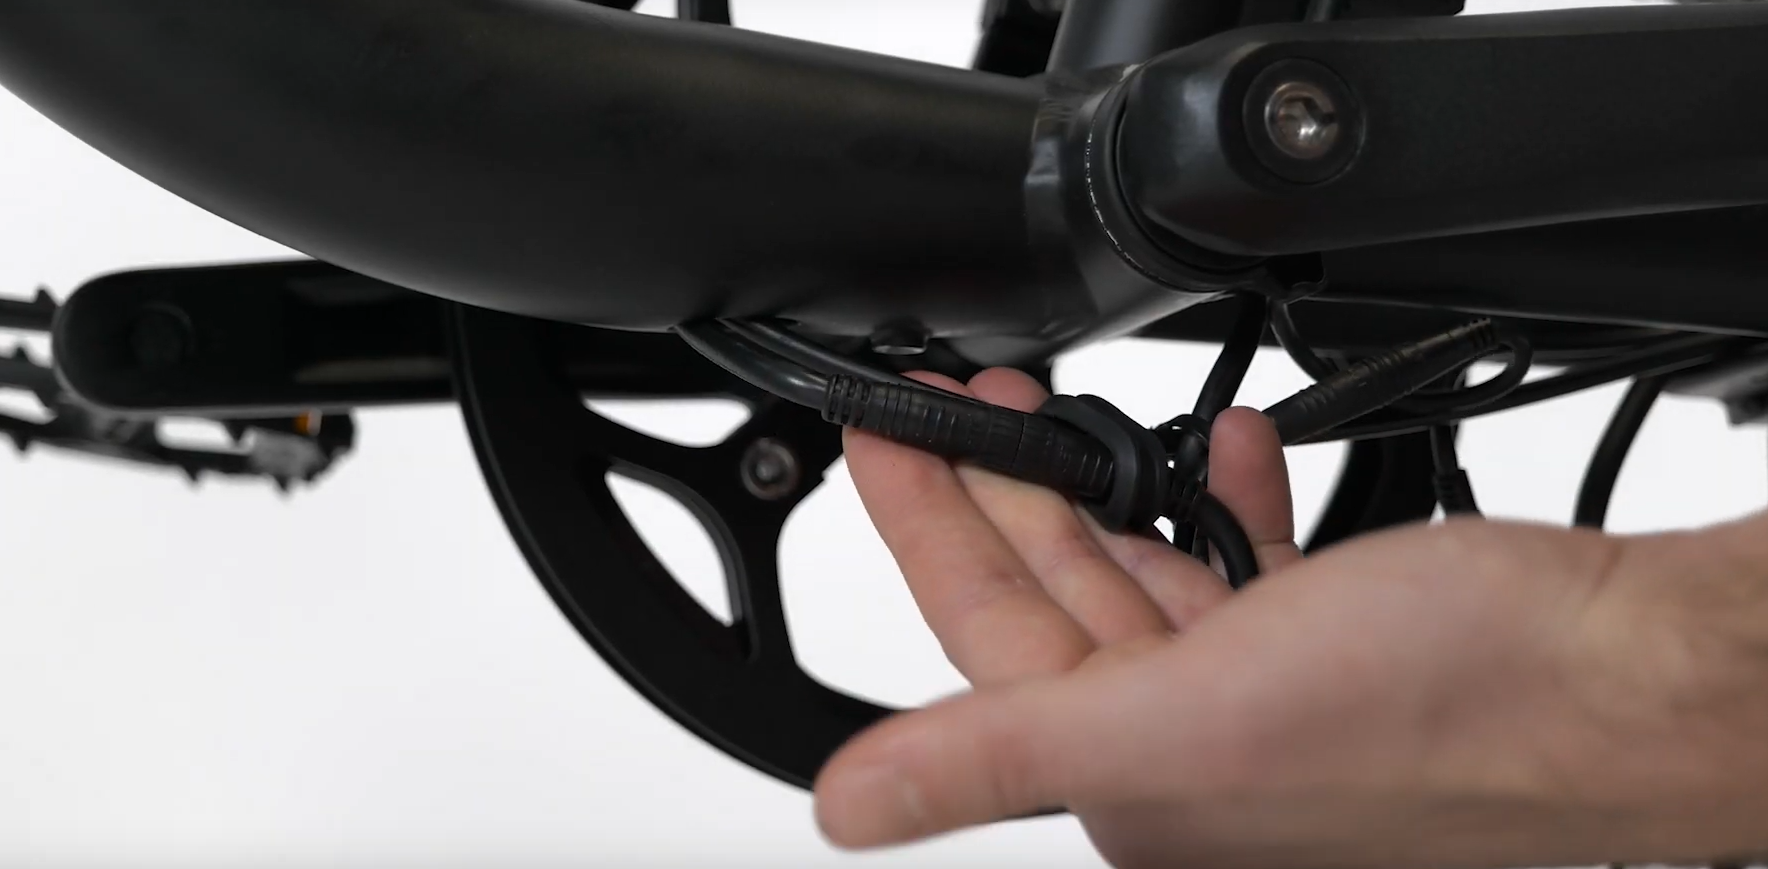
- Pull each side directly apart without twisting and inspect both sides of the connector. If you notice signs of moisture, debris, or damage, take photos to send to Rad Power Bikes Product Support as soon as possible.
- Reconnect the wiring harness connector. Align the internal notch and pins, and external arrows, and press directly together without twisting to fully seat the connection.
- Turn on the battery and power on the bike to see if the issue is resolved.
If the issue persists after checking all 10 connectors, or you find signs of moisture, debris, or damage, contact Rad Power Bikes Product Support.
Reinstall the Skid Plate
- Replace any zip ties that were removed and use flat side cutters to snip off zip tie excess. Ensure the cut is flush and there are no sharp points that could damage cable housing.
- Reinstall the skid plate starting with the rear bolt near the kickstand. Ensure the cables are properly oriented to afford clearance.
- Pass the rear skid plate mounting bolt down through the kickstand mounting plate and spacer Pass the bolt through the skid plate, pass a flat washer onto the bolt end, and thread on the locknut while holding the bolt in place with a 4 mm Allen wrench.
- Pass the split washer and flat washer onto the front skid plate mounting bolt end. Pass the bolt up through the front of the skid mounting plate and spacer, and carefully thread into the mounting point on the frame, tightening partway (about 3-4 turns).
- Tighten both bolts evenly by alternating between them every few turns. Use a 4 mm Allen wrench to hold the back bolt in place, and an 8 mm wrench to tighten down the locknut. Use a 4 mm Allen wrench at the front of the bolt. Torque both bolts to 5 Nm.
Once the connector check is complete, replace all zip ties snipped during the check, snip zip tie excess, and check that all cables are free from any moving parts. Reinstall the cable cover at the front of the bike.
If the issue persists after completing the connector check, contact Rad Power Bikes Product Support.