RadWagon 4 Handlebar Stem Adjustment Guide
The RadWagon 4 comes with an adjustable handlebar stem that can be adjusted to comfortably fit any rider. Over time and with normal use, the handlebar stem lever may need to be adjusted if the mechanism is too tight or too loose.
Follow the steps below to adjust the RadWagon 4 handlebar stem, if needed.
If you are not confident in your ability to safely and successfully perform all steps, we recommend having the work performed or checked by a local, certified, and reputable bike mechanic.
You will need:
- 2.5 mm Allen wrench
- 3 mm Allen wrench
- 5 mm Allen wrench
- Get the bike ready for maintenance. Turn off the bike, remove the battery, and press and hold MODE to discharge remaining power.
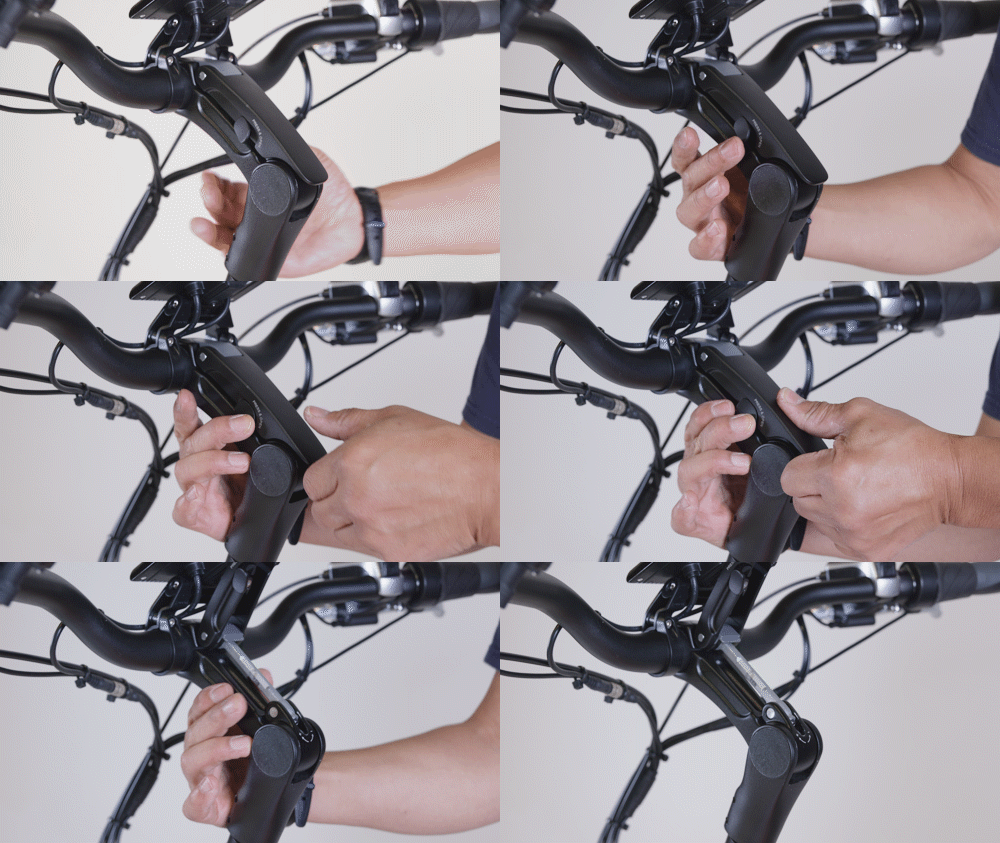
- Open the stem adjustment lever. Press the stem release button on the side of the lever while lifting the lever upward. If needed, use a 3 mm Allen wrench to loosen the display clamp bolts and tilt the display away from the lever to make it easier to open the lever fully.
Note: If the stem adjustment lever is difficult to open, press down firmly on the bottom of the lever, press the stem release button to reseat the locking mechanism, and then open the lever. This may require a bit of effort for a brand-new lever.
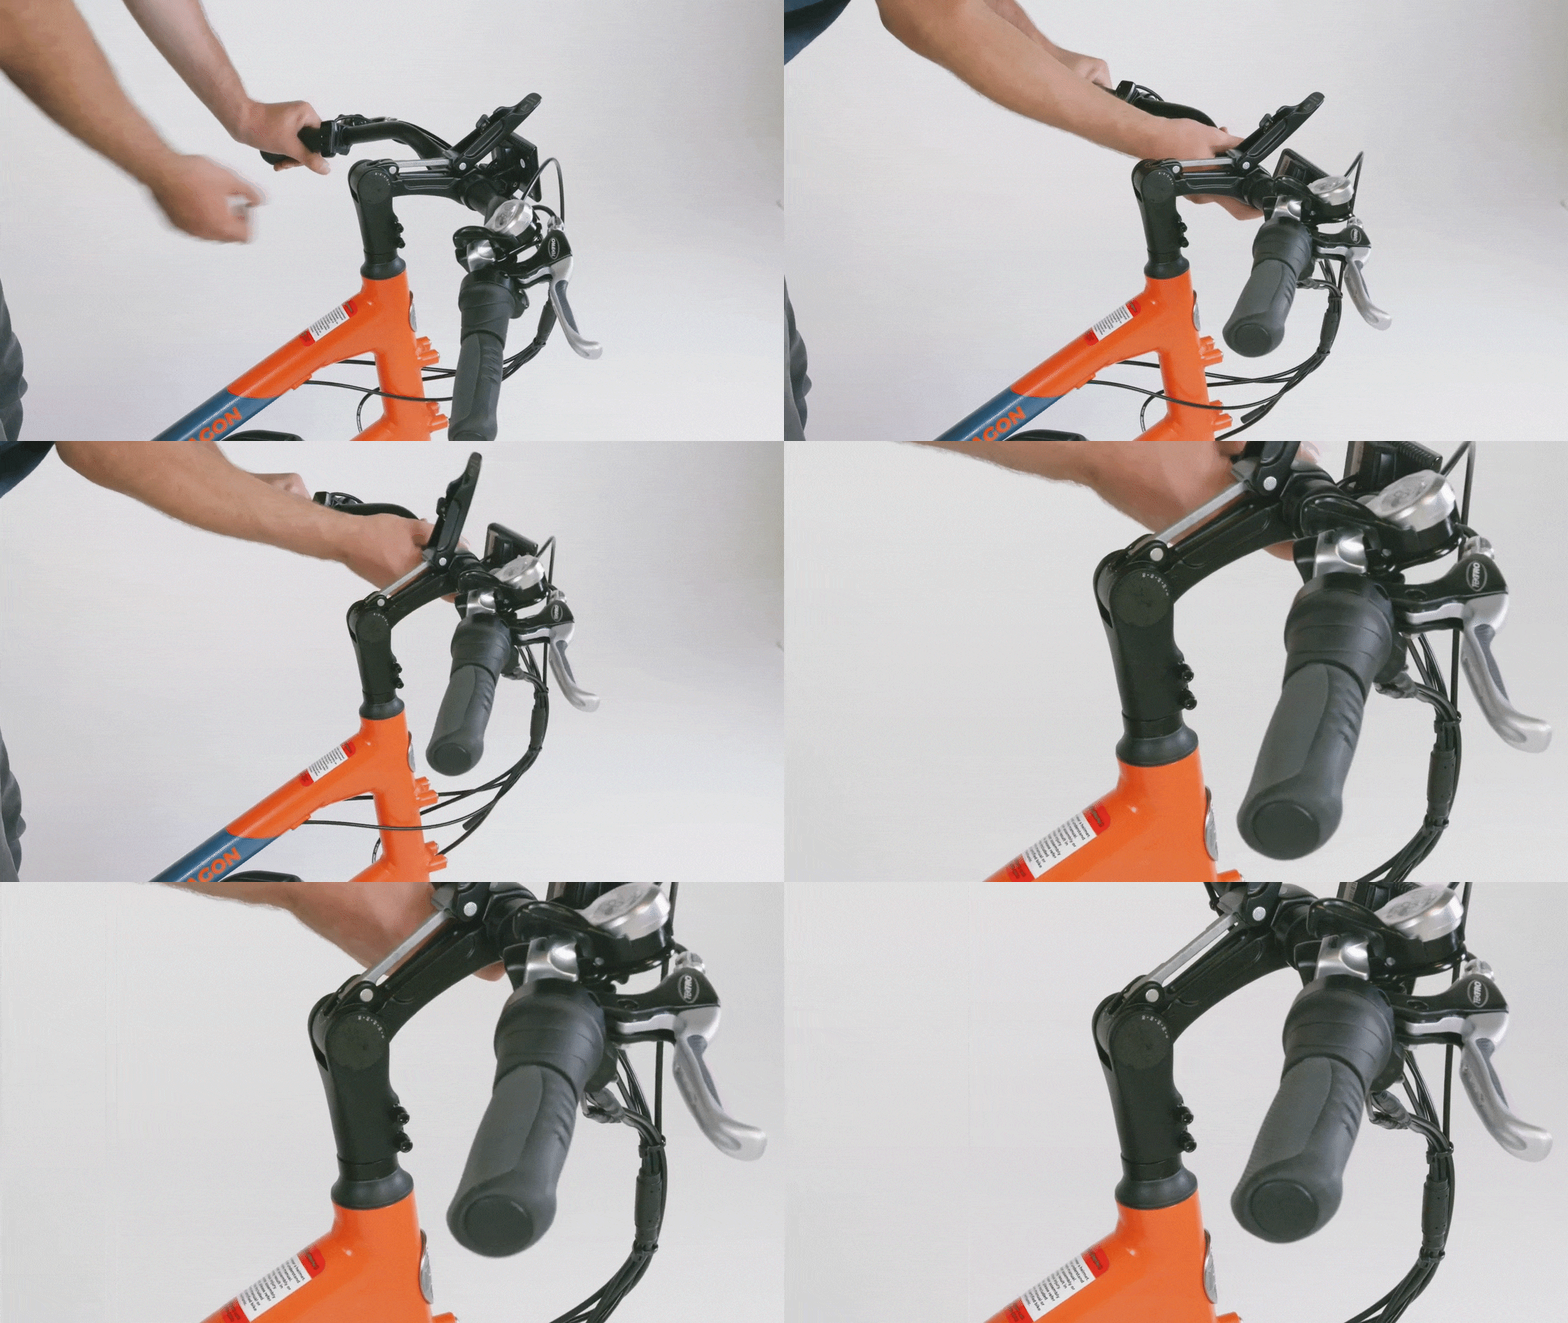
- Adjust the angle of the handlebar stem to fit the rider. Rotate and center the handlebar within the stem so that the handlebar grips are roughly parallel to the ground or positioned however the rider prefers. Be sure to stay within the limits indicated by the stem angle range markings on the side of the stem.
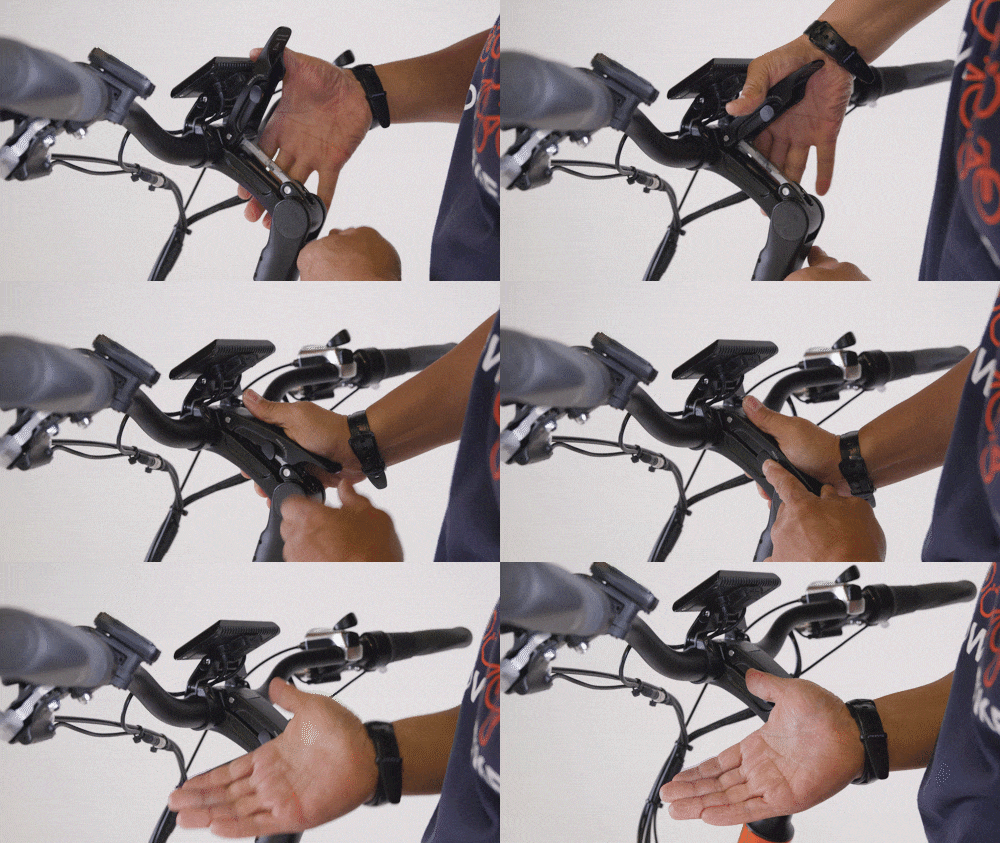
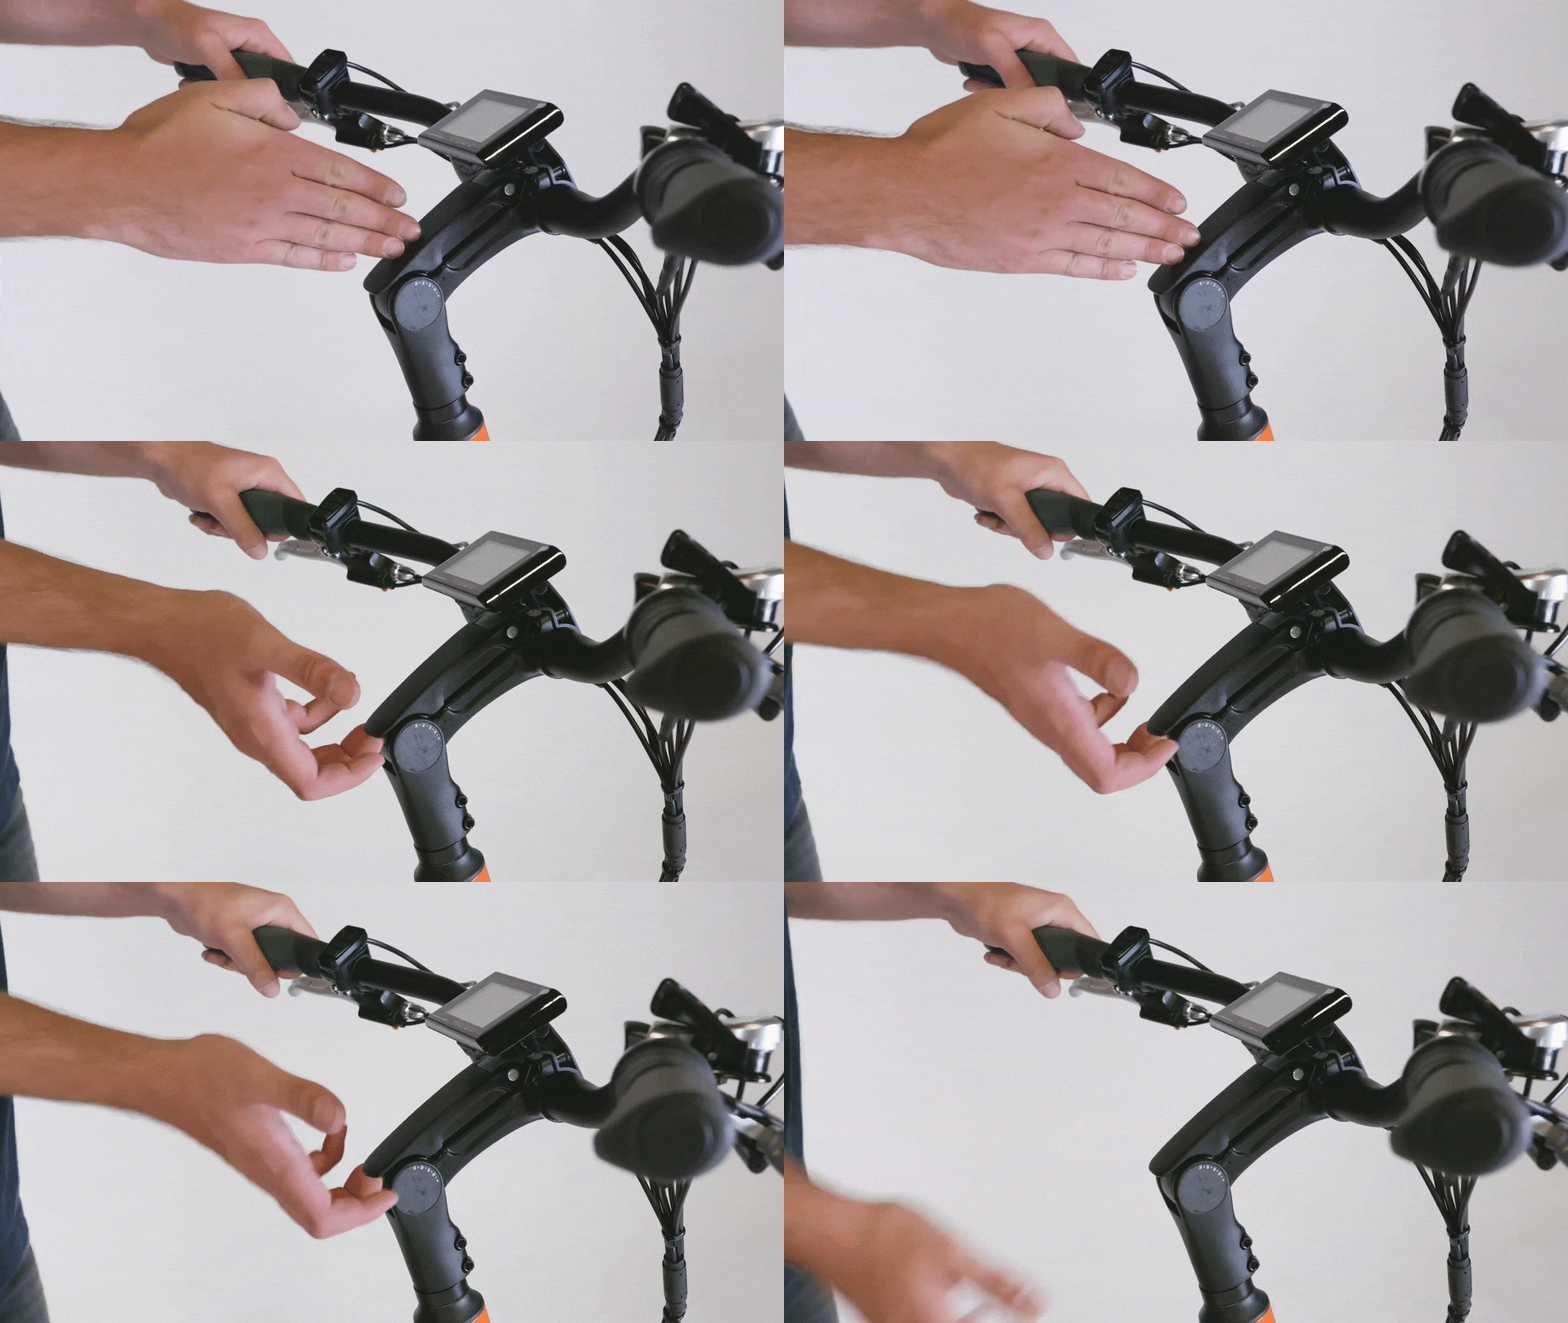
- Close and secure the stem adjustment lever until the stem release button clicks. Use one open hand, palm down, to press down on the lever, and press the stem release button with the other hand until the lever clicks into place. Be sure to keep fingers, hair, clothing and other items away from the lever to avoid pinches. If the lever is difficult to close, continue to the next step to adjust the lever.
- Loosen or tighten the stem adjustment lever, if needed. If the stem adjustment lever is too tight or too loose to latch or unlatch, follow the steps below to adjust the tension.
- Open the lever.
- Use a 2.5 mm Allen wrench on the lever torque adjustment bolt (shown below). Start with a quarter turn clockwise to tighten the lever tension, or a quarter turn counterclockwise to loosen tension.
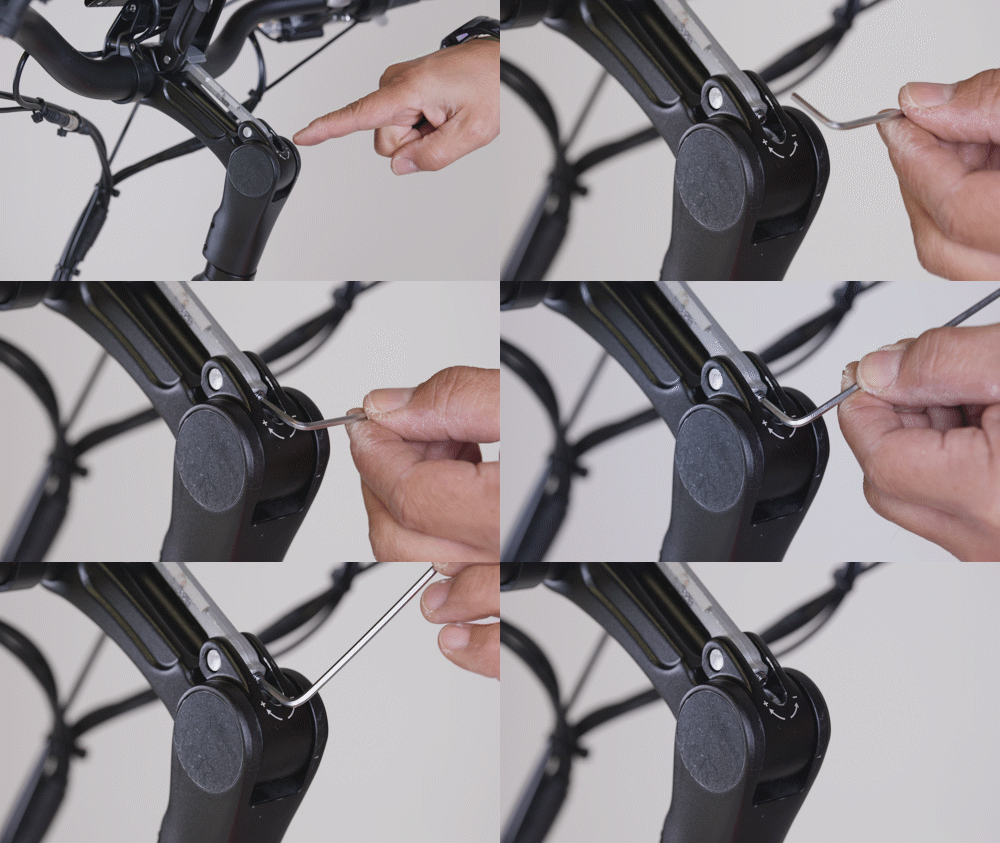
- Check to see how the lever is operating, and repeat until you can close the lever completely with enough force to leave a light imprint on your palm.
- Ensure the lever is centered and test the security of the lever. Try to pull up on the lever to test that the lever is fully secure. The lever should not open unless you press the stem release button.
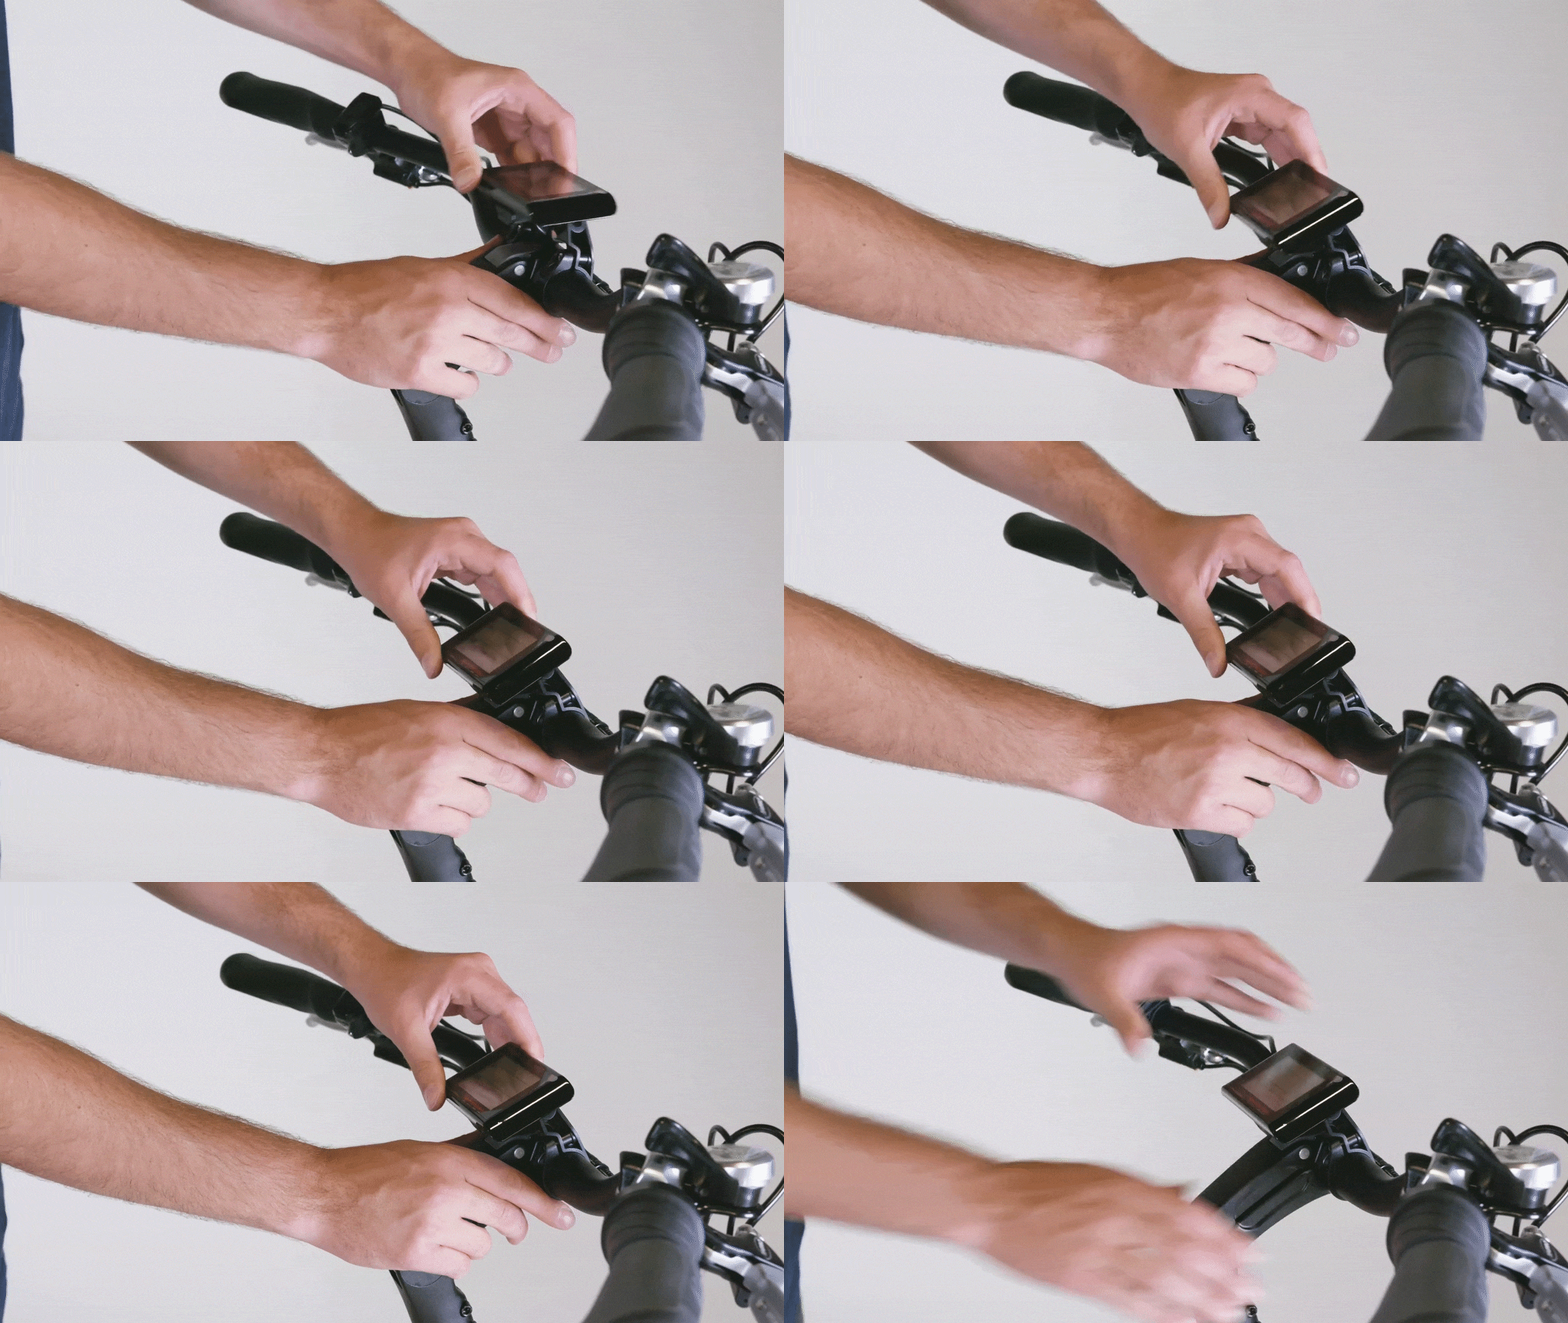
- Reposition the display, if needed. Reposition the display so it is easily visible to the rider. Use a 3 mm Allen wrench to tighten the display clamp bolts securely. Do not overtighten.
- Adjust the angle of the brake levers, if needed. If the brake levers are angled too high or too low for the rider’s comfort after the handlebar stem has been adjusted, follow the steps below to adjust the brake levers.
- Use a 5 mm Allen wrench to loosen (but not remove) the brake lever clamp bolts.
- Adjust the angle of the brake levers, and ensure they are easily accessible to the rider.
- Securely tighten both brake lever clamp bolts to 6 Nm.
- Reinstall the battery and test the bike fully before riding.
Overextending components like the handlebar stem, seatpost, or seat can cause those components to break or fall off your bike, which will put you at very high risk of serious injury or death. Avoid this danger by never extending these components beyond any minimum insertion markings etched into the components.
